Equipment for beginners — part 1
Welcome to the wonderful world of beekeeping 😄.
If you are one of the hundreds of trainee beekeepers currently attending a Start Beekeeping course with a local association, you will probably be filling time between the weekly sessions fervently reading equipment catalogues and websites.
You will be — in equal measure — tempted, confused, concerned about making the right choice, and astounded at the costs for the 'essentials'.
How do I know this?
Been there, done that, bought the T-shirt.
Warwick and Leamington Beekeepers (my beekeeping alma mater) provided their trainees with a copy of the Thorne's catalogue. Six weeks later, at the end of the course and before ever opening a hive, I had a list of equipment I felt I must buy, a very tatty and well-thumbed catalogue, and a billion questions such as “DN4 or DN5?” and “Should I purchase the 'BeeExpert' Taranov board 'SwarmSaver™️'?” {{1}}
The course tutors did their best to answer the questions and tried to discourage the most egregious equipment choices.
Nevertheless, boundless enthusiasm, a cold spring, and weeks spent salivating over the catalogue, were too much for some. Orders were placed, boxes and boxes of stuff arrived, and it was still far too early to open a hive.
I was fortunate. I had a youngish family, a big mortgage, and little spare cash. Other priorities (and the bank manager) delayed me 'pushing the button'.
And then I got a lucky break.
A previous association member, discovering they were allergic soon after starting the previous season, was selling up.
Their mentor — my mentor — put them in contact with me.
They had bought little and wisely, and I bought the lot for a song.
Almost everything I bought is still in use every season (~18 years later). I think there are only two exceptions … the hive tool, which was an abomination and soon lost, and the smoker (which I still have, and use very occasionally, but is really too small).
Early lessons
I started with the bare minimum, not what the catalogues tell you are essential, invaluable, game-changing, or revolutionary.
In fact, if they describe anything like that, it's a sure bet the item is unnecessary.
Remember, beekeepers drive knackered vans, while those who sell beekeeping equipment drive something newer, sleeker, shinier, faster, and considerably more expensive 😉.
Other than the hive tool and smoker, the kit included a cedar hive (floor, brood box, supers, crownboard and roof), a queen excluder, and a bee suit. There were also a few bits and bobs for making frames.
All were reasonable quality, but none were top of the range.
Most, as I said, are still in use.
And it was still a few weeks before I had my own bees.
I think there are several important lessons here:
- There's no rush. It will be weeks, and probably 2–3 months, until you'll be needing most of the equipment, so take your time in making the right choices {{2}}. You don't need everything now. As I'll explain, the first thing you require is probably not the hive.
- You also don't need new or top of the range anything. Beekeeping equipment should last decades. If you have the option to buy used, then do (I'll discuss some basic precautions in part 2). If you don't, then buy something that will last, and continue to be usable {{3}}.
- There's not much that is actually essential. Buy what you require, but no more. If you enjoy the hobby you'll have many, many years to buy, build, and borrow other equipment, when and if you need it (or think you need it {{4}}).
In one of my talks, I say (about equipment) “You never have enough, until you have far too much”. However, that doesn't apply in your first season … buy the bare minimum.
Buy once, buy wisely
I'm not going to tell you what to buy, but I will make a few suggestions to help you decide.
In addition, I will mention a couple of things you should probably not buy. Not because they don't work (frankly, the bees rarely care … they cope admirably with all sorts of ill-chosen and badly designed equipment), but because there are better alternatives that will make your first hesitant steps in beekeeping easier.
And if you find it easier, you'll enjoy it more.
The names and makes I mention are those I have experience with, but they are not specific recommendations. Instead, they are an indication of the types of things you should be considering. Regular readers know that there are no adverts or affiliate links on this site, and that any equipment I use has either been bought or built by me (i.e. there are no positive reviews in exchange for promoting stuff I've been given).
Even buying the basics, the outlay is likely to be considerable. So, do what I did, and see if any of last year's trainees are abandoning the hobby. You might be lucky and save a chunk of cash {{5}}.
Buying wisely means thinking about the future.
- Is the item of sufficient quality to last for years?
- Does it conform to standards of any type? Despite what you might be told or read, there are precious few of these in beekeeping (and there certainly aren't for hive types), perhaps other than frame dimensions. However, compatibility is critical, as I discuss below.
- If there's a choice (and there often is) choose the item that makes things easier for you and/or your bees. I'll give a few examples later — queen excluders, supers, gloves, and hammers (!) — but it applies to everything you purchase. If it makes things easier, you'll enjoy the hobby more. That means you'll probably continue beekeeping … which makes it all the more important it's compatible and of sufficient quality to last.
Compatibility
Frame dimensions and the bee space {{6}} around them define the internal size of the box to accommodate your bees. Since you should be purchasing your bees locally, and because you might need to borrow equipment from your mentor, it makes sense to use a frame size that is widely used by local beekeepers.
Ask around. If everyone uses Langstroths, you're sorted. They use Nationals? OK, use those. Smiths? Fine. Skeps? Er, not so much 😉 {{7}}.
No frame type is inherently 'better' than any other.
But it's not quite that simple!
Frames come in different depths. You can't fit a deep frame into a standard depth brood box. Vice versa does fit, but it leaves the bees lots of empty space which they'll happily fill with comb, making inspections problematic.
So, you need to know the frame dimensions (National, Langstroth etc.) including the depth of the frame … and that defines the box you need to accommodate them.
Unfortunately, the supposedly standard hive types (e.g. Nationals, Langstroths, or Smiths) are really only standards with regard to their internal dimensions, with the caveats on depth outlined above. Even then, the width of the box can vary {{8}}.
The external dimensions of the box are determined by the numbers of frames and the material the box is made of … and these vary.
Sponsors get more … posts, news, and information on the science, art, and practice of sustainable beekeeping. They also have access to over a decade of legacy posts, and ensure The Apiarist continues to appear every week.
Stacking — where fancy design meets practical reality
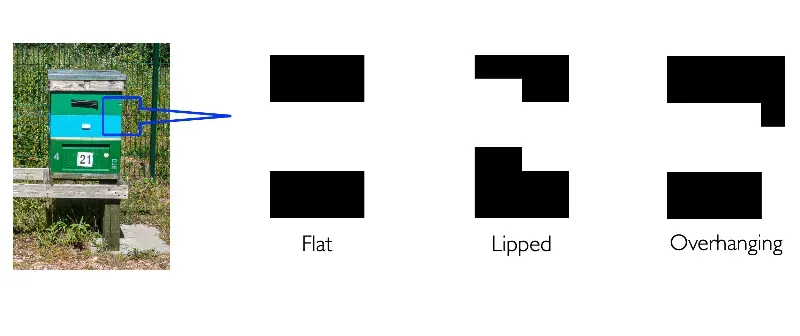
Worse, the interface between the boxes may differ. Some are flat, some are lipped, some are overhanging.
In many ways this is the most important limitation for future compatibility.
A defining feature of beekeeping is the lifting and stacking of boxes on top of each other. We do this to provide the bees with more space to expand into, or to store honey in, or during the various hive manipulations used to stop swarming, or to split the colony to make more bees.
And, if the boxes do not stack, then “Houston … we you have a problem”. You might be able to balance one box on top of another, but they're either not secure, or the bee space is butchered. This results in the bees being crushed, or lots of brace comb (and crushed bees).
Boxes with flat interfaces stack on top of other flat boxes, irrespective of the manufacturer {{9}}.
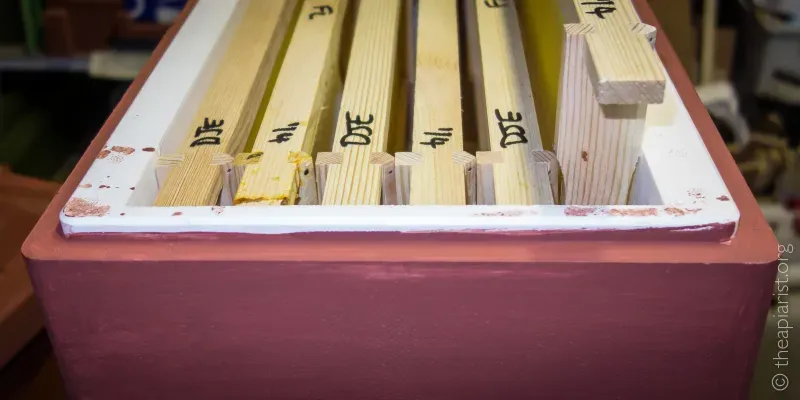
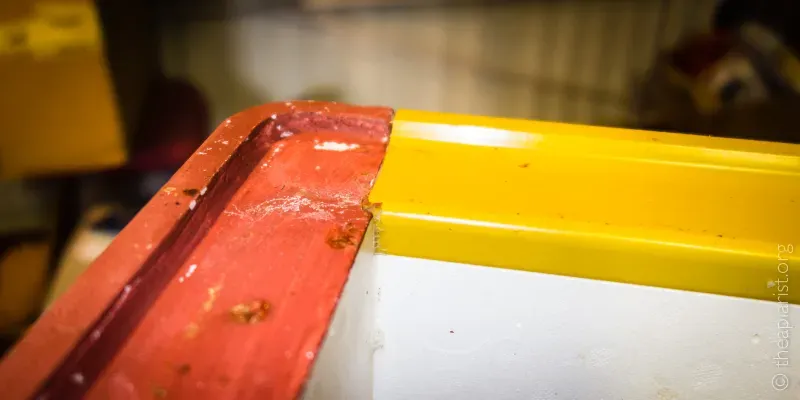
Flat, lipped and overhanging interfaces determine whether boxes will mix'n'match. The lipped image is a poly nuc because I don't own any lipped full-size hives. The overhanging interface shows the underside of a poly super. The curved corners mean the box will not stack on boxes with similar external dimensions (see below).
Boxes with lips, or overhangs, are almost always manufacturer-specific {{10}}.
Worse, they're almost certainly specific to that particular iteration of the hive design made by that manufacturer.
The design might change next year, or in a decade. The change will be justified as providing improved function, but I suspect it's as much to do with improved profits.
Don't get me wrong, these hive designs with upstanding lips, or overhanging edges, are likely all perfectly good. But buying them ties you to a particular make/design for the foreseeable future.
Until they start making something slightly improved different.
And, when that happens, you will be left with boxes of different designs/types, some of which are mutually incompatible.
That way lies madness {{11}}.
Do your homework
I'm getting ahead of myself.
The first thing you should be thinking of buying isn't a hive.
But since we've come this far, now's the time to go back and re-read the catalogues and websites and look carefully at the hive designs. Think of this as 'informed homework'.
Be aware that some manufacturers sell hive types with the same general name, but that are incompatible with each other, to say nothing of compatibility with a hive of the same 'type' from a different manufacturer.
Now you're starting to understand the issue 😄.
Ask your association about the hive/frame types that predominate locally. Now you know what to look for, you'll probably realise that your choice is more limited.
In Part 2 I'll discuss other factors to consider when choosing your first hive.
In the meantime, although you've not got bees yet (and you won't have for some time), visits to the training apiary should be starting once the weather warms up.
You will need to feel comfortable and confident when the hive roofs are lifted, so the first thing you should be thinking of acquiring is a bee suit.
The bee suit
Faintly ridiculous, deeply unflattering, … and yet absolutely essential.
Bees should not be aggressive, but they can be defensive if the hive is opened for too long, or the manipulation is heavy-handed {{12}}. You therefore need to be properly protected so that you feel confident.
That doesn't mean you will never get stung.
The odd sting or two should be expected (per season, not per inspection), and it's a reminder that the bees are unhappy about something you're doing.
Your association may have suits you can borrow to start with.
If not, and definitely before you have your own bees, you will need to buy one.
Buy a suit, not a jacket/trousers combo.
The fewer gaps there are, the less likely you'll find a bee inside the veil, or targeting the soft tissues near your armpit (or worse … much, much worse 😱 {{13}}). The flexibility that separates offer, includes the flexibility to allow the bees to get in.
There's a huge choice. A polyester/cotton mix is fine, but make sure you buy one that isn't too restricting; stings will rarely penetrate if the suit is a bit baggy, and you'll be doing a lot of bending and stretching.
As I said, unflattering. Don't worry, you'll get used to it and will soon think nothing of going to the petrol station, or round the supermarket, in your suit on your way back from the apiary.
Make sure the veil is detachable, that the zips are good quality, and that the areas where the zips meet (in particular, under the chin, or at the nape) have Velcro-type closures. The wrists should have thumb loops.
Pockets, integral knee pads, and embroidery are all nice to have, but not required.
I've only ever bought and used BBwear. The BBwear suit I bought secondhand is still the one I routinely use … I wore it to the apiary this afternoon when adding my microalgal pollen patties to the colonies. It's been repaired by the manufacturer (new veil and a couple of new zips), and it should last at least another 20 years.
When I started, my association had a deal of some sort with BBwear, who offered discounts for new members. Ask your association. Alternatively, if you attend the beekeeping shows, they used to offer discounts to purchasers who didn't take the bundled gauntlets with the suit.
And, believe me, you do not want the gauntlets 😉.
If you've enjoyed reading The Apiarist, please consider becoming a sponsor. Alternatively, since my late-night writing is fuelled by caffeine and cake, you can help offset my outlay on these essentials by pressing this button. Thank you 😄
Extremities
Your hands, wrists, and ankles {{14}} need protection.
Ankles (and feet) are easy. At least when starting out, wear wellington boots, and tuck your bee suit inside them. Bees tend to crawl up things, so if one crawls from the ground onto your foot, they may get inside the suit if you wear it over your boot.
Wellingtons are also useful as apiaries can be muddy and wet.
In the future you may well find wellingtons are too hot or clumsy for everyday beekeeping wear. However, when starting out, it's one less thing to worry about.
Hands and wrists are the things that are closest to the bees when doing an inspection. The soft inner forearm and wrist are often particularly sensitive to stings, and there can be a tempting gap between the end of the bee suit sleeve and your glove.
Gauntlets might seem the obvious solution.
Don't. Just don't.
Other than bending and lifting, beekeeping is all about manual dexterity.
Gauntlets singlehandedly (and two are worse 😉) destroy that dexterity.
You cannot feel the bees, or the lugs of the frames, or — with the thickest and most 'protective' gauntlets — the handholds recessed into the sides of broods and supers.
You will crush more bees, which release alarm pheromones {{15}}, and so will consequently get stung more.
Of course, you might not feel the stings because of the thickness of the gauntlets, but the colony will get increasingly agitated and defensive.
This makes the colony inspection a lot more difficult.
And you'll have the same problems next week.
The sting pheromone soaked into the gauntlets will agitate the bees before you do anything to the colony. You'll begin to think you've bought an aggressive colony from an unscrupulous supplier, or worse, you'll consider abandoning the hobby {{78 Washing the gauntlets helps remove the pheromone … but makes them even less flexible, so reducing your dexterity further.}}.
But the good news is that all of those problems are avoided by not wearing gauntlets in the first place.
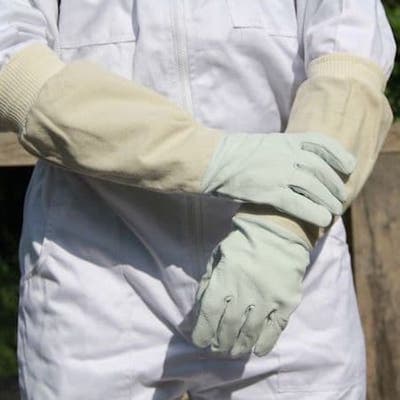
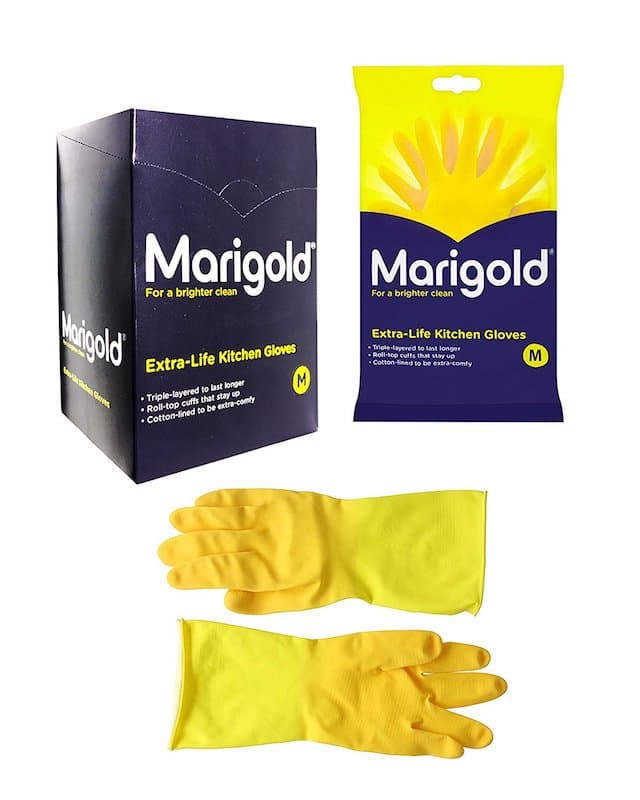

Gauntlets, Marigolds and long-cuff nitrile gloves
The thinner, the better
It seems antithetical, but you'll get stung less if you wear thinner gloves.
Much thinner.
Long cuffed nitrile gloves are thin enough you can feel a little 'bzzzz' if you're about to crush a bee between your finger and the frame lug, and they're thin enough to pick the queen up by her wings if needed. You will be more aware of what everything feels like, and will very rarely get stung through the gloves.
If you do get stung, the barbed portion of the sting gets stuck in the glove, not your finger, so you feel very little {{16}}.
I wear nitriles for 80% of my beekeeping. For the remainder I'll wear standard Marigold-type washing up gloves. These are harder wearing, so useful if you're doing lots of lifting, carrying or frame manipulations. They are also (almost) completely impervious to stings. If the colony is 'hotter' than normal — for whatever reason — Marigolds provide the necessary protection.
For beginners, Marigolds are a much better choice than gauntlets, but I'd encourage you to try nitriles.
All these gloves should be considered disposable, but they can be re-used multiple times in the same apiary (to avoid disease transmission to other apiaries), so the 'wastage' is probably acceptable.
For the same reasons I tuck my suit into my boots, I stretch the cuffs of the gloves over the ends of my sleeves … which explains the need for thumb loops. Without them, the sleeves inevitably ride up with all that stretching and reaching.
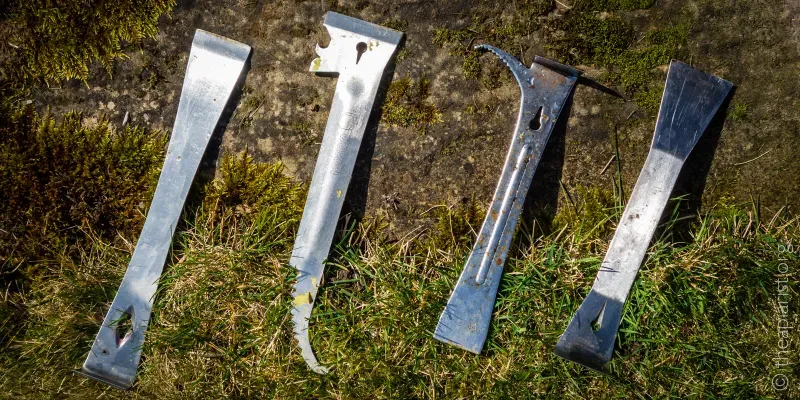
Hive tools
There are a dizzying range of hive tools available. Dadant list ~11, Mann Lake ~14, and Thorne's ~23.
Confused? You will be.
Considering they're all just bent bits of metal that do pretty much the same thing, that should tell you something, though I'm not entirely sure what.
'Uncharitable me' (surely not?) thinks it is the equipment suppliers selling stuff we don't really need, but marketed in such a way we'll think it's an essential.
For example, an extra long hive tool to reach into the depths of the brood box and/or for more 'leverage'. Propolis is sticky stuff, but it's not superglue, and I've yet to find frames so stuck together a normal hive tool (used properly) wasn't enough to loosen them.
And, “the depths of the brood box”? Really? Just remove another frame and put your entire arm in … your fingers are much better at retrieving whatever you were going to use the hive tool for.
However, for once, it's not just marketing.
The reality is that hive tools are a very personal choice. During an inspection you'll be holding one most of the time, so size and weight are an important consideration.
I have medium-sized hands, and the larger hive tools all feel unwieldy and clumsy. Conversely, the small ones may not provide enough leverage.
Try before you buy, but — even then — expect to buy several before you find one that feels perfect.
And, when you do find the right one, buy some spares.
Like queens, they can get to be elusive (you drop both in the grass, but the hive tool can't find its own way back to the hive).
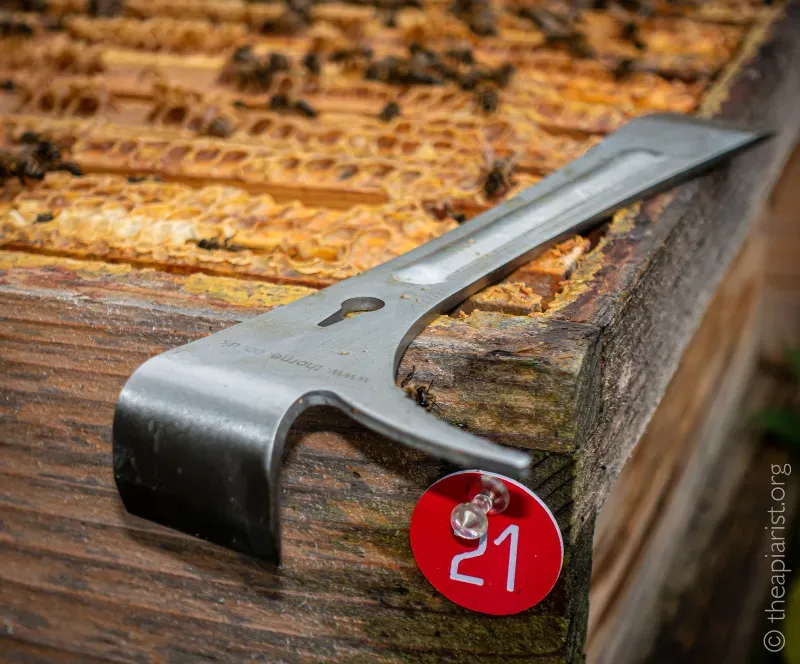
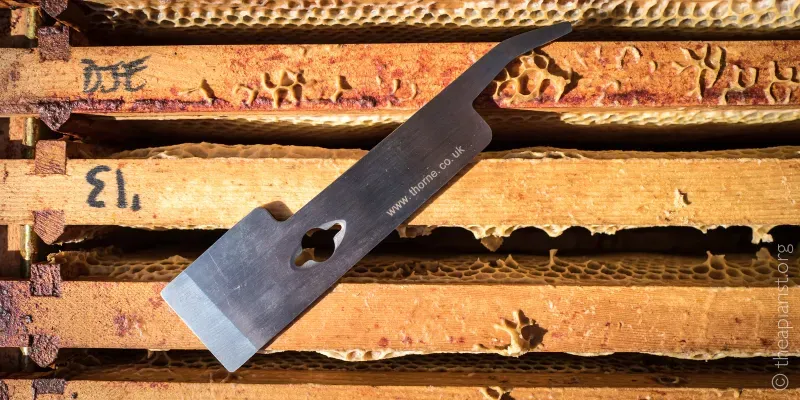
I'd recommend buying stainless steel (the cheap ones aren't) and make sure it has a sharp 'edge' for removing propolis and brace comb. Keep it in a sealed container soaking in a strong solution of washing soda {{17}} as part of your good apiary hygiene.
My favourite is the one shown above. I bought a dozen when they were last available. The 'new low price' currently shown on the website is for a different, appreciably lower quality, variant {{18}}.
Not long now
The weeks between January and early-March can feel interminable for beekeepers in temperate regions {{19}}.
Winter is slipping away, but spring isn't really here yet.
But it's coming.


An amphitheatre of sound, filled with the song of skylarks
Over the last ten days or so I've watched rooks starting to build their straggly nests in the leaf-free tops of the tallest oaks, and been dazzled by the drifts of snowdrops in the low sunshine. I've walked across fields bathed in the songs of skylarks establishing their territories, and watched a free-living colony of bees in a nearby tree turf out the corpses that had accumulated during the cold weather.

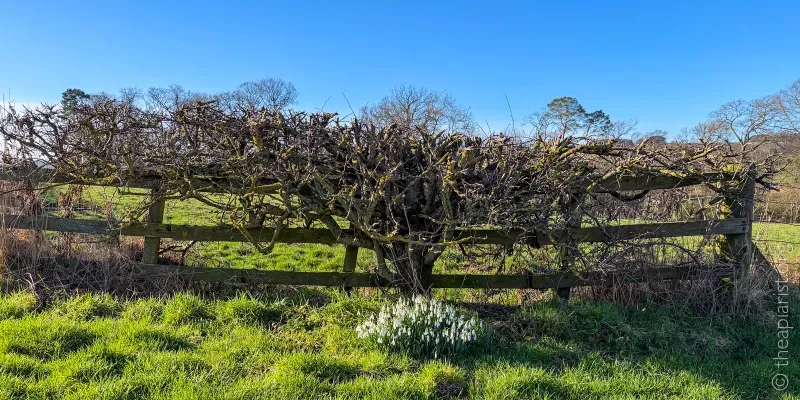
The nearby 'bee tree' and snowdrops in the hedgerows
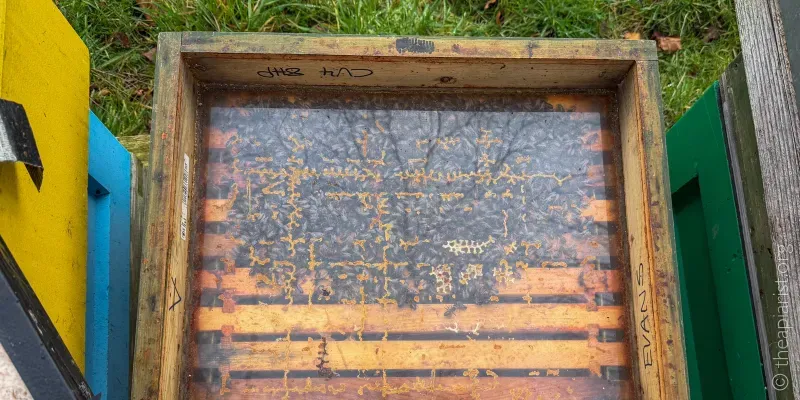
Most of my colonies are looking good, considering the season hasn't really started yet. All appear alive and well (so far, it's still a month until I can be certain they've survived the winter), and have pollen patties, and fondant if needed. On the better days, for an hour or so, they're foraging on the flowering gorse and hazel catkins. The willow has yet to flower, but are close to bud burst.
My preparation for the season is at about the stage I'd expect it to be (i.e. well behind schedule 😞). Inevitably, I've bought some new stuff I probably didn't need, and — commendably — have nearly finished building some things I did.
However, the pile of bundled unassembled frames in the shed aren't getting any smaller, and I know I've got to make a start on them soon.
In the next post on 'equipment for beginners' I'll discuss hives, bits for hives, and nucs.
And yes, you'll need one of those as well 😉.
Now, go do your homework.
More like this?
That's over 3,000 words you've just read on bees and beekeeping. If you want more of this every week, then why not sign up as a sponsor of The Apiarist? About 50% of posts are now for sponsors only, and sponsors ensure that there will be comprehensive, well researched and entertaining posts on sustainable beekeeping appearing every week.
Equipment for beginners — part 1 first appeared in The Apiarist in February 2026. Copyright ©️ 2026 David Evans
{{1}}: Those Q's are easy to answer … DN5 are better (Why? Stronger, less brace comb), and no, it doesn't exist. And, even if it did, you still don't need it.
{{2}}: Beginners should not get bees early in the season … leave it until it's dependably warm. Inspections are much easier.
{{3}}: If not by you, by someone else. The reality is that beekeeping isn't for everyone. Some start with unbridled enthusiasm, but — for whatever reason — decide to give up. If that's the case, wisely chosen equipment will be easier to sell (and at a better price), to help someone else start beekeeping.
{{4}}: Which is not the same thing at all 😉.
{{5}}: Lots of people start beekeeping every year. However, the numbers of beekeepers are not increasing that fast. Therefore, a significant proportion of people who start beekeeping must be giving up. Do the maths!
{{6}}: Hopefully, this has been described in your beginners course … it's the ~8 mm of so space the bees move through. Much more or less than that, and they reduce the space with brace comb.
{{7}}: I'm being flippant … however, there's an important point to be made here. Learn how to keep bees using what I would term 'usual' methods … that means removable frame hives, swarm control, mite management etc. It's the easiest way to succeed. After you've mastered these things, by all means try other management methods. However, anyone promoting skeps, uncontrolled swarming, or no mite control for beginners is being irresponsible. To paraphrase Benjamin Franklin … they're being 'prepared to fail'.
{{8}}: There are National hives that take 10, 11 or 12 frames, and Langstroths are usually 8 or 10 frame boxes, though there are apparently others as well.
{{9}}: But remember, stacking does not mean they'll necessarily all be aligned … that depends upon the dimensions of the box.
{{10}}: Those with overhangs might look as though they'll stack on boxes with flat interfaces, but they usually don't. I could show you the T-shirt 😞.
{{11}}: That's another T-shirt I've got.
{{12}}: The first often happens during demo inspections in the association apiary, and both can be features of inspections by beginners.
{{13}}: Another T-shirt.
{{14}}: And feet if you routinely wear sandals.
{{15}}: Well, you would, wouldn't you?
{{16}}: The volume of venom injected is much reduced as the post-sting pumping of the venom by the stinger is not into you.
{{17}}: Addis sell a Clip-Tight food storage container that is ideal for keeping the hive tool(s) in.
{{18}}: I know, because I've bought one 😞.
{{19}}: In the Northern Hemisphere … if you're in New Zealand it will be July and August I presume.
Join the discussion ...