Your first bees
June is a good time to start keeping bees.
The long, cold, dark winter is a distant memory. The uncertainties of spring – the unseasonably warm days in March, the April (snow) showers, the “will they, won’t they” doubts over spring build up (in a cold year) or early swarming (in a warm one) – are over.
If you did a ‘start beekeeping’ course in the winter then waiting until June to get bees might feel like a lifetime, but it actually makes a lot of sense.
You miss the roller coaster ride that spring sometimes provides. In a bad year, starvation or swarming can leave you without bees by the end of May ?
Instead, you benefit from better (more settled) weather, stronger colonies and at least three months to get to confidently work with your bees as you – hopefully – get some summer honey and prepare them for the winter ahead.
Buy local bees
There are compelling reasons to buy local bees. By this I mean queens reared locally.

More locally reared queens …
Not Greece or Italy {{1}}, imported in large batches and dropped into a box of ‘local’ workers, all of whom will be replaced within a month. These are effectively bees from southern Europe and are quite possibly not suited to Cumbria or Essex {{2}}.
Several scientific studies have shown that locally reared bees do better than imports, particularly when overwintering.
But the benefits don’t end there. If you buy bees locally you’ll probably buy them from a local beekeeper {{3}}. I’ve proposed before that this could be your mentor … and that, ideally, you could have helped split the nuc from a strong colony, watched it develop and then purchased it.
But that’s not always possible. Mentoring is time consuming and dependent on the organisation of the local beekeeping association, to say nothing of simple geographic factors {{4}} or Covid and social distancing.
When you buy local bees you should expect to get some of the ‘back story’ on the colony. When was the queen grafted, when did she start to lay?
If you do agree to buy bees from a local beekeeper, don’t then go and then buy them from someone else. Preparing nucs is time-consuming and involves committing resources from honey production or making increase. At the very least, a beekeeper reserving a nuc for you probably means s/he is turning other potential purchasers away. Have some courtesy.
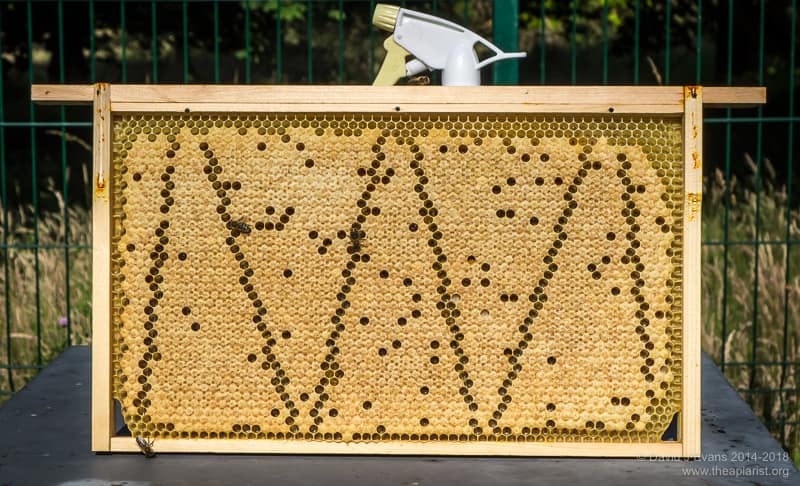
A 5 frame nuc when sold should contain a frame of stores, a laying queen (!) – clipped or marked if requested – and 3-4 frames of brood in all stages.
There should be sealed brood in the colony laid by the queen heading the colony.
OK, enough preamble … what about the practicalities of getting the bees home, installing them in a hive and doing your first inspection?
Transporting bees
If you are collecting your nuc from a local apiary it will probably already be sealed up for transport. The entrance should be sealed securely and the frames should be wedged in place so they won’t flap around during transit. I use closed cell foam blocks for this, but it may not be necessary in some smaller nuc boxes.
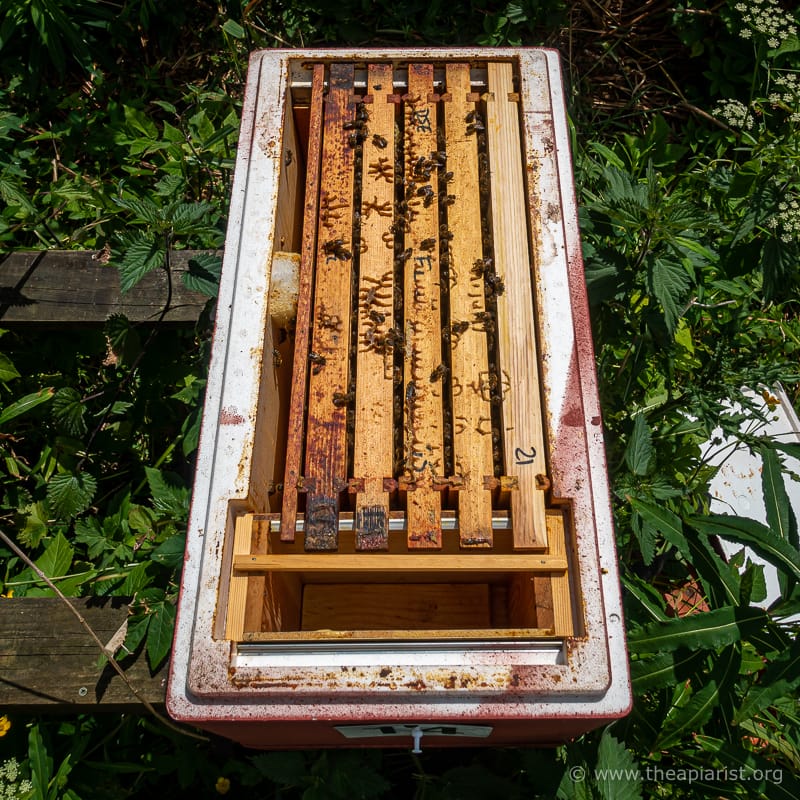
Preparing a nuc for transport. Note the foam block to secure the frames.
You might not be provided with a strap, so bring your own. Ratchet straps are probably overkill for a nuc, but they certainly do the job. Gaffer tape works well, as do these ‘no moving parts but can I remember how they work?’ hive straps.
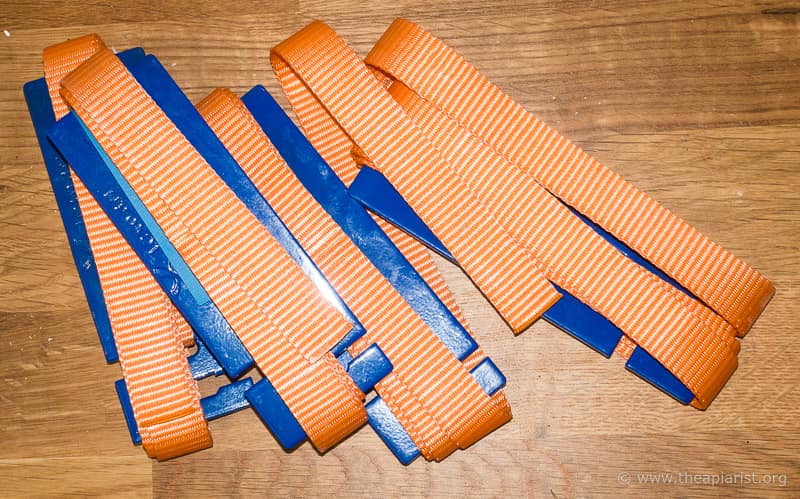
Standard hive straps
If you collect them at the beginning or end of the day there will be more bees in the box and fewer foragers out, er, foraging.
It’s always good to actually get the bees you’re paying for ?
More importantly, it’s also cooler at the start or end of the day, which is one less thing to be concerned about when transporting bees. Since you’re buying locally you won’t be transporting the bees far. That being the case, it’s usually sufficient to make sure there’s good airflow under the open mesh floor, without using a travel screen.
If you move bees in the heat of the day expect to have to use some sort of mesh screen over the top of the frames. The last thing you want is overheating and stressed bees.
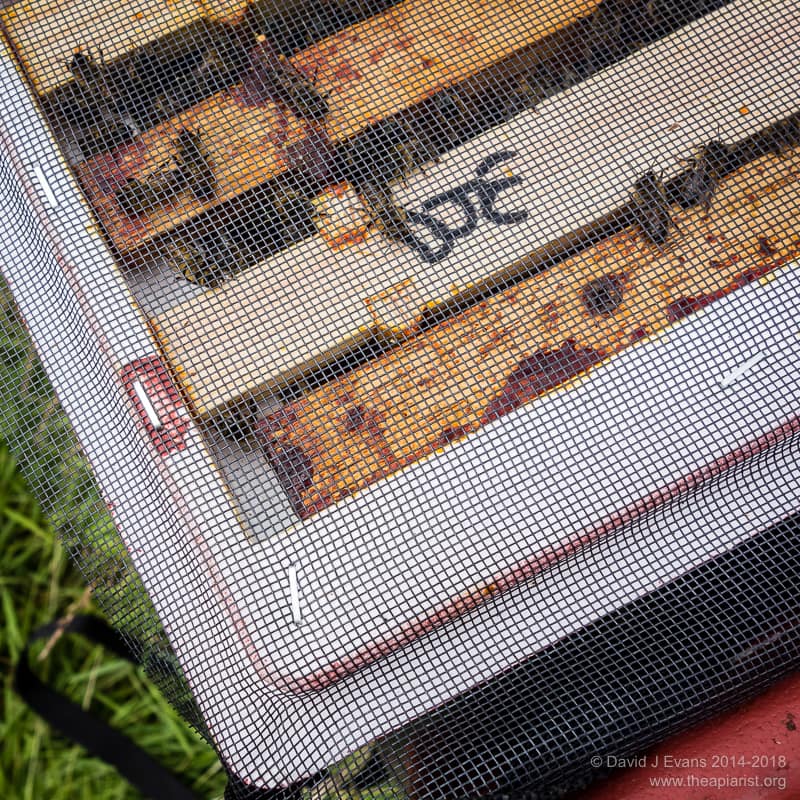
Mesh and staples
Actually, that’s the penultimate thing.
The last thing you want is the combs melting and collapsing … avoid this at all costs.
Escapees
Secure the nuc in the car {{5}} so that it can’t tip over. The frames should be in line with the direction of travel.
It’s not the end of the world if they’re perpendicular to travel, but it reduces the ‘frame flap’ when accelerating and decelerating.
I often put the bees on the car seat, strapped in place with a seat belt, with a sheet or two of newspaper underneath the OMF to stop getting nectar or pollen on the nappa leather upholstery my filthy car from soiling the nuc box.
I’ve moved dozens of nucs like this and never had a problem.
Drive carefully.
You might find one or two bees “escaping”. In my experience these are more likely to be ‘hitchhikers’ who were underneath the open mesh floor, rather than Houdini-like bees that have circumvented the sealed entrance of the nuc {{6}}.
Stop and let them out at the earliest opportunity … it’s safer and they’re more likely to get back to the home apiary.
If you’re 10 miles away from the apiary their fate is probably sealed ?
Opening the hive entrance
Bees can be a bit disoriented and distressed after a car journey.
Therefore, don’t be in a rush to open them up too soon.
I always place them in the location they are going to be permanently sited and leave them for at least half an hour.
Then, and only then, I gently open the hive entrance.
If you do it as soon as you arrive the bees may come flooding out … if you leave them to settle they will be much calmer.
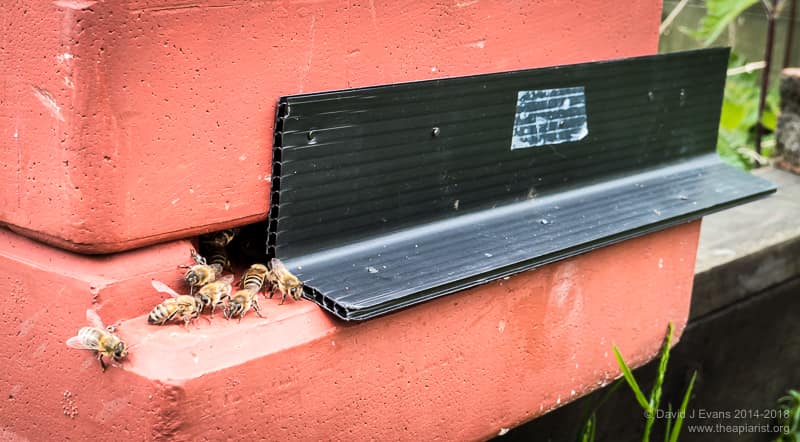
Correx, the beekeepers friend …
Don’t bump or rock the hive.
Don’t wrestle with the sealed entrance.
Hopefully the 30+ minutes recuperation time has allowed you to work out a strategy to open the hive entrance with the minimum disturbance possible.
Those rotating entrance disks have got a lot to commend them ?
Ideally you want the bees to be barely aware that the entrance is now open when it wasn’t a moment before … for example, there’s usually no need for smoke {{7}}.
Remember, the bees know nothing about their new environment. You want them to explore it at their own pace, rather than releasing a few thousand agitated bees all at once.
Open the entrance so the bees can come and go, but don’t leave a cavernous maw gaping that they might struggle to defend,
Take a few steps back and enjoy watching the first orientation flights of your new bees.
And that’s it for the day … leave them in peace.
Transferring the nuc to a full hive
At this time of the season the bees will rapidly outgrow a 5 frame nucleus hive. If you leave them in there too long the queen will run out of space to lay and they’ll start to think about swarming.
Remember that overcrowding is one of the (many) triggers for swarming and, once they’ve decided to go, it can be very difficult to stop them.
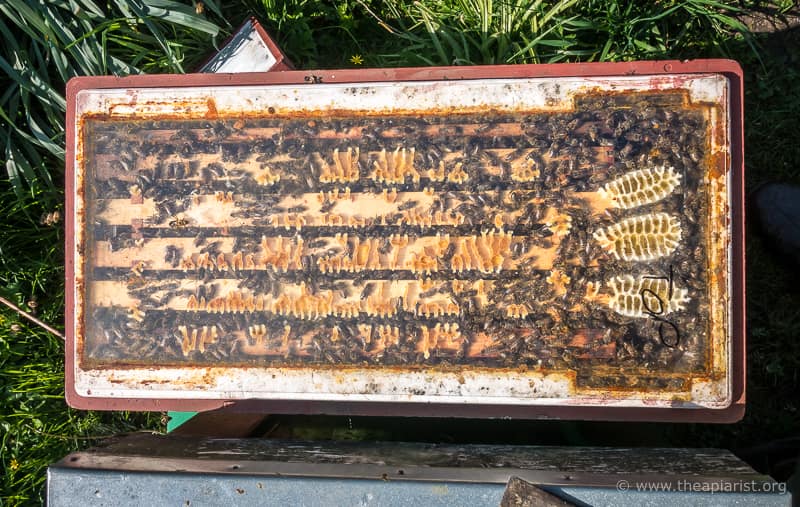
Here’s one I prepared earlier … an overcrowded overwintered nuc in April
Therefore you need to transfer them to a full-sized hive within – at most – a few days of acquiring them {{8}}.
You will need a full hive – floor, brood box, crownboard and roof – together with five or six (or 7 for the new Abelo boxes I see) frames with foundation fitted {{9}}.
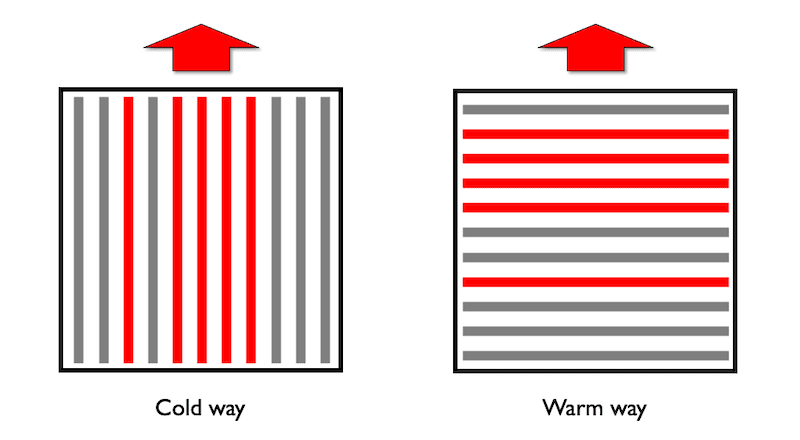
Frame orientation – frames from nuc in red, new foundation in grey
Since this is probably also the first time you are going to open the nuc (and, if it’s not, why did you look earlier? See the final section of this post.) you’ll also need a beesuit, hive tool and smoker.
- Move the nuc gently to one side and place the new floor and brood box where the nuc was, with the entrance facing the same direction.
- Gently smoke the nuc. Just a couple of puffs near the entrance should be more than sufficient. You don’t need to ‘kipper them’.
- Transfer the 3-4 frames of brood one at a time, placing them next to each other in the new hive. By all means have a brief look at each side of the frames, but place them in the new hive in the same orientation with regard to their neighbours. The goal here is that the brood nest is not unduly disturbed.
- Flank these with a frame or two of foundation and then add the frame of stores.
- If I’m arranging the frames the ‘warm way’ i.e. parallel to the hive entrance, I’ll place the occupied brood frames closer to the entrance. This helps the colony defend the entrance. If the frames are perpendicular to the entrance (the cold way) I place them in the middle of the hive {{10}}.
Add the crownboard and roof.
All done.
Feeding the colony
Probably the first dilemma faced by a new beekeeper is whether to feed the recently re-hived nucleus colony.
This is what beekeeping is all about … making judgement calls based upon the strength and state of the colony, in the context of the local environment and with an understanding of what the weather is going to be like over the next week or two.
Get used to it … you’ll be making a lot of decisions like this ?
Here are a couple of scenarios …
- Unseasonably cold weather with lots of rain and an understrength nucleus colony.
- Warm, settled weather with a very strong nucleus colony in an environment with abundant forage.
The first must be fed for it to survive, let alone thrive.
The second may well not need feeding at all.
It’s best to err on the side of caution and feed nucs if there’s any doubt they will not have enough nectar to draw fresh comb and expand the brood nest.
This spring – at least since late May – the nectar flow has been exceptional and I’ve not fed any nucs. All have drawn comb ‘for fun’, often drawing successive frames one after another that I’ve rotated into the box.
If the colony does need feeding I prefer to use a contact feeder (a plastic bucket with a fine mesh grille in the lid inverted over the brood nest) containing 1:1 (by weight) syrup made of granulated sugar and water.
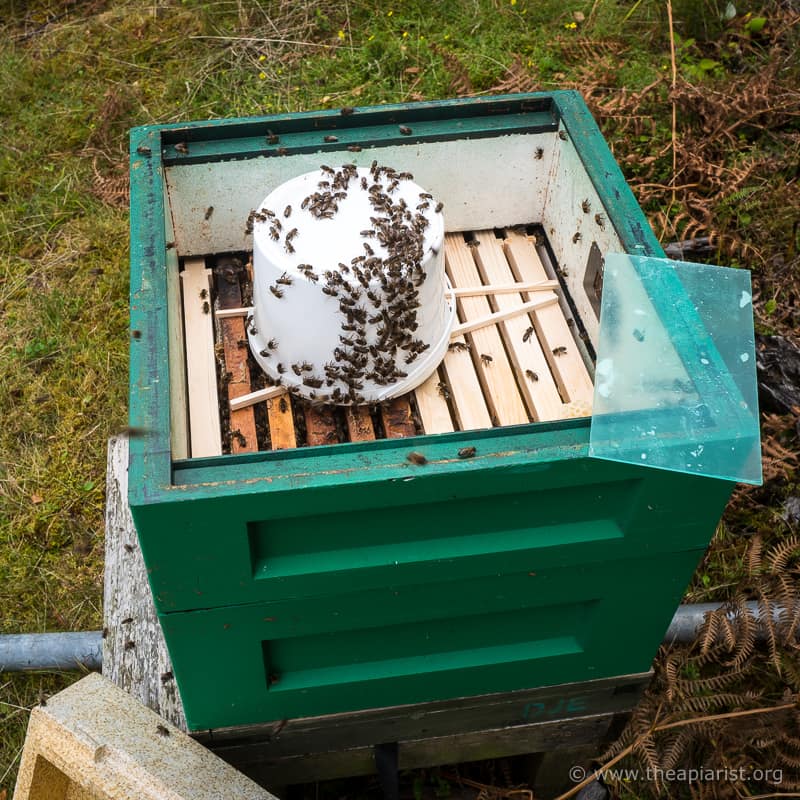
Welcome to your new home … nuc ‘promoted’ to hive with contact feeder in place
The aim it to imitate a good nectar flow rather than allow the bees to store large amount of syrup stores. You want them to draw new comb and rear lots of new brood.
I place the contact feeder directly over the top bars, separated by a couple of wooden spacers. I do this because most of my crownboards lack central holes. Use a spare super to enclose the contact feeder.
I think my contact feeders are ‘half gallon’ ones … they are just big enough to take a mix of 2 litres of water and 2 kg of sugar {{11}}. If the weather remains poor, or the nectar remains elusive (you could always ask the local beekeeper you bought the nuc from … another advantage of buying local bees ? ), then it will do no harm to give them a second ‘half gallon’ of syrup to help them build up.
Do not spill syrup in the apiary. It encourages robbing and your new colony may not be able to defend itself. If in doubt, again err on the side of caution … reduce the entrance size of the hive.
Inspections and enjoyment
On a warm, calm, settled day you should conduct your first colony inspection. Nucs, even recently promoted ones in a full hive, are usually a pleasure to inspect. There are sufficiently small numbers of bees that you should be able to see what’s going on relatively easily.
Don’t worry about finding the queen. If there are eggs present and no sealed queen cells then she will be in the hive.
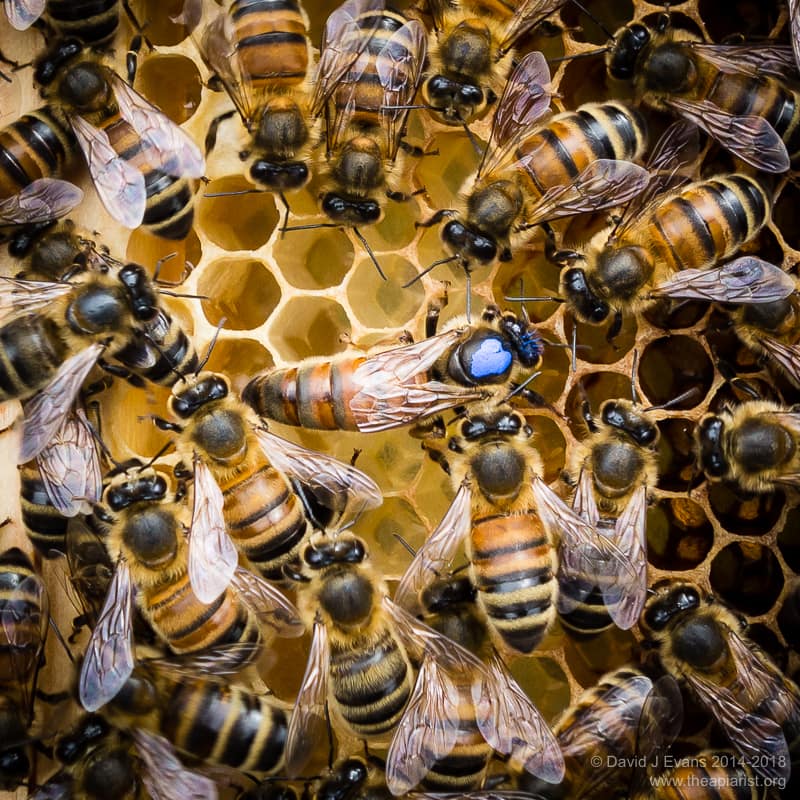
They’re not always this obvious …
It’s always a bit risky making assurances like that as I can think of several scenarios when I would be wrong.
If there are eggs present then there was a queen in the hive within the last 3 days {{12}}.
If there are sealed queen cells present then it’s possible that the hive has swarmed.
But what about eggs being present together with unsealed queen cells?
That’ll do nicely …
There are two obvious explanations, one of which is much more likely for a new beekeeper with their first colony:
- The colony was dead set on swarming and has swarmed without waiting for the queen cell to be sealed. This happens, but it’s unlikely to occur with a nucleus colony just moved to a new hive {{13}}.
- The queen has very recently died – or, more accurately, been killed – and the bees are rearing new queen cells under the emergency impulse,
New beekeepers are understandably enthusiastic … but they can be clumsy.
It’s not unusual for a queen to be damaged or killed during a colony inspection by an inexperienced beekeeper {{14}}. It’s easy to squidge the queen between the sidebars of the frame and the brood box, perhaps because she’s rushing about after the colony was smoked too much, or between frames when returning them to the hive.
If you can’t find the queen you can’t be sure where she is.
Accidents happen.
This was almost certainly the fate of my first ever queen which disappeared a week or two after I bought my nuc … and I thought I was being so careful ?
Which brings me to my last couple of points.
Do not inspect the colony more than necessary.
Once every seven days is sufficient. Don’t meddle. Let them get on with things. When they get to 7-8 frames of brood add a queen excluder and a super.
Observe and enjoy them … from a distance.
Congratulations … you’re now a beekeeper ?
{{1}}: Or anything that’s been imported ‘under the radar’ via Northern Ireland.
{{2}}: Despite the striking similarity of parts of these counties to the Amalfi coast or the Peloponnese.
{{3}}: After all … where else would you get them?
{{4}}: It’s a 90 minute drive to the association apiary for my ‘local’ BKA …
{{5}}: I know one or two people who move hives by bicycle (trailer) but I’m writing for the majority here …
{{6}}: So check the OMF before setting off.
{{7}}: Though you might want to wear gloves and a veil ‘just in case’.
{{8}}: I’m making some assumptions here about the strength of the nuc you have purchased. These comments are based on at least three and a bit of the five frames containing brood, together with a frame of stores. If the nuc has a frame of eggs, a frame of stores and three frames of undrawn foundation it will take a lot longer to outgrow the box … and you’ve been robbed, that’s not what any self-respecting beekeeper would call a viable nucleus colony.
{{9}}: Don’t fill the box with foundationless frames … walk before you can run, don’t allow the bees free reign to draw comb wherever, use foundation to start with.
{{10}}: Remember, none of this is mission critical … bees are very adaptable. If you’ve just installed a nuc completely the ‘wrong way round’ don’t worry. The bees will cope just fine. Consider changing things at the next inspection but do not open the box just to rejig the frames.
{{11}}: Which doesn’t quite make sense to me … half a gallon is 4 pints which is 2.25 litres. A mix of 2 litres of water and 2 kg of syrup is about 3.35 litres … I’m confused.
{{12}}: OK, not if the hive is full of laying workers … but I’m trying not to write more caveats than sentences here.
{{13}}: Unless it was left for too long in the nuc box …
{{14}}: And it can happen if you’ve inspected hundreds of colonies … this year. I’ve recently ‘lost’ a queen for no apparent reason and have to assume it was simple hamfistedness (or ‘hands like feet’ as my research team would describe me a particularly inept bench scientist).
Join the discussion ...