Two frame nucs
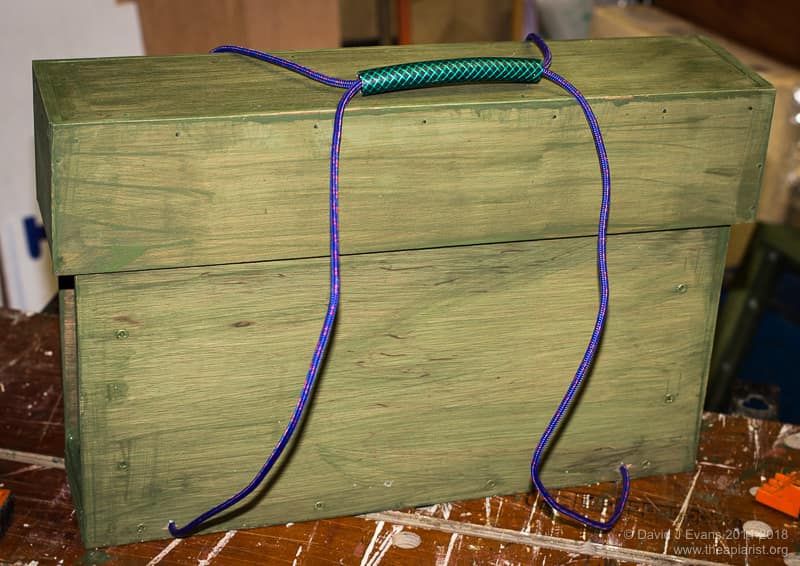
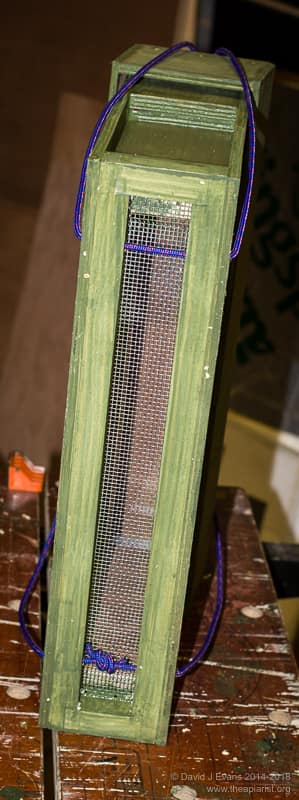
The completed box
Two frame nuc boxes are extremely useful and relatively easy and inexpensive to construct. I use them throughout the season for all sorts of things, including:
- carrying drawn frames, foundation, stores and/or dummy boards
- mating nucs, primed with a grafted cell or a frame with a swarm cell
- two frame ‘split’ to protect an old queen while the colony is re-queened
- simple box to protect a frame with the queen while manipulating the colony e.g. harvesting nurse bees to populate mini-nucs, Bailey comb changes
- transport box for grafted larvae, with the frame wrapped in a damp tea towel and a hot water bottle for warmth
- a seat (for grafting, or just avoiding the damp ground)
Design
v1 … too narrow, too shallow
I think this type of box needs the following desirable attributes; wide enough to take two frames (perhaps plus a dummy board which means an internal width of ~85mm), top bee space so you don’t have to worry about crushing bees, ample space below the frames to accommodate a frame containing a long fat queen cell (30-40 mm isn’t too much), open mesh floor and secure entrance block. In addition is should be relatively lightweight and have handles that make it easy to carry. The one addition feature I’d like to have is stability, but this is tricky with such a narrow box … I strap mine to a hive stand if it’s being left unattended. Some of these desirable attributes are obvious, others were learnt the hard way (e.g. gently lowering a frame with a precious queen cell on the bottom bar into a box that was 1cm too shallow … oops). You can build one of these two frame nucs largely with wood from the scraps box and a simple range of tools. Remember “measure twice, cut once“.
Dimensions
Internal dimensions of my two (National) frame nuc box are:
- Length – NNN mm
- Width – 85 mm
- Depth – NN mm
Internal floor frame
The precise measurements of wood needed depend upon the what you have available. The side panels on mine are 8mm exterior plywood. The end panels are build from 18mm and 12mm scrap ply to generate the necessary thickness to accommodate the frame lug. The framed open mesh floor is from 21mm thick softwood. The entrance block is 9mm softwood. The crownboard is a Perspex offcut; although it’s convenient to be able to see through it a simple piece of thin plywood will do fine if you’ve got no Perspex. The roof has 12mm thick end panels but the sides and top are built from thin ply to keep the weight down.
Although it’s unlikely you’ll keep bees in one of these boxes for long periods (even getting a queen mated and observing how well she lays only takes two to three weeks) pay attention to the beespace, allowing about 6-9mm gap between the frame and the end walls.
Construction
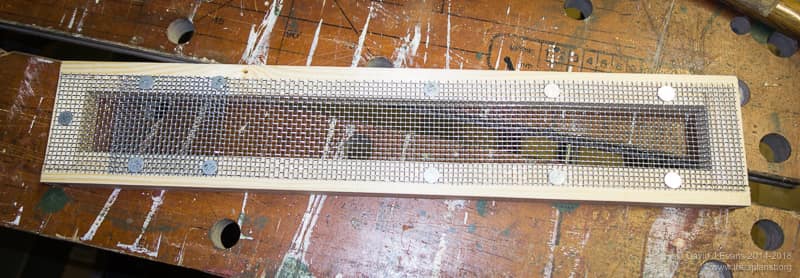
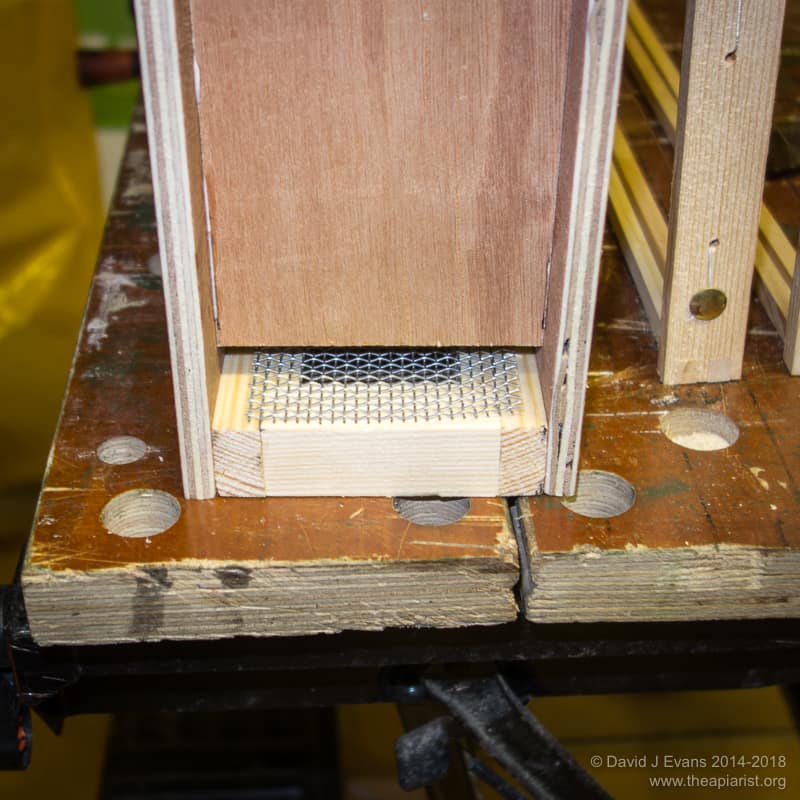
OMF
Using softwood, with glue and screws holding together simple joints, build a floor frame with suitable external dimensions. The side walls will be attached directly to the floor frame. Cut a piece of mesh to size and nail it down using roofing felt nails or similar. The side walls are simple rectangles of 8-9mm exterior grade plywood. To ensure the crownboard and lid sits flat it is important that the corners of the side walls are exactly 90o.

End
The end panels are the same width as the floor frame – they are attached ‘inside’ the side walls. The cross-sectional view is shown (right), with the external end piece also acting as a handle for lifting the box. Remember to take account of the need for frame runners and fit these before assembling the box.
Fit the side walls in place using glue and screws, ensuring that the top edges are parallel and level – that way the roof will sit flat. Fit the end panels in place, ensuring that they are vertical, using glue and screws through the side walls. The top of the end panels should be level with the top of the side walls. Don’t worry about minor gaps … once full of bees they’ll use propolis to seal these up.
Entrance
The easiest way to provide a suitable entrance is to drill a 12-15mm hole through one of the end panels and use a foam plug to block it when it is not required. However, although more work, a better way to provide a secure and removable entrance is to cut the bottom of one of the end panels down by 9mm, thereby leaving a 9mm slot once the end panel is fitted (flush with the top of the side walls). A short piece of 9mm softwood can be used as an entrance block and this can be held securely in place with a bent nail.
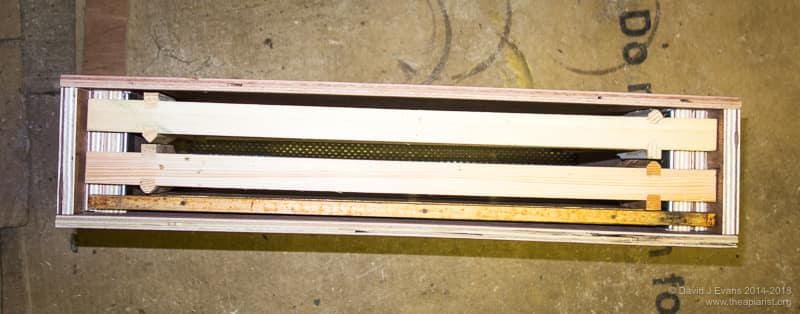
Top view
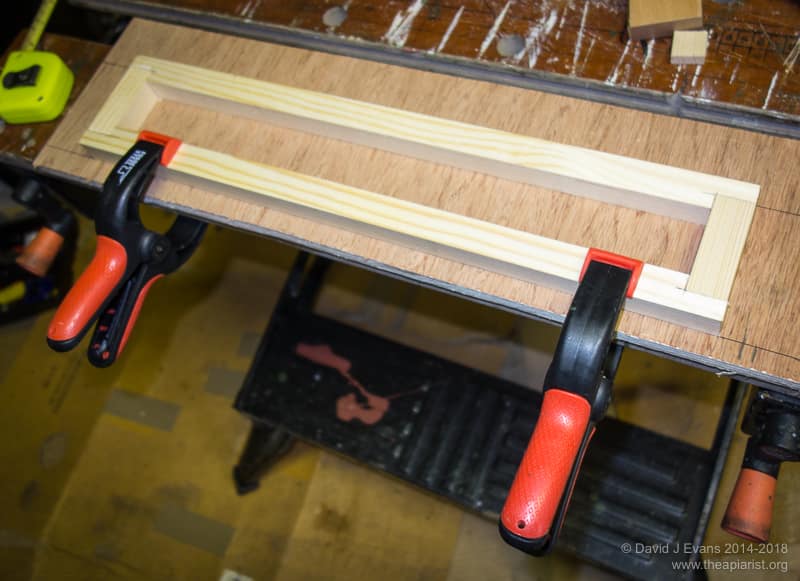
Cut a thin piece of ply slightly larger than the surface area of the top of the box and frame the inside with 21mm x 21mm softwood. Add end panels (using slightly thicker ply to make the next step easier) and then add thin side panels, securing them with gimp pins to the edge of the end panels. The roof should be lightweight and shallow. Make the side and end panels of the roof sufficiently short that you can easily access the handholds on the end panels of the box body. I’ve not bothered covering the roof with anything to waterproof it.
Give the entire exterior surface of the box 2-3 coats of something like Ronseal Fence Life or other bee-safe wood preservative.
Finished bottom view
For convenience fit a carrying handle. I used a single piece of braided polyester cord. Drill four suitable diameter holes through the side wall and floor frame, beneath the mesh floor. Run the cord through these via a short offcut of garden hosepipe to make a comfortable grip, knotting the two ends of the cord underneath the box. Before cutting off the unused cord make sure the handle is a) long enough to move completely out of the way, so the top of the open box can be readily accessed, and b) short enough to ensure the box is clear of the ground when being carried.
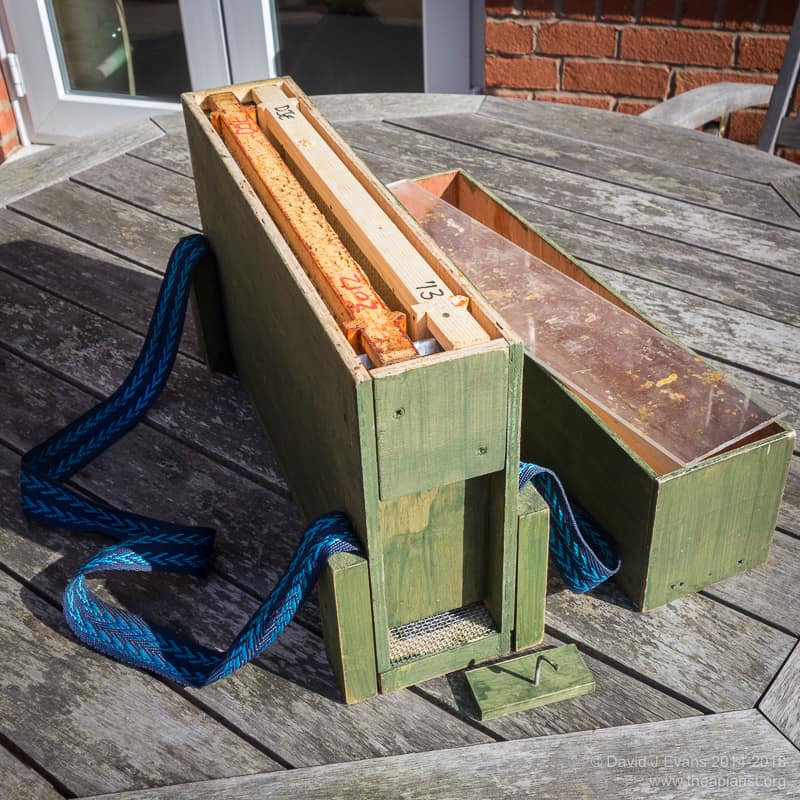
In use
I usually carry a frame of foundation, a frame of sealed stores and a dummy board in one of these boxes. That covers most eventualities and saves too many trips to and fro to the car, or worse, to and fro the apiary. When I’m queen rearing I use the box to carry grafts from wherever I’ve done the grafting to my cell raising colony (which is often in a different apiary). I wrap the frame of grafts in a damp tea towel. On a cool day I’ll add a large flat pre-warmed “freezer block” into the box to make sure the grafts don’t get chilled. If I’m doing something with the colony and want to ensure the queen stays safe I’ll put the frame she is on into the box, put the lid back on and tuck it in a shady corner somewhere. Finally, I’ve used one of these two frame nuc boxes as mating nuclei, adding a frame of emerging brood, a frame of stores, an additional frame’s worth of nurse bees (shaken on top … actually add these first as the ‘target’ is rather small if the box is full of frames) and primed it with a sealed queen cell hanging between the top bars of the frame.
As indicated at the beginning, these boxes have little lateral stability. If they are going to house bees for any length of time strap them to a hive stand or something secure.
A version of this article appeared in Dr. Bodgit’s DIY column in Bee Talk, the monthly newsletter from Warwick and Leamington Beekeepers.
Join the discussion ...