Beeswax wraps
One of the great things about beekeeping as a hobby is that you are never short of gifts for friends and family {{1}}. A jar or two of honey instead of a bottle of wine – or in addition to a bottle of wine – for dinner parties is always received with enthusiasm.
In your first year or two of beekeeping honey might not be available in excess. You get caught out by swarming or you lose the colony through poor mite management.
However, with a little more attention to swarm prevention / control and timely application of miticides your colony strength increases. Your colony numbers also probably increase. Together these, coupled with favourable weather and a geographically well-sited apiary, ensure a good honey crop.
You’ll never again be short of a last minute gift 🙂
But bees don’t only produce honey
With increasing hive numbers you will also start producing surplus wax. Bits of brace comb, wax cappings or wax melted out in a steam wax extractor … it all starts to add up.
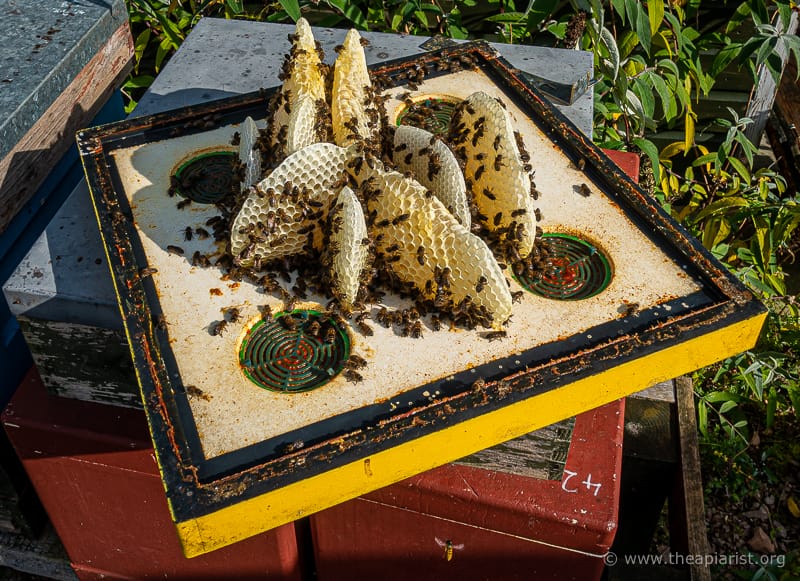
Oops … brace comb
Before you know it you’ve got a few kilograms of wax and you need to find something creative to do with it.
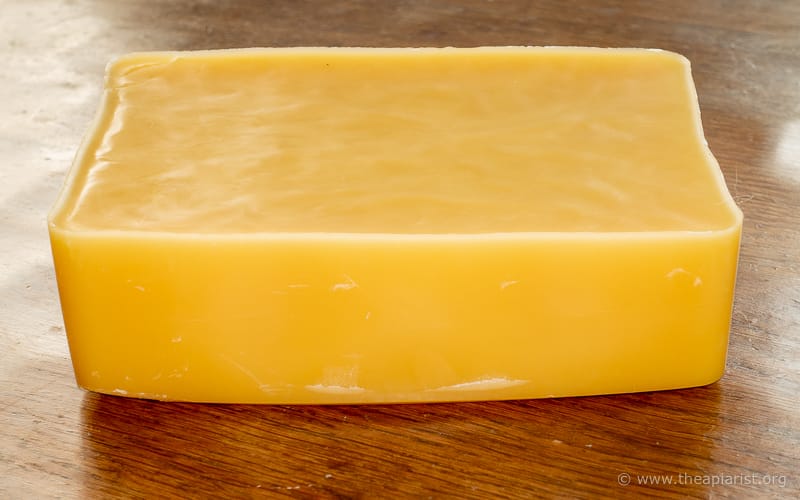
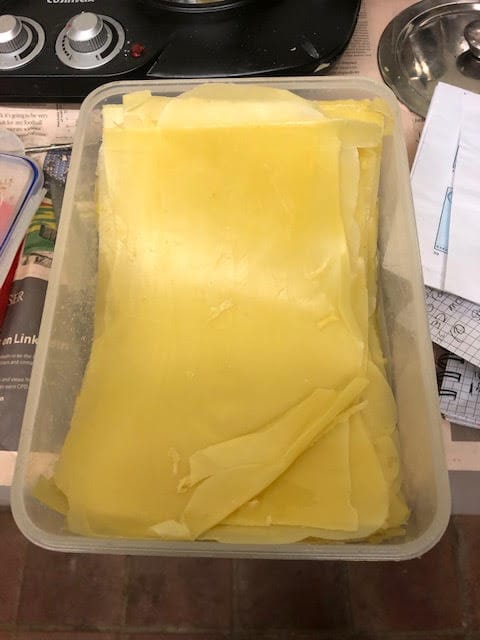
Wax block
Or uncreative … the simplest solution is to trade it in for fresh foundation {{2}}. The block shown above has been filtered through a sheet of kitchen paper and is reasonably clean. In my experience, the wax doesn’t need to be anything like this clean to still be acceptable for exchange.
Of course, the obvious thing to do with excess wax is to make candles.
You need good quantities of nice quality wax, a bain-marie, moulds, wicks and significantly more skill than I’ve got {{3}}. It’s also useful to have a very understanding and patient spouse … there will be spillages 🙁
Alternatively, with relatively little wax you can easily make beeswax wraps to seal food – or food containers – in the fridge or for lunches.
Beeswax wraps
‘The eco-friendly, plastic free, alternative to clingfilm’.
That’s how Thorne’s advertises the beeswax wraps they sell. At two for about £13 (24 cm square) or three for £6 (12 cm square) they are not inexpensive … and when you see how easy they are to make yourself you’ll a) be gobsmacked/impressed {{4}} at the profit margin and, b) want to make some yourself for use or gifting.
We’ve been using commercial (a gift, in a coals to Newcastle way, from a non-beekeeper) or homemade wraps for at least a year now. The ones I have made are at least as good as the commercial ones, though they don’t come in the nice brown recycled packaging {{5}}.
If you get your skates on you probably have sufficient time to prepare these before Christmas for last minute, in person, gifts.
If I’d written this a month or two ago you’d have also had time to post them – and they’re ideal for this for obvious reasons – but the last posting date {{6}} for Christmas was probably in October 🙁
Ingredients
The wraps are beeswax-impregnated cotton fabric of some sort. I’ve used plain or patterned cotton of a variety of colours. Depending upon the quality of the wax the material will discolour slightly, so it usually helps to have an off-white colour to start with.
I’ve no idea of the density or weight of the fabric. For comparison, I’d say it was similar to sheets or pillowcases.
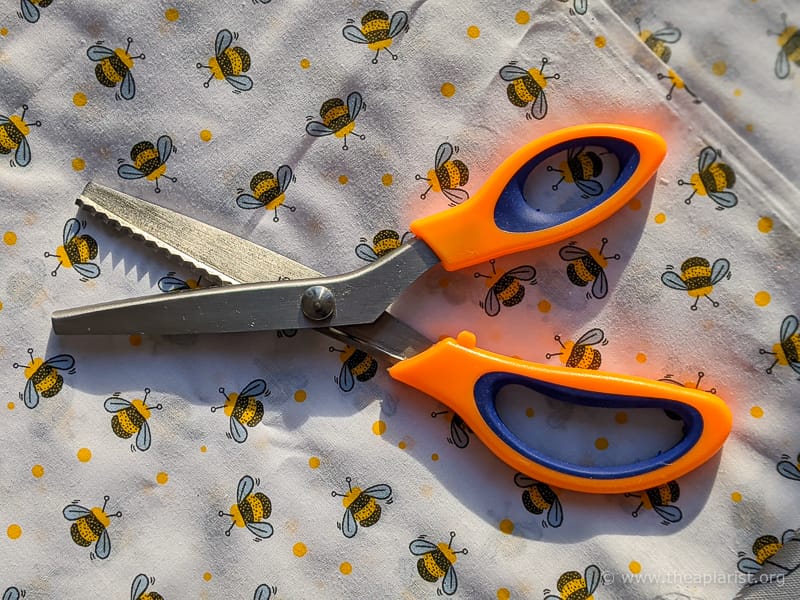
Fabric and pinking shears
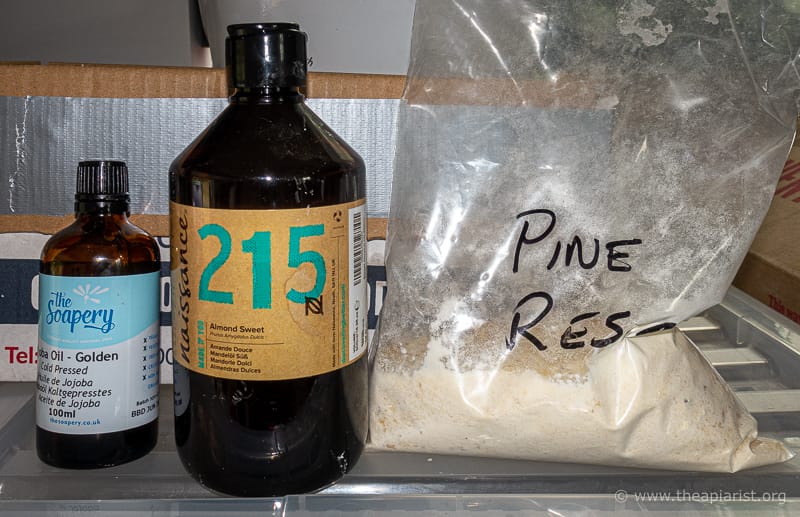
The beeswax is prepared with jojoba oil (to provide some antibacterial properties), almond oil (to increase pliability) and powdered pine rosin (to provide the ‘tack’ or stickiness).
You’ll need the following:
- Cotton fabric cut into suitably-sized pieces. Use pinking shears to generate a run-free edge.
- 100 g clean, filtered beeswax.
- 10 g jojoba oil (100 ml @ £6.49) {{7}}.
- 10 g almond oil (500 ml @ £6.99).
- 70 g powdered pine rosin (500 g for £8.99).
Ingredients for beeswax wraps
The pine rosin (the left-overs from turpentine distillation from pine resin) is usually sold in yellow to amber-coloured translucent lumps. Before use it needs to be ground into a powder. I use a pestle and mortar but I suspect you could do a much faster job with a coffee grinder {{8}}.
In addition to the ingredients above you will also need a limited amount of additional ‘equipment’:
- some means of melting the ingredients and holding them at temperature. A slow cooker is ideal for this purpose though you could also do this in a homemade bain-marie (e.g. a pyrex bowl in a saucepan of water over a low and controllable heat). Wax is flammable. Take care.
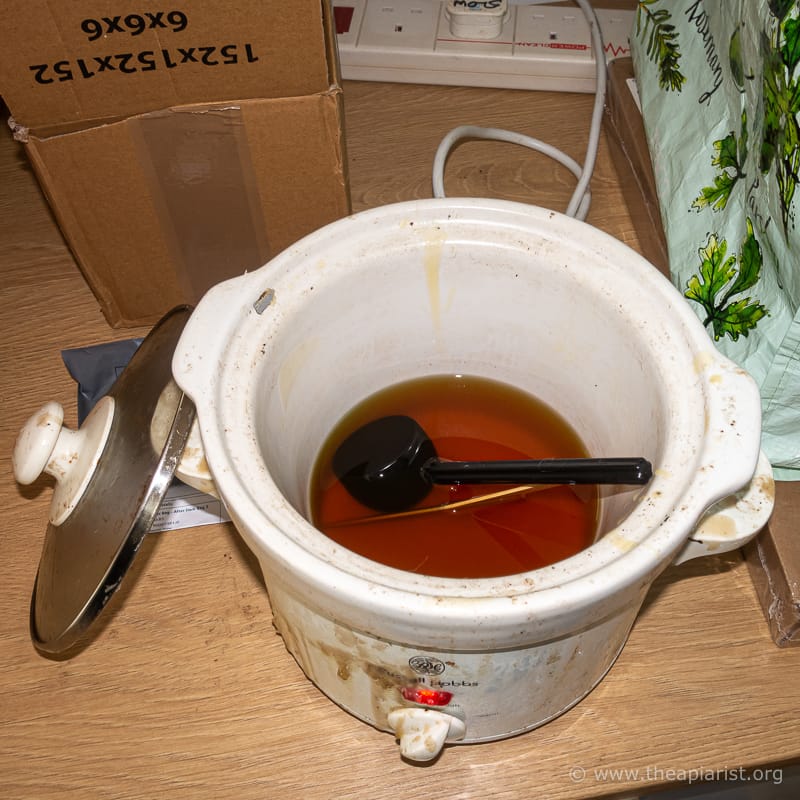
Slow cooker …
- a metal oven tray and an oven to put it in.
- baking parchment.
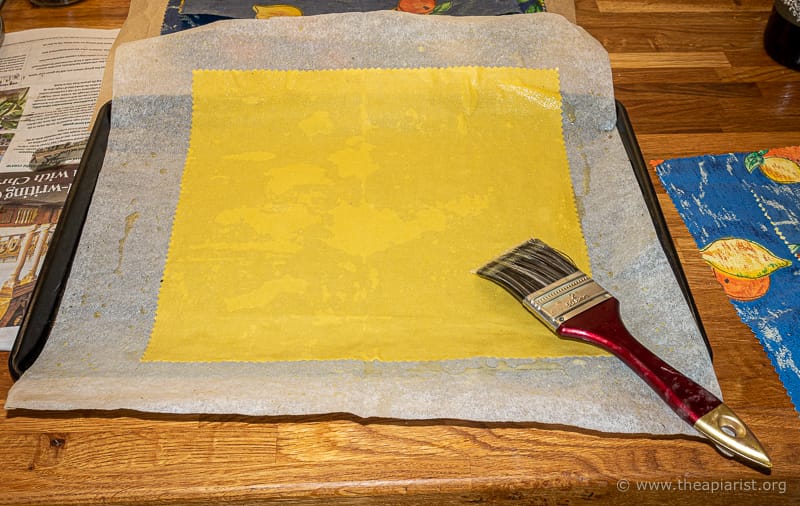
- a dedicated poor quality paintbrush. ‘Dedicated’ as it will be useless for anything else afterwards. ‘Poor quality’ as we’re not discussing fine art here … it’s just for spreading the melted stuff evenly over the fabric.
- disposable wooden stirring sticks (lolly sticks, or similar).
Instructions
Evenly spread the beeswax mix
- Add the powdered pine rosin to the slow cooker and allow it to melt with occasional stirring. I set my slow cooker on medium heat for this.
- Add the remaining ingredients to the melted rosin. I weigh the oils and add the solid wax and allow everything to melt together with more gentle stirring.
- Pre-warm the oven to ~125°C.
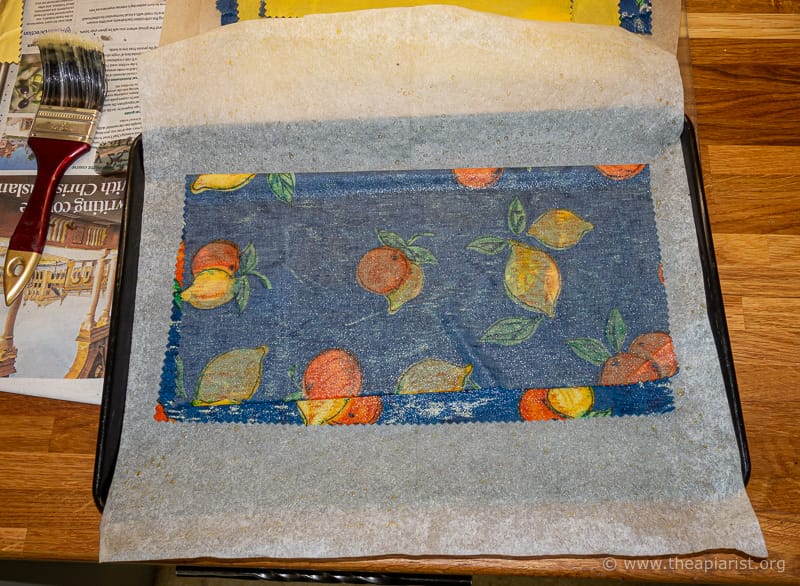
- When the mix is ready place the metal oven tray covered with a sheet of baking parchment and the first piece of pre-cut fabric in the oven for a couple of minutes.
- Place the pre-warmed metal tray and fabric on a heatproof and newspaper-covered surface {{9}} and ‘paint’ the fabric with the beeswax mix. To reduce drips from the paintbrush I use an old coffee scoop to add the beeswax mix to the fabric and then spread it evenly with the paintbrush.
- Put the tray and coated fabric back in the oven for two minutes.
- Remove again and use the paintbrush to ensure the beeswax mix is spread evenly, with no lumpy bits or excess. This usually involves using the paintbrush to sort of spread the excess off to the sides {{10}}.
- Lift the now covered fabric wrap by two corners and hold over the metal tray (not the floor!) for 15 seconds or so to catch any drips. Remember, it’s likely to still be hot. Use tongs of some sort if you have heat-sensitive fingers.
- Lay the finished wrap aside once it is sufficiently cool. This takes just a few seconds. You’ll often see instructions to hang these on a drying rack but I’ve never bothered.
- Add another piece of fabric and go back to #4 in these instructions. Repeat until you’ve run out of beeswax mix, fabric or patience.
Here are some I prepared earlier
Once cooled they can be folded gently and stored.
Notes
The quantities by weight in the ingredients list above are sufficient to make (at least) a couple of dozen wraps {{11}}. If that’s more than you need, or if you want to prepare the beeswax mix in bulk in advance, simply pour it into a suitable container (e.g. a plastic ice cream tub) that has been pre-treated with something like FloPlast Silicone Spray to allow its easy removal for re-melting.
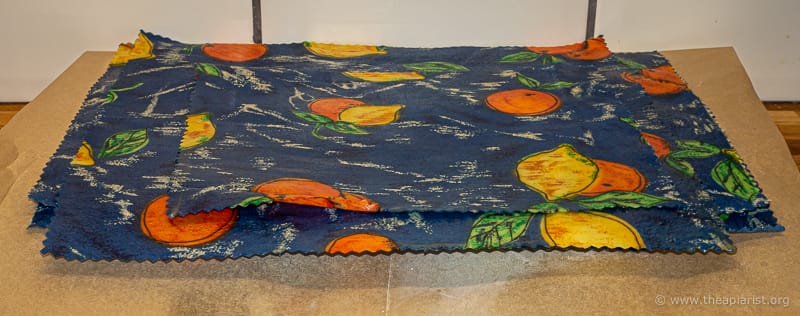
You can make large wraps suitable for a loaf of bread in the same way. Just fold the fabric over so that it fits onto the metal tray. Turn it over to ensure that the fabric is full impregnated with the beeswax mix.
Large wraps
I found the recipe above somewhere online. I tried a couple and this worked best for me {{12}}.
The wraps I make are a little thicker and quite a bit ‘tackier’ than the commercial ones I’ve seen.
I’m using tacky here as an adjective meaning ‘sticky’ … not as the informal ‘poor taste or quality’ !
This tackiness is an advantage as it is a little more self-adhesive when you’re wrapping things, and it probably makes the wrap last a little longer as well. You could probably reduce the rosin content to make a ‘drier’ beeswax wrap, but I can’t guarantee it will stay wrapped.
The same sorts of guidance applies to the use of these wraps as any commercial ones. Do not use them to wrap raw meat or fish. If they get dirty wash them in lukewarm water with a very small amount of detergent. If they lose their ‘stick’ revitalise them by placing them in the over for 5 minutes at 125°C.
Have fun 🙂
Note
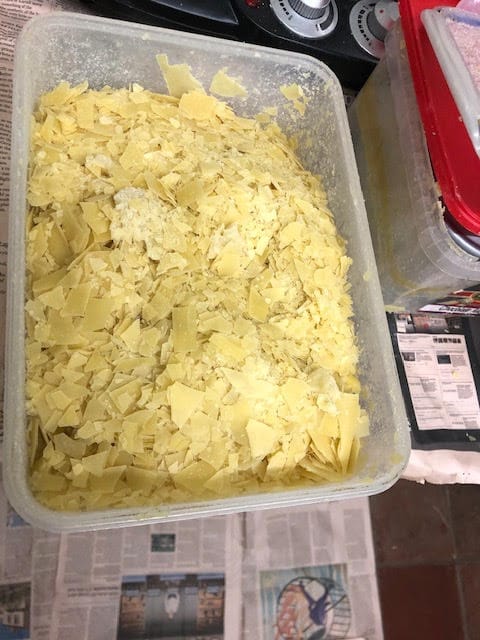
Elaine Robinson, a regular reader and commenter, sent me a description of an alternative way of preparing and applying the beeswax mix. Having mixed the ingredients she pours it onto a wetted piece of plywood where it sets in a thin sheet.

Preparing this sheets of beeswax wrap mix
Having floated this off in water she freezes it – or them as it makes sense to prepare a lot in advance – in a tub and then, by simply shaking the tub, turns it into broken shards.
Here are some that were prepared earlier – sheets of beeswax wrap mix
Using about 16 g of shards per 30 cm square wrap Elaine stacks the fabric and shards on a baking tray and places them in an oven at ~80°C.
Ready to use shards – use them straight from the freezer to avoid stickiness
After melting everything all that is then needed is a brush to ensure the edges of each of the beeswax wraps are fully covered … followed by folding the wraps and popping them into some very neat custom-made brown paper sleeves that she also prints at home.
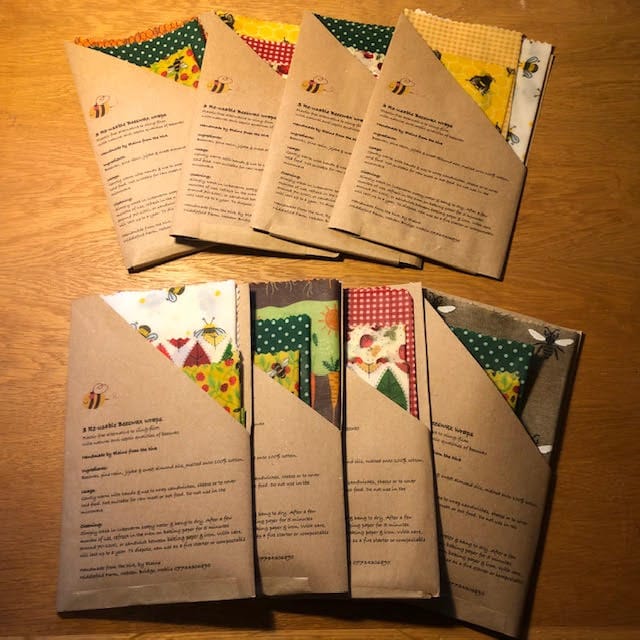
All done!
Which look very impressive and made my efforts look rather inadequate 😉
{{1}}: Or enemies and random strangers, but the first at least would be a bit weird.
{{2}}: The link for this on the new Thorne’s website appears to be broken.
{{3}}: I’ve made candles but don’t really have the time, patience or skill to make good candles, so I’m unlikely to ever write about it here.
{{4}}: Depending whether you made a purchase or not.
{{5}}: Which you immediately recycle.
{{6}}: 1st and 2nd class last posting dates are the 21st and 18th of December respectively.
{{7}}: These were the prices/amounts when I wrote the post, but there are dozens of alternatives, some of which may be less expensive. With the addition of more wax, there’s probably sufficient oils and pine rosin to prepare a couple of hundred wraps if you buy these quantities.
{{8}}: This is just a suggestion … note that this might well ruin your coffee grinder (for coffee at least). You have been warned.
{{9}}: There will be drips!
{{10}}: Don’t worry about excess being left on the baking parchment. It will be absorbed by the next piece of fabric you add.
{{11}}: Though this depends upon the size you are making of course.
{{12}}: And/or contained the most accessible/affordable list of ingredients!
Join the discussion ...