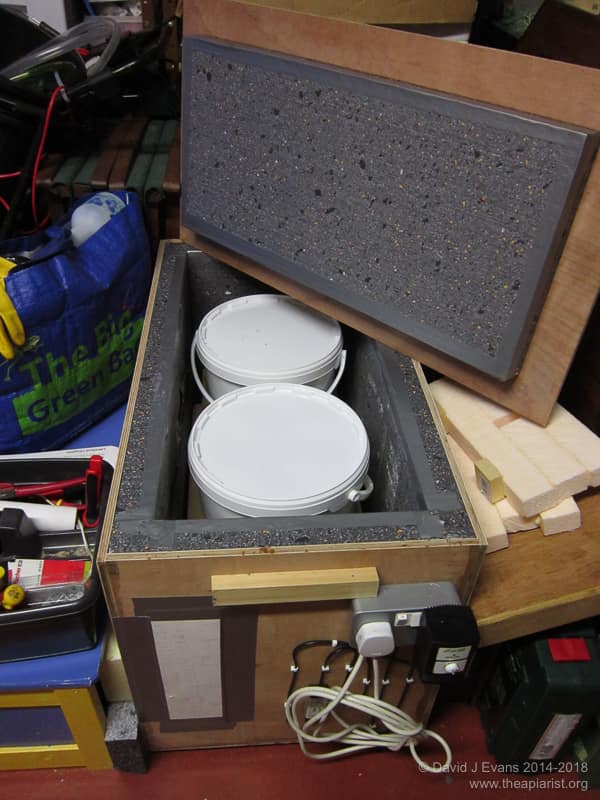
Honey warming cabinet
Preparing soft set honey, or warming OSR for bottling, means you will need a source of controllable heat large enough to accommodate one or two 30lb honey buckets (or more of course). Many recommend an old fridge or freezer with an incandescent 100 watt bulb. These are getting increasingly difficult to buy and require some electrickery skills – which I lack – to accurately and safely control the temperature. An alternative is to build a honey warming cabinet from ply, lots of insulation and a well-regulated thermostatically controlled heating element, like they use to hatch chicken eggs.
Honey warming cabinet
Using ply sheeting, a few dozen 4 x 40mm screws, some wood glue and a few sheets of 50mm insulation (for example Kingspan or Jablite, both of which are available from larger B&Q stores for about £4-5 per sheet) you can build a cabinet that easily rivals those sold by Thorne’s the usual commercial sources for a fraction of the price.
Ask your local wood merchant to prepare 9mm exterior grade ply cut to the following dimensions:
- Top and base: 2 pieces, each 47.5cm x 87.5cm
- Sides: 2 pieces, each 50cm x 87.5cm
- Ends: 2 pieces, each 50cm x 45cm

Internal view
Using ample glue and screws construct an open-topped box on top of the base sheet. Add scrap stripwood as handles on either end and feet underneath before going to the next stage (rather than after having to deconstruct the finished box as I did … the screws holding these handles and feet on should go from the inside of the box outwards). Line the box with thick insulation; both Jablite and Kingspan are easily cut with a carving knife which is much less messy than using a regular saw. A single sheet of insulation lines the base of the box, with the sides sitting on top and lying flush with the top of the ply side panels (see photos). The insulation does not need to be fixed in place, particularly if you overlap the ends (like sealing the top of a cardboard box).
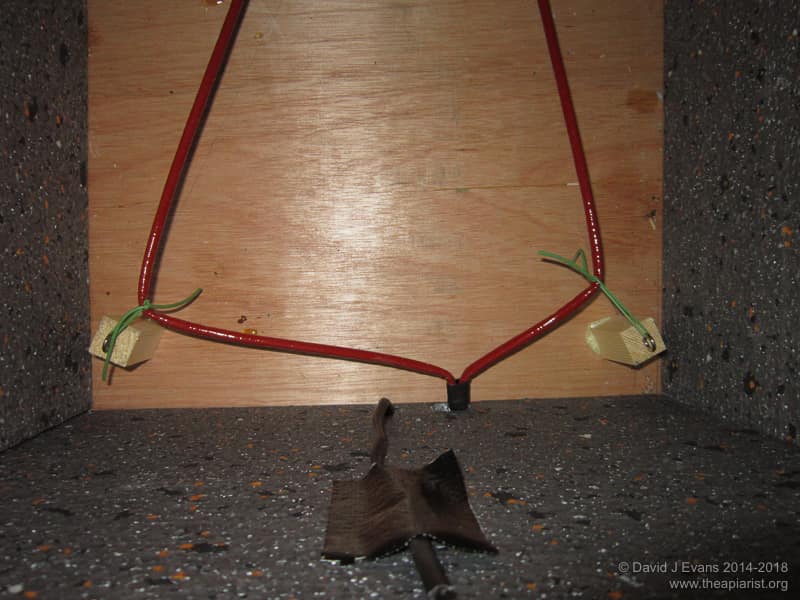
Element … ary
I used a 100 egg incubator heating element from Ecostat. These are sold by beekeeping suppliers at a considerable markup … instead try Patrick Pinker Game Supplies who sell them for significantly less (c. £55 if I remember correctly). These elements are pre-wired and consist of a control unit/plug with two protruding wires. One is the thermostat and the other the heating element. Both need to be fed through a hole drilled in the end or side wall of the box. I added an external socket (see note at end of article) but this is not necessary – simply ensure that the wires from the box cannot be accidentally pulled out as this is likely to damage the element or thermostat. The heating element needs to be supported from short wooden pegs so that it is clear of the walls and floor of the cabinet – I prepared a false floor from an offcut of 3mm ply and glued/screwed the vertical posts to it. Small eyelets are attached to the top of these which then – using the supplied rubber bands – support the element. The comprehensive instructions for the Ecostat element make this very clear. The thermostat needs to be well separated from the element. I taped it to the inner side wall of the box. While you have the role of duck tape out it might be wise to cover the exposed edges of the insulation which can be a little friable. The lid is simply constructed by gluing a suitably sized piece of insulation to the middle of the ply sheet – you can use Gorilla glue safely with foam insulation. Tape the edges of the lid as well as they can get quite a few knocks.
[Note 1: I have prepared some rudimentary plans (with dimensions) showing the construction of this honey warming cabinet. These should be read in conjunction with this page which contains the relevant images.
Note 2: There is an additional brief post on alternative places to source the thermostat and heating element. These are also available from Thorne’s and possibly other major beekeeping equipment suppliers, though at higher prices.]
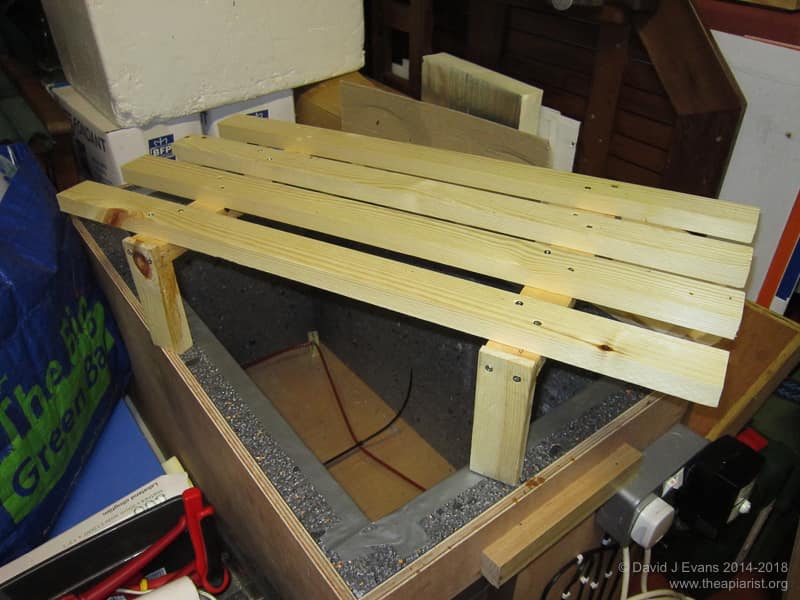
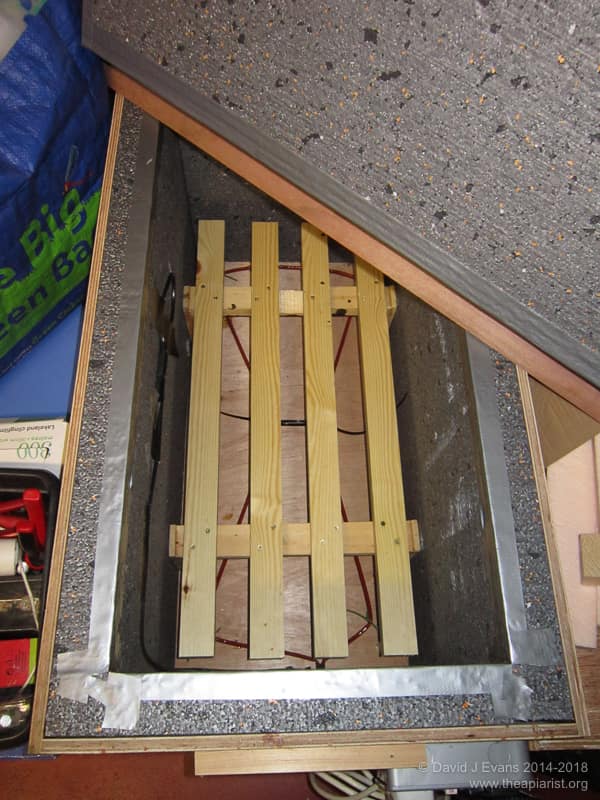
Bucket stand
You need the lid and floor finished before you can prepare the last component – a ventilated stand for the honey buckets. This needs to provide clearance above the element, but be short enough that the buckets leave space above them when the lid is closed (to allow air circulation). The picture shows the sort of thing required without exposing my poor quality carpentry.
Finally you need to calibrate the thermostat. This can easily be done by standing a large container of water in the cabinet with a thermometer in it, allowing the cabinet (and, more importantly, the water) to reach a stable temperature before recording it. Alternatively, and a lot more conveniently, buy one of those cheap remote weather stations from Maplin which have an external temperature sensor. Leave this in the cabinet and monitor the temperature with the base unit. My cabinet is in an unheated garage and holds temperatures between about 20oC and at least 55oC +/- 0.5-1.0oC when the ambient temperature is below about 14oC.
Ready to go
Soft set honey needs a temperature of 14oC or below so is best made during the colder months of the year, though you can always use your well insulated box as a chiller if you add lots of cooling blocks.
Improving heat distribution in the cabinet
After using this cabinet for about three years I modified it by adding a small mains powered fan underneath the slatted wooden stand. I used the external twin three pin socket to provide the power for this. This is a marked improvement (on what already worked pretty well). The box reaches temperature faster and fluctuates very little. The only problem I have encountered is when you try and maintain a constant low temperature … the fan generates some heat and it is difficult to keep the temperature much below the low 20’s centigrade.
Queen cell incubator
With an inner container such as a polythene ice cream carton with a damp cloth inside (to raise the humidity) I’ve used this incubator to hatch out queens from grafted cells. Just stack the hair-roller cages vertically in the ice-cream carton and check them regularly. Virgin queens can easily be added to queen less mini-nucs. If you’re going to use this cabinet for incubating queen cells remember to calibrate the thermostat and mark it for 34oC well in advance.
Warming super frames before extraction
If you take care to build the cabinet the same dimensions as a couple of supers you can use it to warm boxes of frames for extraction.
A version of this article first appeared (way back in 2012) in Bee Talk, the monthly newsletter of the Warwick and Leamington Beekeepers.
Join the discussion ...