In the bleak midwinter
Winter has finally arrived.
Green thoughts in a white shade
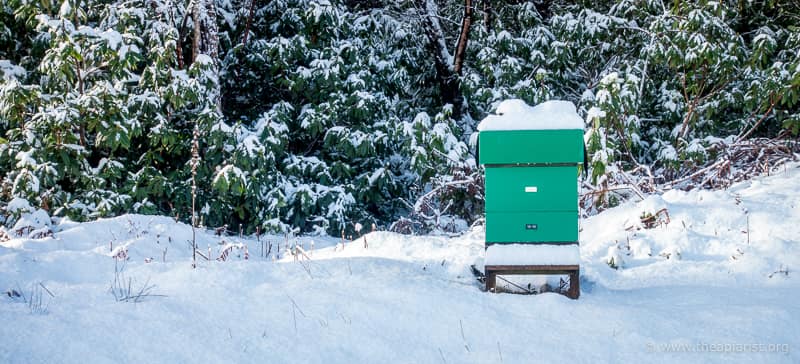
We’ve had temperatures fluctuating around 0°C for the last two to three weeks now, with some very hard frosts and more than enough snow to make the track impassable.
Like the bees, I’ve spent the time hunkered down focusing on keeping warm and conserving my stores.
Unlike my bees, I’ve benefited from triple glazing and a wood burning stove 😉
And the main thing I’m worried about running out of is milk for my cappuccino {{1}}.
The 20th was particularly cold with temperatures well below -5°C and stunningly clear. There was something strange about the conditions, as the loch froze. The surface, for 30 metres or more from the shore, had a thin film of ice covering it.

Ice, ice baby
As the tide dropped the shore was left with a sparkling crust of 1mm thick glass-like ice confetti.
The salinity of seawater is typically ~3.5% … this amount of salt reduces the freezing point to about -2°C, a temperature we’ve regularly experienced in the last fortnight. This suggests the ‘strange’ conditions were probably the absence of any swell coupled with the really calm conditions.
Whatever the cause, it was beautiful.
Early season forage … you must be joking 😉
Under conditions like these the bees are effectively invisible. They’re very tightly clustered . With daytime temperatures rarely reaching 3°C none venture out of the hive. With the exception of cleansing flights and the removal of corpses – and it’s too cold for either of these – there’s little reason for them to leave the hive anyway.

The gorse is in flower … somewhere under there
The only thing flowering is gorse and it would be a foolhardy bee that attempted to collect pollen at the moment.
I’ve previously written about the genetically-determined flowering time of gorse. In an attempt to improve forage at certain times of the year I’ve been collecting seed from suitable plants and germinating it indoors. As soon as the weather improves I’ll plant these seedlings out {{2}} as the amount of gorse around the apiary is quite limited.

Gorse (and some broom) seedlings
Gorse seed is painful to collect and germinates poorly. I pour boiling water over the seed and then let it soak for 24 hours, which improves germination at least ten-fold.
Hive checks
Every fortnight or so I check the hive weights by hefting. Only two colonies have had any extra fondant yet and that was through ‘an abundance of caution’. I suspect they actually didn’t really need it.
The next eight weeks (here {{3}} ) is when brood rearing should be starting to really ramp up. It’s during February and March that starvation is an issue.
Here on the west coast, my colonies are rearing brood. This tray has been in for about a week. I’m including it as I’ve been asked several times about how to determine if a colony is rearing brood without opening the hive.
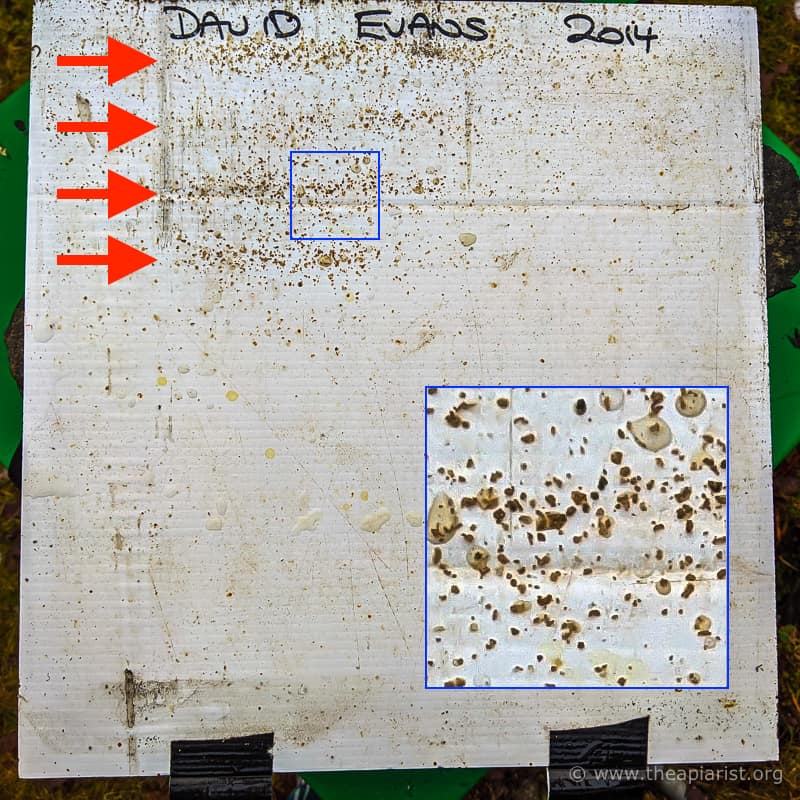
Biscuit coloured (or a bit darker) cappings indicating brood rearing in this colony
The red arrows indicate the biscuit coloured cappings that have fallen from the seams in which they are rearing brood. The inset shows a magnification of the indicated part of the image. The photo was taken with a camera phone and the cappings are perhaps a bit darker than usual (though I also know there are a few older brood frames in this hive 🙁 ).
And if the conditions are right, even with a well-insulated poly hive, you can identify which wall the cluster is up against by the evaporation of the overnight damp from the outer surface of the hive.
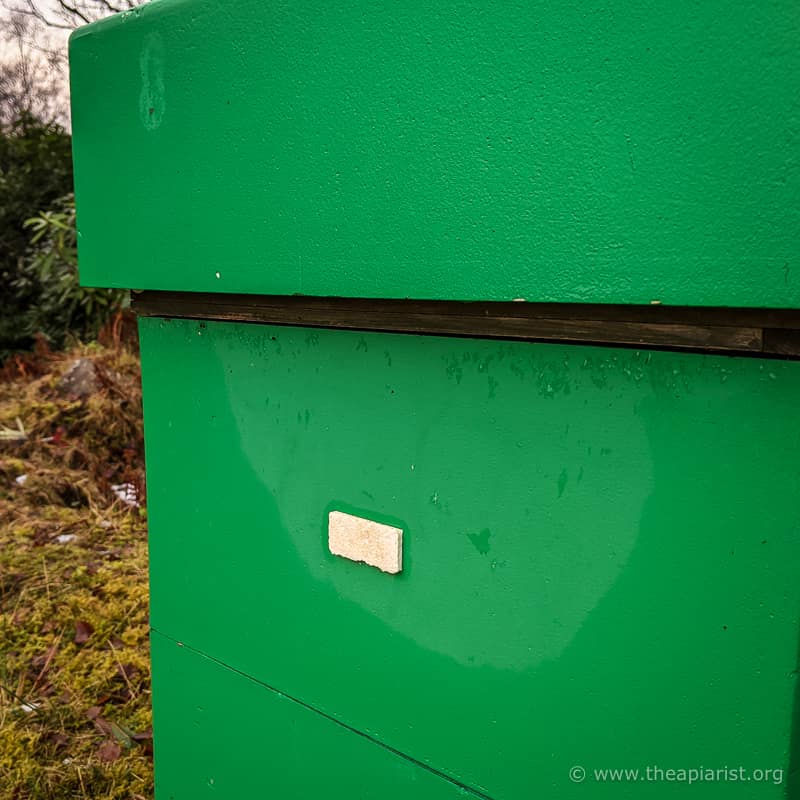
The location of the cluster is clearly visible on this Abelo poly hive
This is the front of the same hive from which the Varroa tray was photographed – the cappings on the tray and the cluster location correspond perfectly.
By the way … don’t bother looking for Varroa on the tray. This hive is in a Varroa-free region 🙂
As I’ve said before, it’s not unusual for colonies in poly hives to cluster tightly against the wall in winter. Those in cedar are more often away from the wall in my experience (and the same thing applies to brood rearing other than at the height of the season).
Hey good lookin’
The Abelo hive above is a nice looking box. The paint finish is bonded well to the polystyrene and provides good protection.
If you leave unpainted polystyrene out in the elements it starts to look pretty tired, pretty quickly.
I don’t have any pictures as none of my poly hives are unpainted.
At least, none are any more 😉
I’d acquired some new Maisemores nucs with bees and had a number of unused and unpainted Everynucs. Most manufacturers recommend you paint poly hives with masonry paint of some kind, or they sell (often quite pricey) paint that’s suitable.
Everynuc poly nucs
I’ve painted a lot of nucs with masonry paint, using a paint spray gun. It goes on fast and is reasonably hardwearing … but not great.
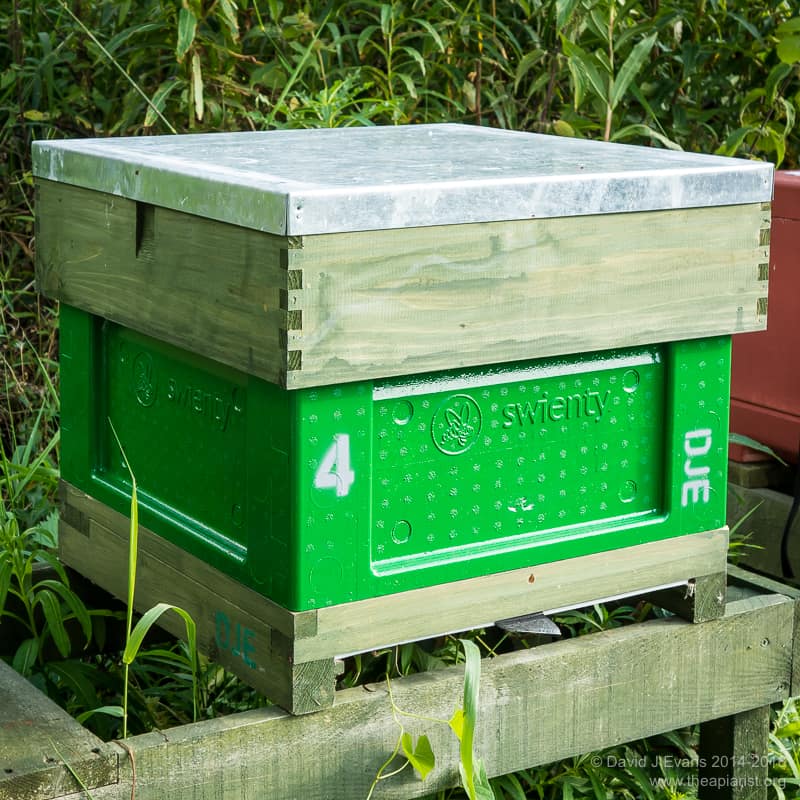
Swienty brood box …
In contrast, my Swienty brood boxes look as good now as when they were first painted 5 years ago. These received two coats of ‘Buckingham green’ Hammerite Garage Door paint.
This paint is designed for galvanised metal garage doors (the clue is in the name 😉 ). It contains a bunch of unpleasant sounding solvents but, when dry, appears to be entirely safe. I’d recommend not reading the 13 pages of safety data sheets or you might never dare open the tin because of the imminent risk of explosion.
Melting polystyrene
These solvents have the effect of slightly ‘melting’ the surface of the poly hive. This creates a really strong bond between the paint and the hive surface. The melting isn’t enough that you can notice the surface texture change … it’s just an invisible chemical reaction going on as you brush the stuff on.
Maisemore’s poly nuc after the first coat
However, this reaction might account for the rather patchy coverage of a single coat. If you paint it on thickly enough to try and produce a nice even finish it tends to run and sag a bit.
So give it two coats … and then it looks excellent.

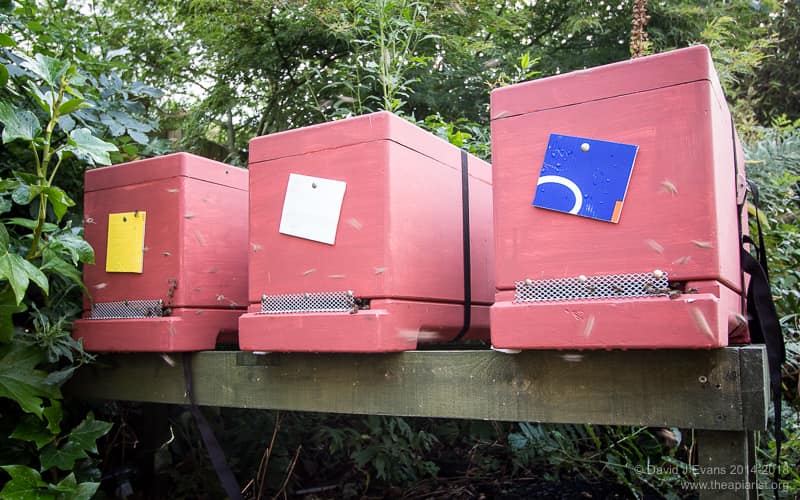
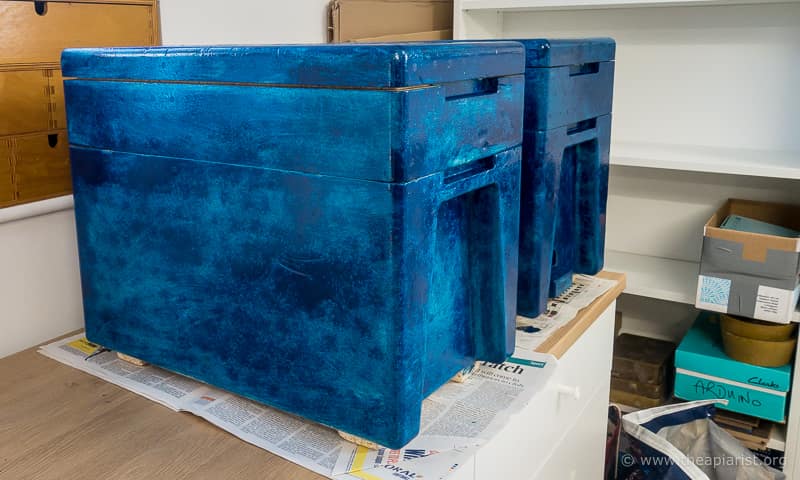
Oxbridge Blues – a few painted poly nucs ready for the season ahead
Several months ago I bought a ‘remaindered’ tin of Hammerite paint in Oxford blue. I had wanted a contrasting colour (to my other boxes) for these nucs to help orientate returning freshly mated queens.
I paint the entire box, avoiding any of the ‘touching’ faces which are left unpainted. Some paint usually seeps into joins between the roof, body and/or floor, but you can easily prise them apart with a judiciously applied hive tool.
I’m rather pleased with how smart they now look.
I’m somewhat less pleased with the quality control on some of the Everynucs {{4}}. Several had the mesh floor stuck down incorrectly, with parts unattached. In places the gaps were big enough for a bee to enter.
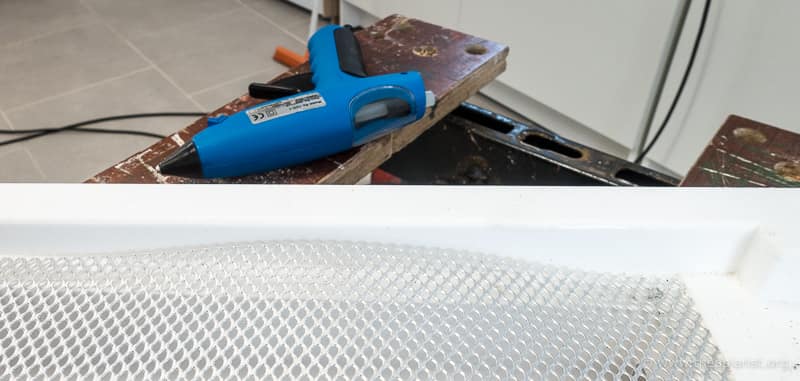
Open mesh floor and big gap at the side in an Everynuc
I simply pulled them off and restuck them down with a glue gun. This is an easy fix but really should not be necessary on a nuc box that costs almost £60 🙁
A+E
With the current Covid pandemic we have a responsibility to minimise the demands we are placing on our heroically overstretched healthcare workers.
For this reason I’ve been avoiding doing any DIY for beekeeping for many months now 😉
However, the season is looming ever-closer and I want to try some new things.
My toolbox contains approximately equal amounts of disconcertingly sharp implements and elastoplast. I’m well prepared 😉
I’m also currently living very remotely. In the event of a bad injury I’m unlikely to ever trouble the staff in A+E … unless the accident conveniently coincides with the ferry timetable 🙁
I therefore decided to risk life and limb by building the things I need to try queen rearing using a Morris board.
I’ll describe full details of the method later in the year.
For me, this method should offer advantages due to the type of bees, the size of my colonies, the number of queens I want to rear and the period over which I want to rear them.
You can buy these boards (for about £30 each) … or you can build better ones for about a fiver from offcuts from the wood bin, a bit of queen excluder and a piece of aluminium. They are a bit fiddly to build, with four opening doors and a ‘queenproof’ slide, but the cost savings and satisfaction you gain more than outweigh the blood loss involved.
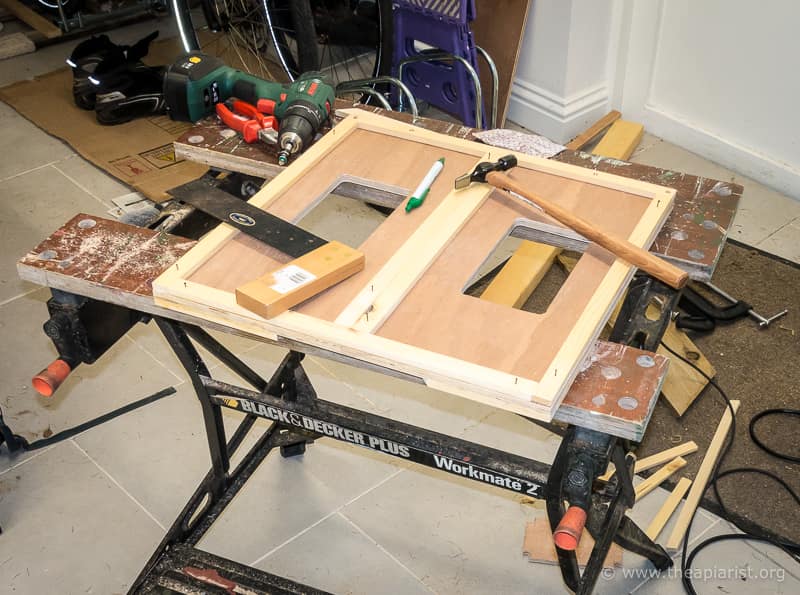
Here’s one I started earlier … a Morris board under construction
The very fact I’m still able to write this post shows that I managed to retain all my fingers. Whether or not the Morris board works {{5}} I consider that fact alone a success 🙂
Doing the splits
The Morris board works by allowing access to 5 frame upper brood box for defined periods. I therefore also needed a brood box divided in half.
I’ve been doing a lot of wax extracting recently and a couple of cedar boxes have cracked under the stress of repeated steam cycles. I split one down to its component boards, burning the bits that were unusable, but recycling one side into the central division of another old cedar box.
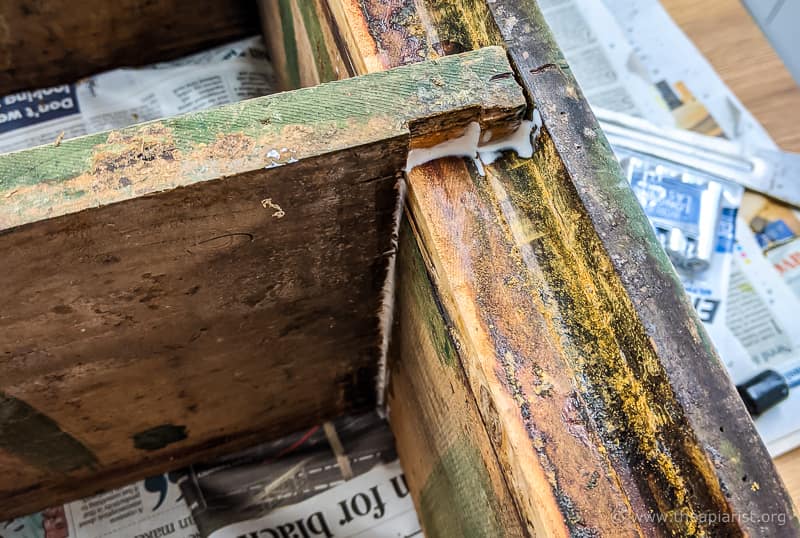
Split brood box – detailed view of my very poor workmanship
I’ll be queen rearing in two apiaries simultaneously, so will need two of these upper boxes. However, I only managed to salvage one sufficiently large board from the steam-damaged box. Fortunately I have some cedar nucs built precisely (so clearly not by me 😉 {{6}} ) to National hive dimensions, so I can use two of these side-by-side with the same design Morris board.

Late afternoon sun, 24th January
But queen rearing remains both a distant memory and a very long way off in the future. Until then it’s a case of enjoying the short winter days and drinking cappuccino in front of the fire.
Good times
Notes
Hammerite Garage Door paint is usually £15-20 a tin (750 ml). It’s worth shopping around as there’s quite a bit of variation. I found it remaindered and paid under a tenner 🙂
I reckon there’s enough in one tin to do two coats on 9-10 nucs as long as you take care not to over apply the first one. You could probably thin it a bit (though I’m not sure what with {{7}}) but I’d take care you don’t create something that just melts the poly box.
Even at £20 it still works out at only about £2 a nuc. Considering these can cost £40-60 it seems like a reasonable investment of money to keep them looking smart for years.
And a good investment of time (it took me ~15-20 minutes per coat) … after all, what else are you going to do in the bleak midwinter?
{{1}}: And if that isn’t a first world problem, I don’t know what is.
{{2}}: Together with a lot of broom I’m also growing.
{{3}}: If you’re new to this site be aware that I live in Scotland … our season is significantly shorter than it is in the south of England, lots cooler than it is in Arizona, and positively tropical when compared with the winter in Manitoba. You’ll need to adjust the dates according to the local conditions where you keep bees. You cannot make beekeeping decision based on the calendar … they can only be judged in terms of the local area and the development cycle of brood.
{{4}}: However, it should be noted that the poly these are made of is smoother, thicker and seems of better quality than that of the Maisemore boxes.
{{5}}: And it will … a Morris board works using similar principles to a Cloake board, a method I’ve used very successfully and described previously.
{{6}}: They were built by Peter Little of Exmoor Bees and Beehives.
{{7}}: Apparently not white spirit as it makes a gloopy mess.
Join the discussion ...