Slip Slidin' Away
Synopsis: Cooler and shorter days leaves less time for the critical final tidying of hives before winter. Remember to remove Apivar strips and check the stores. New winter jobs include wax extraction and (more) honey preparation.
Introduction
Slip Slidin’ Away, the title of a Paul Simon song released 46 years ago this month, is also a phrase that neatly describes this beekeeping season as it disappears in the rearview mirror.
There are still things to do but, day by day, suitable conditions in which to do them are getting rarer. No more nipping down to the apiary in the early evening to “check on a few hives” … instead it’s a case of hoping the autumnal weather is going to be sufficiently benign that you can – if you need to open the hives at all – get in and get out without disturbing the cluster or chilling the bees.
And that’s without taking into account the second named storm (Babet) of the winter which is due to bring 100-200+ mm of rain to my east coast apiaries today. With that much water there will be extensive flooding and roads washed out.
I may not be able to get to the apiaries at all this weekend, let alone open the hives.
The imminent arrival of Storm Babet means I’ve booked another hotel – giving BEAR Scotland a couple of extra days to fix the roads – so I can complete the last few essential pre-winter tasks in the apiary before the weather closes in completely.
These tasks are all associated with the final preparations of the colonies for the winter; removing the Apivar strips now that mite treatment is completed, checking the levels of stores, tidying up the remains after feeding the colonies and strapping down the hives securely for the storms ahead.
I hope I’m not too late {{1}}.
Apivar strips
Many readers use miticides other than Apivar. They use Formic Pro {{2}} or Apiguard or one of several oxalic acid-containing preparations.
Alternatively, they apply some sort of toxic homebrewed concoction of dubious {{3}} efficacy, while constantly looking over their shoulder in case the regional bee inspector turns up unannounced.
But, in late summer/early autumn, I use Apivar. It works well, it is temperature independent and it is present for an extended period – two complete brood cycles – ensuring the protection of the all-important winter bees during their development.
If there’s a late Indian summer and my strong colonies decide to rob collapsing mite-ridden hives in the neighbourhood, the continued presence of Apivar – typically the strips are in the boxes for 8-10 weeks – ensures any mites that hitch a ride back to my apiary meet an untimely end.
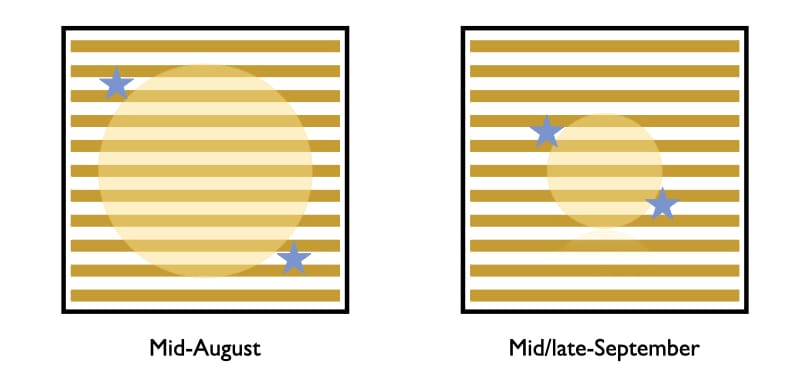
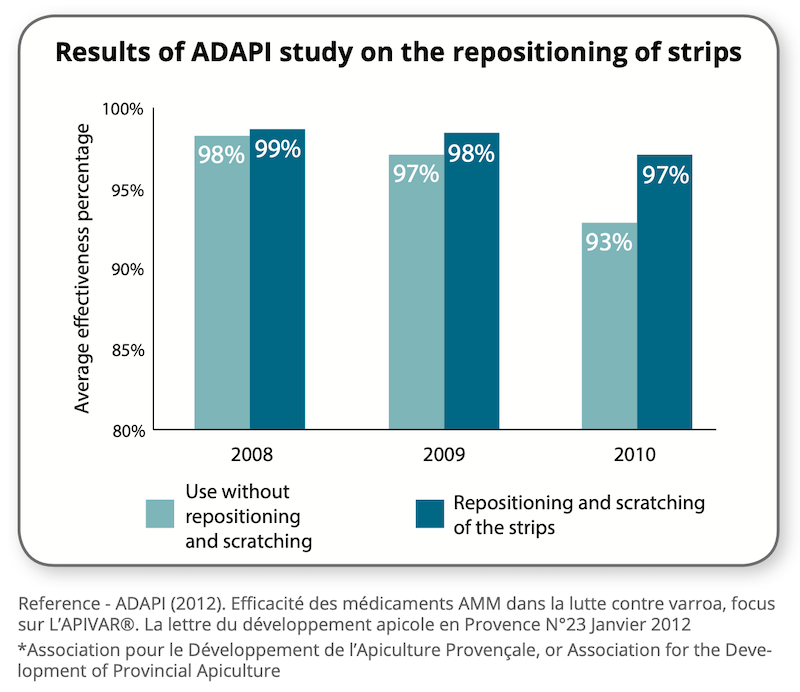
Halfway through the treatment period (a few weeks ago now) the strips were removed, scraped clean of propolis and repositioned adjacent to the edge of the contracting brood nest. This maximises treatment efficacy.
The other thing that helps treatment efficacy is the absence of widespread resistance to amitraz, the active ingredient in Apivar. One near-certain way to encourage the development of resistance is to expose mites to sub-lethal or trace concentrations of amitraz, for example in strips that have been used.
This is why strips must be removed from the hive once the treatment period is complete.
So – whatever the weather – when I finally get to the apiary I’ll be opening the hives and removing the strips.
Gently, gently
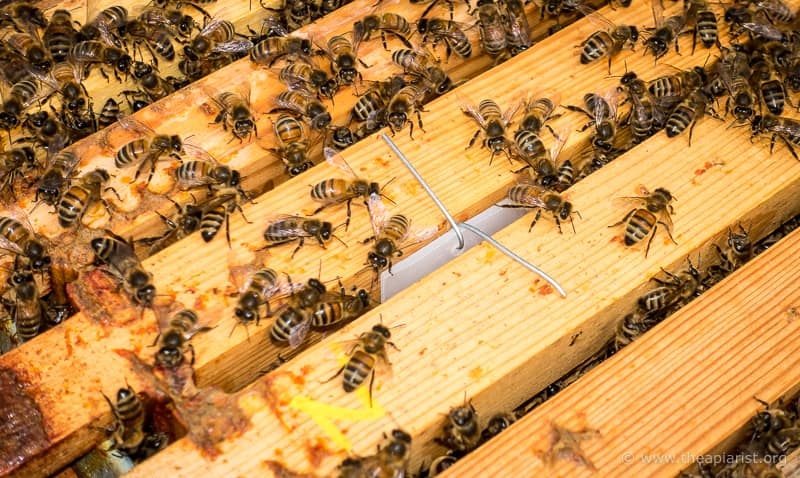
The Apivar strips are suspended in the gap between frames using a cocktail stick … or, if I didn’t have any cocktail sticks, by sticking the tab at the top of the strip into the comb just under the top bar of a frame.
None of the hives have been inspected since mid/late August. As a consequence, all the frames will be firmly propolised in place.
The strips will also now be thoroughly stuck and – assuming I’ve got them positioned correctly – surrounded with tightly packed bees.
Don’t simply grab the top of the strip and wrench upwards. This inevitably rolls bees between the strip and the frame and almost always crushes bees, leaving a little vertical trail of death and destruction.
Bees dislike being rolled and really dislike being crushed.
It’s far less disturbing to the colony to prise the frames 5-10 mm apart at the lugs closest to the strip that needs to be removed, carefully ‘waggle’ the strip free of any entombing propolis and gently withdraw it … without rolling, squashing or killing any bees.
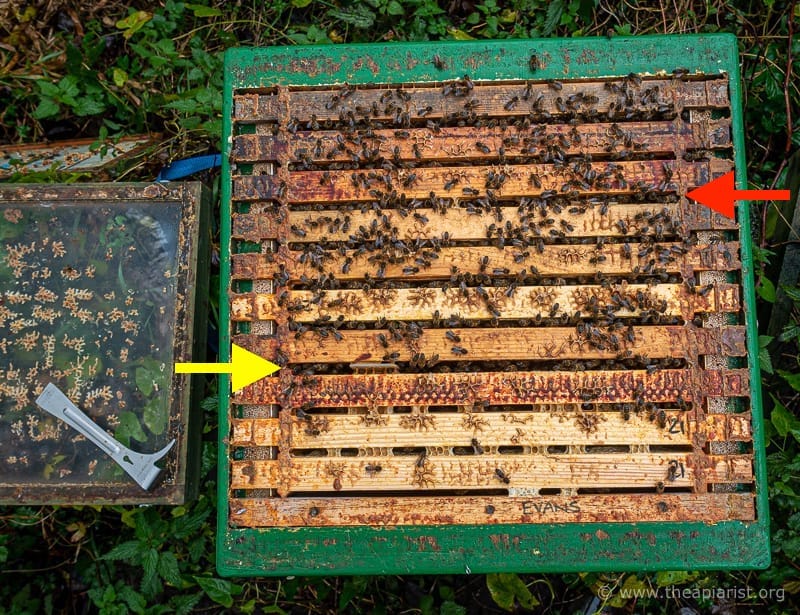
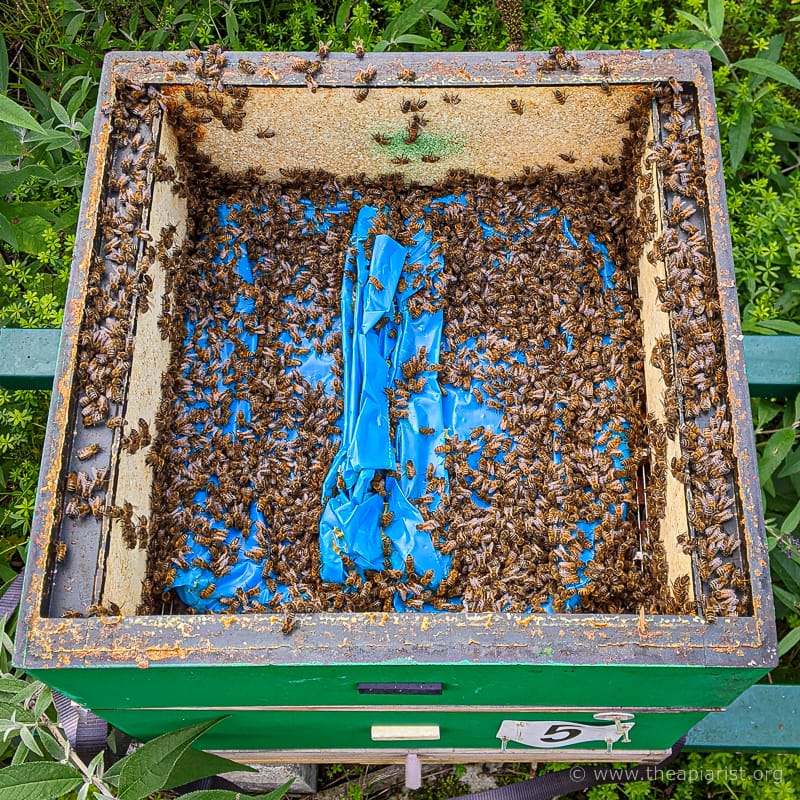
You don’t need to remove any frames. In the photo above simply remove the dummy board {{4}} and prise the frame lugs apart on one side of the hive only.
Start with the Apivar strip closest to the yellow arrow. Prise the lugs apart, remove the strip and gently push the frames together again. Then do the Apivar strip by the red arrow. Done in that order there’s less resistance when moving propolised frames.
This takes a matter of moments … far better than finding the strips again in April!
It’s a wrap
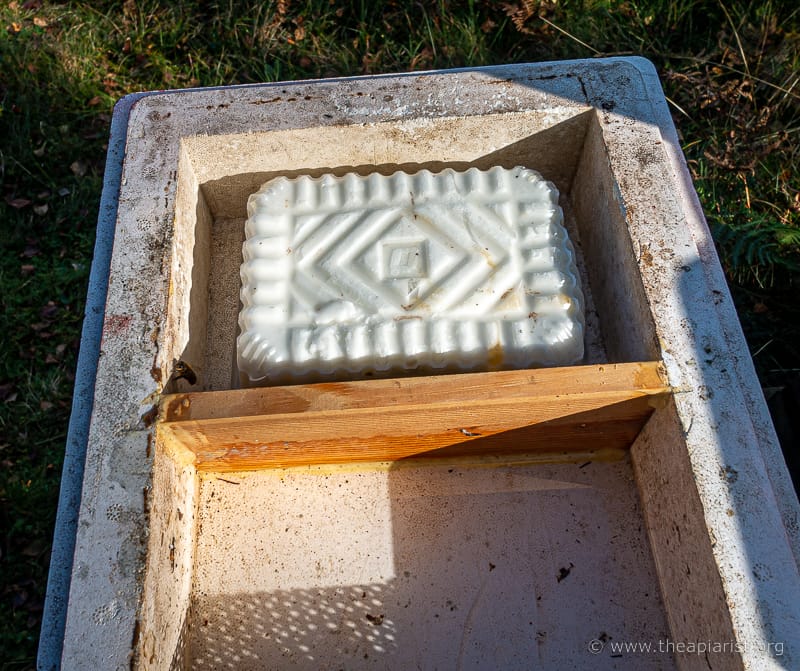
I feed only fondant in the autumn. Typically a single brood colony will get one 12.5 kg block of fondant, split down the middle, opened like a book and laid fondant-face down – still wrapped – on a queen excluder over the top bars of the frames. An empty super is used to provide ‘headspace’ to accommodate the fondant block.
Framed wire queen excluders – with a beespace underneath the rim – are to be preferred for this {{5}} rather than the el cheapo plastic or zinc sheets that lie flush on the top bars.
With a framed excluder you can easily prise it up should you need to access the brood box … for example, to reposition the Apivar strips.
A month or so after adding the fondant it will be finished – sometimes sooner – but usually after the Apivar strips need to be scraped and repositioned.
Before the colony is closed up for the winter the super, fondant wrapping and queen excluder need to be removed. I want my colonies to have no deadspace over them into which valuable warmth can escape.
Colonies are strong and you’re likely to find hundreds of bees over the empty wrapper. Don’t just smoke them hard and try and get them to move down. Instead, without removing the super, gently pull up the plastic from the centre – it will be propolised down – causing the bees to lose their grip and fall off. Essentially you’re using the super as a ‘funnel’. Shake the plastic over the funnel, and then give them a puff or two of smoke.
Wait … the bees should move down and you can then remove the super and queen excluder.
All done. Add the crownboard, insulation and roof.
Au revoir.
Outdoor tasks
By mid/late October here in Scotland the bees, if they’re flying at all, only do so for an hour or three around midday. Early mornings and late afternoons are too cold. However, it’s not so cold that it’s unpleasant to be outside, so this is a good time of the year to fire up the steam wax extractor.
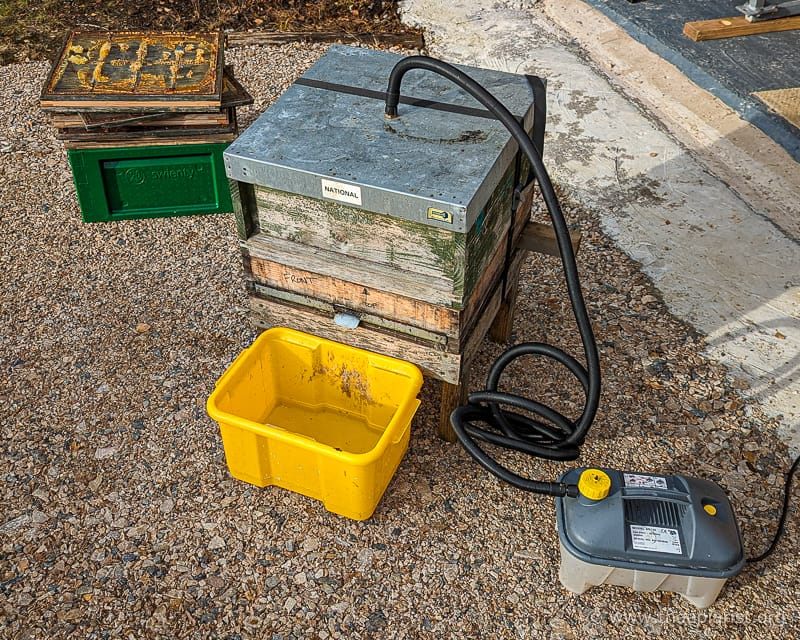
I built one of these several years ago but eventually replaced it with a Thorne’s Easi-Steam {{6}} which is a little more efficient as it haemorrhages less steam, and so works a bit faster.
In addition to the absence of flying bees, the autumn is also a good time to extract any wax from old frames before the damned wax moths get to them.
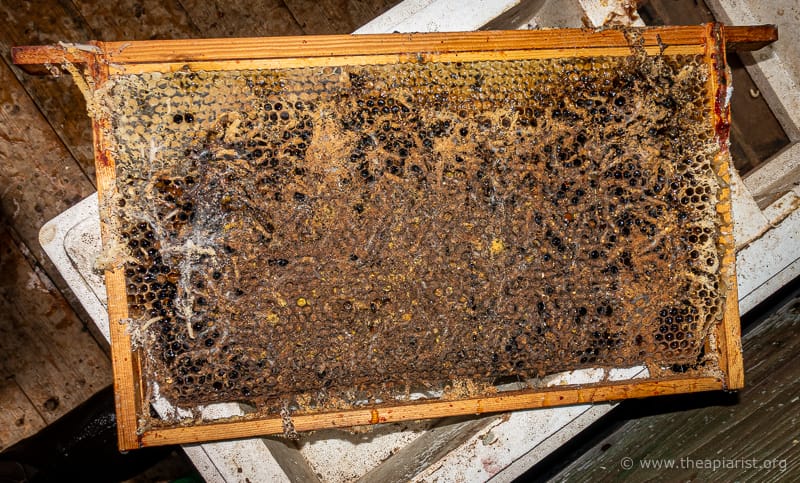
You don’t get much wax from old, dark brood frames, but you do get some. It probably won’t be good enough to make candles from, but you can use it to make excellent firelighters or trade it in for new foundation.
Queen excluders used when feeding fondant are almost always heavily propolised and/or have lots of brace comb added above them.
You can laboriously scrape this off {{7}} or you can just stack them in the steam wax extractor, strap everything up tight and power up the steam generator.
Which – because I’m lazy – is exactly what I do.
It’s then simply a case of scraping the wooden frame free of warm propolis, letting them cool and dry, and then subsequently flame sterilising them before the new season starts.
Nuc feeders
I’ve got a whole winter of DIY ahead of me, but there are a few projects that need to be completed before the winter as they are needed during the winter.
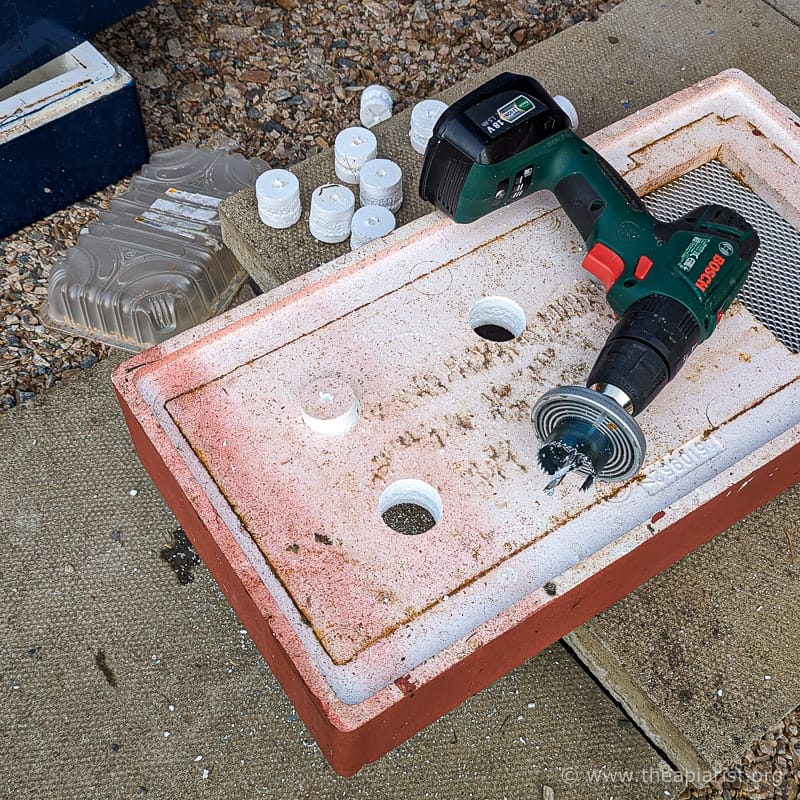
The easiest (and therefore the first to be completed {{8}} ) was butchering modifying some more nucleus feeders for fondant this winter.
I’m overwintering more nucs this year than usual. Most are in Thorne’s Everynuc poly nucleus hives. Although these have an integral feeder at one end of the brood box it can be some distance away from tightly clustered bees.
I’ve therefore modified the top poly feeder – designed for feeding syrup – by boring a few 3 cm holes through it. I can then add a 1-3 kg block of fondant directly over the clustered bees should I need to. I’ve never used these feeders for syrup but have successfully used this modification on feeders in previous winters.
I don’t think I have enough feeders for nucs, so I’ll only use them on those that feel light. The remainder will receive fondant top-ups in the integral feeder if needed.
Honey
My honey sales usually ramp up in the autumn as the outlets I sell in get more customers wanting coffee, cakes and a convivial atmosphere rather than the howling winds and driving rain on offer outside.
I’m therefore very busy preparing, jarring and labelling honey.
I didn’t have (or couldn’t find) a suitable fine grain, seed honey for making soft set honey {{9}}.
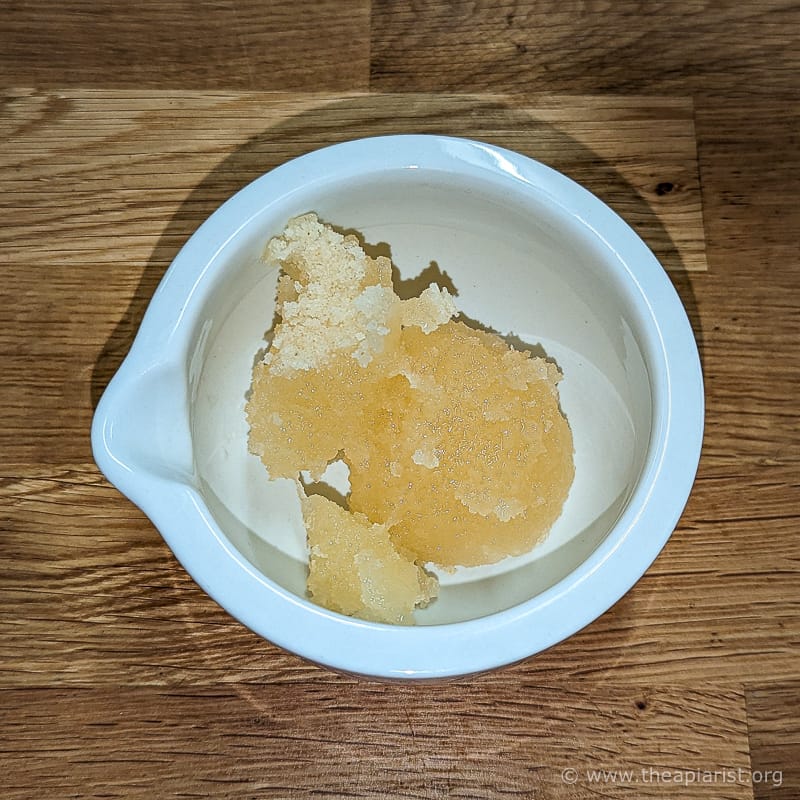
I’ve discussed this method of preparing honey previously. Essentially you melt some coarsely crystallised – typically oil seed rape or other fast- and hard-crystallising, high glucose, honey – and then add a ‘seed’ honey with a fine crystal structure. The cooling honey re-crystallises around the fine crystals present in the seed, to produce a wonderful smooth ‘melt on the tongue’, spoonable and spreadable soft set honey.
There’s more to it than that (of course) and it’s a process that takes time and reasonably careful temperature control. Because the re-crystallisation optimally occurs at 14°C {{10}} it’s much easier to make soft set honey in the autumn and winter.
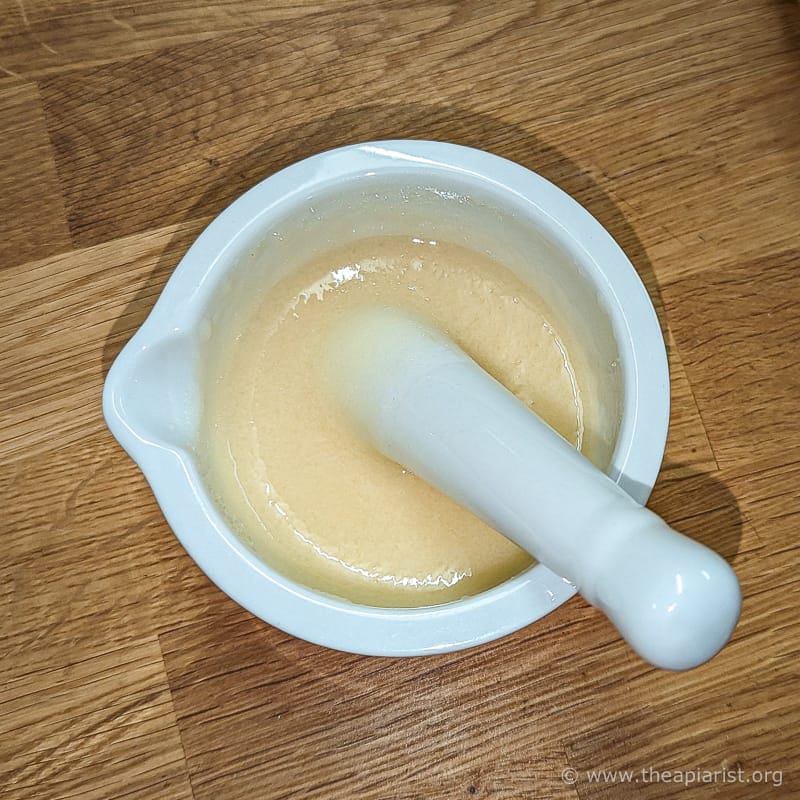
Although you can just buy a jar from the supermarket, it’s easy to prepare your own fine-grained seed honey. You need a coarse grained honey, a pestle and mortar and some elbow grease {{11}}.
Simply grind the honey, a spoonful at a time, until it is super-smooth. You’ll need about 10% (by weight) of the total you want to prepare. Much less and re-crystallisation takes much longer.
Hang on, what happened to the Rapido honey creamer?
About 18 months ago I described the production of ‘creamed’ honey using a fast-rotating stainless steel ‘paddle’ or creamer {{12}}. This is not soft-set honey, but this process should produce a similarly fine-grained ‘melt on the tongue’, spoonable and spreadable honey.
Should and usually does.
But sometimes the honey partially separates; you end up with a bucket containing predominantly fine-grained honey together with some much coarser honey crystals which sink to the bottom of the bucket … or jar.
I’ve had one or two batches that – although nicely flavoured – were disappointing because they had a poor texture or appearance.
At least that was my opinion. I never had any complaints from customers and I continue to get repeat orders, but it was a bit vexing. After processing, most buckets would be perfect, super-smooth and evenly textured. But occasionally I’d get a dud I was far from happy with.
My guess was that the honey that processed poorly was a mixture of two significantly different nectars, with different sucrose/glucose content and therefore crystal structures. I’ve been keeping notes on what works and what doesn’t (remembering that I have no way to determine the sucrose/glucose or nectar content) and will report back after further testing.
If anyone has experienced the same situation (and has solved it) I’d be interested to know.
Heather
I’ve still got a stack of supers containing heather honey to extract. It was a surprisingly good season considering how poor the area is and the amount of rain we had in the weeks before and during the heather flowering.
The heather is a bonus after an otherwise poor summer. The heather honey will be great to either sell ‘pure’ or to use for the production of heather blends, often preferred by customers who like the flavour but not the strength of pure heather honey.
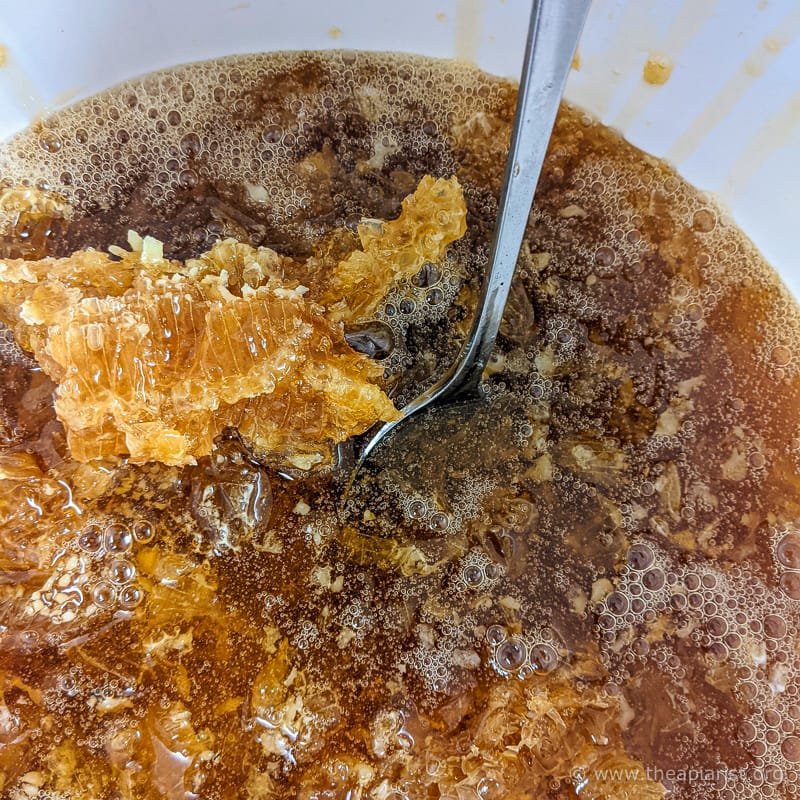
Having covered every flat surface – horizontal and vertical – in wax and honey last year while extracting just 15 kg from a couple of supers using the crush and strain method I’m going to do something different this year.
Life is simply too short to spend several months elbow-deep in a honey and wax slurry.
More information when I have, a) started, b) succeeded, and c) cleaned up afterwards.
Next June … perhaps.
In the meantime, Mull appears to be on fire …
{{1}}: I’m not, the hives are always strapped down.
{{2}}: If they can find any to buy … good luck with that!
{{3}}: And, almost certainly, untested.
{{4}}: At the bottom of the photo. Often you don’t even need to remove this, but the one in the hive above has an oversized top bar.
{{5}}: Other than the £17 more they cost!
{{6}}: What’s wrong with Easy-Steam?
{{7}}: And the beekeeping suppliers will be happy to sell you yet another essential tool to do this with.
{{8}}: I can achieve near-professional levels of procrastination at times … if I don’t get distracted first.
{{9}}: I’d foolishly jarred the last lot to complete a big order, forgetting I’d have to start from scratch next time. D’oh!
{{10}}: See the comment from Jeremy below and reference to a paper on optimal conditions for crystallisation.
{{11}}: Don’t use this type of elbow grease.
{{12}}: Thorne’s now appear to list this as a ‘honey churner’, though it’s out of stock at the moment. Unhelpfully, their linked instructions for use are for a different process altogether!


Join the discussion ...