Steam wax extractor
You can easily extract wax for recycling from old brood frames, cappings or offcuts of brace comb collected during the season. On a hot sunny day a solar wax extractor works well, but needs regular turning to the sun for maximum efficiency. These are also the days on which bees will be flying and the inevitable smell of hot wax and residual honey can be a bit of a bee-magnet. I prefer to do my wax extracting in the autumn or winter, using a steam wax extractor which also sterilizes frames ready for the next season. Thorne’s sell one of these (Easi-Steam), consisting of a modified roof and floor to add to an existing brood box. These are nicely made but not inexpensive, and it is relatively straightforward to build your own.
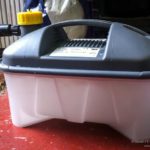
Steam is generated using a wallpaper stripper. The make is unimportant but ensure it has a reasonably sized reservoir and so generates steam for a long time. I bought an Earlex SS125UKP which has a 4 litre tank and runs for a little over an hour (~£20). It takes about 30 minutes to extract 11 brood frames and quite a bit of brace comb which, with a 2kW element, makes it economical to run. You only need the tank and hose from the wallpaper stripper so might even be able to pick up one with a missing “business end” from a car boot sale. If you are going to buy one ensure it has an auto-cutoff should the tank run dry – this allows you to run the steam extractor unattended.
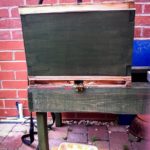
The design is straightforward. You need a solid floor, lined to prevent wax sticking to it, some sort of mesh screen to prevent too much contamination of the melted wax with propolis, cocoons or lumps of pollen, a brood box and a tightly fitting lid through which the steam is piped. I just use a sheet of ply for the lid, held on securely using ratchet straps.
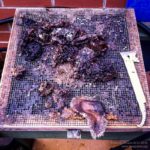
It’s worth using thick ply for the floor and lid to minimize warping from the repeated exposure to steam. I used 12mm ply, but thicker would have been better. I added a lip of 22mm softwood around the lid to provide some rigidity. Using the same sized stripwood I added a lip around three sides of the floor, together with two angled pieces that effectively form a “spout” through which the melted wax will pour. I lined the floor with a suitably shaped piece of metal from the side of an old washing machine, bending the edges up to provide a wax-tight (more or less) base. Take care cutting sheet metal – use thick gardening gloves to protect your hands. I originally used an old travel screen to prevent too much rubbish contaminating the wax. However, it quickly gets clogged and this year I’m going to use some galvanized flooring mesh (see photo).
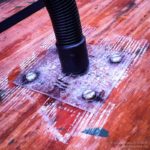
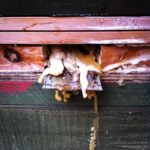
The last thing to arrange is to secure the steam hose to the lid. The best way to do this would be to fix a threaded tube to the lid. However, I’m still searching for something that fits properly. In the meantime I created two Perspex “clamps” through which the hose end fits, with the Perspex bolted through the lid to hold everything in place (see the photos as it’s easier to illustrate than describe).
To use the steamer place the floor on a hive stand, add the mesh and a brood box (either dedicated for the purpose or one that would benefit from being steam sterilised – I use a plywood bait hive that’s a bit deeper than a normal brood box, allowing me to add frames and some brace comb scraps). To extract from frames simply fit them into the brood box, squeezing a dozen in if you can – there’s space above and below for the steam to circulate well. If you’re extracting from offcuts of brace comb, grafted queen cells and all the other bits scraped up and collected during the season, simply spread these across the mesh. Fit the lid in place and clamp the entire thing together with some ratchet straps. Finally, add a block of wood under the back of the box to tip it up and encourage melted wax to pour out of the spout. Place a container with an inch or so of water under the spout and turn on the steamer.
It takes 10-15 minutes to get to temperature. During this period honey and condensation may run out of the spout. Once a higher temperature is reached the wax pours out. Once the wax has reduced to a trickle you can turn it off, let the entire box cool to avoid scalding (the inside of the box will reach 105oC) and only then open it up. With brood frames you’ll be left with black, papery thin cocoons, bits of wire and softened propolis. All of this is easy to discard (though a bit messy) and, after a quick scrape with a hive tool, the frames are ready to be reused.
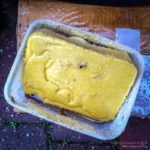
The wax generated is not particularly clean and will need further filtering. If there was residual honey in the frames you will also need to wash this away. Thorne’s reckon that wax recovery with steam is about 95% efficient. It probably doesn’t need adding … run the extractor out of doors! Not only does it generate a lot of steam, but it tends to irregularly drip from various unsealed (i.e. poor quality) joints and can pong a bit. Actually, it can be pretty rank. Don’t use it when bees are flying or you’ll be inundated.
After quite a bit of use I’d noticed that the flush joints between the floor/mesh, the brood box and the lid provided opportunities for the steam to escape, so lowering the temperature and making the extraction less efficient. To avoid this I added strips of rubberized self-adhesive draft excluder to the upper surface of the floor edge lip and the lower surface of the lid edge lip. This is not really suited to high temperatures, but appears to do the trick.
As an aside, a slow-cooker provides a great way to melt wax. These can be picked up very cheaply from car boot sales or for nothing from freecycle.org.
Remember “Measure twice, cut once, swear often”.
Join the discussion ...