Kewl floors
Floors can be as simple as a sheet of ply with three lengths of softwood to raise the brood box up slightly. However, open mesh floors are increasingly preferred, providing good air circulation and easy Varroa monitoring. Inevitably the design of the floor also influences the entrance to the hive. Dartington-type hives incorporate an underfloor entrance that offers several advantages. They negate the need for mouse guards in the winter and provide additional protection against wasp attack. I’ve used this type of entrance on floors of National hives for a few years having read a description of them online by Graham White of Edinburgh beekeepers. The style I now use is slightly improved (or at least altered) and is inexpensive and easy to construct.
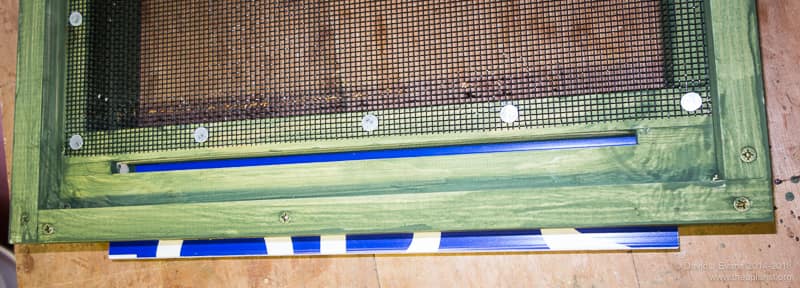
Kewl floor
Note … I’ve recently discovered that these floors and entrances have been referred to as Kewl, for reasons that are not entirely clear, in posts on the BKF by Hombre and others. This is certainly less of a mouthful than ‘Dartington-inspired’.
The key feature is the L shaped entrance. Bees land or enter via a narrow, horizontal aperture, walk to the back wall of the entrance and then climb vertically to enter the hive somewhere in the region of the second or third frame (warm way). The vertical part of the entrance is no more than 8-9mm wide. My preferred floors also have the horizontal aperture only 8-9mm high. I also like landing boards despite the fact they make hives more difficult to transport. I’m slowly converting the landing boards on these Kewl floors to Correx … they are easy to replace, totally weatherproof and come in a range of colours.
No mouse guard is needed because a mouse cannot squeeze through the tight angle in the L-shaped entrance. In addition, bees are able to defend the entrance against wasps both at the external opening and at the point at which the entrance joins the brood box. However, if wasps are really troublesome, you might still need to reduce the entrance to a single bee space and this is easily achieved by simply blocking most of the external aperture with a piece of 8-9mm softwood.
Construction
Construction is simple. Two side rails of pressure-treated wood, cross pieces from readily-available softwood, some scraps from the offcuts box, a piece of Correx and a suitably sized piece of mesh. The following list of parts is for a National hive (planed softwood unless specified) :-
- 2 x 46cm long 38mm x 63mm pressure-treated decking wood (B+Q)
- 2 x 46cm long 46mm x 21mm
- 1 x 46cm long 21mm x 21mm
- ~1m of 21mm x 9mm
- ~2m of 21mm x 21mm
- Correx sheet 10cm x 45cm
- A few 40mm x 4mm screws, four 50mm x 4mm screws, a few gimp (frame) pins, exterior wood glue, a bee friendly preservative, a drill and bits, tenon saw, small hammer, knife, screwdriver, Elastoplast (just in case)
Remember, with woodworking for beekeeping, propolis is your friend. Build flat and square and the bees will fill in any imperfections in the joints!
- Square template
- Side, front and back rails
- Top front view
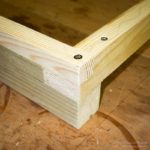
- Corner
- Another corner
- And another
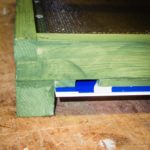
- Entrance detail
- Rear corner
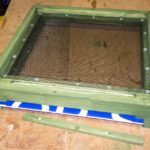
- Kewl floor …
- Entrance reducer …
- Top view of entrance
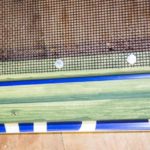
- Correx landing board
- Join one piece of 46mm x 21mm and one of 21mm x 21mm (both 46cm long) with two short pieces of 21mm x 9mm, each 60mm long. Glue and screw as appropriate. This forms the vertical part of the entrance (shown second from the right in Fig. 1).
- The pressure treated decking wood forms the side rails of the floor. This is the only part of the floor in contact with the hive stand/floor. Cut a 76mm x 21mm section from one end of each piece and a 46mm x 21mm section from the other end. These respectively form the front and rear attachment points for the cross pieces and are also shown in Fig. 1.
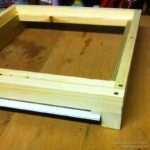
- Using a flat, square and true template (such as a 46cm square piece of ply; Fig. 2) glue and screw the cross pieces to the side rails. Clamp everything down and leave it all to dry.
- Turn the floor upside-down. Add 21mm x 9mm spacers to the underside of the entrance cross piece (see Fig. 3) using gimp pins only. The landing board will be attached to these spacers in due course. Only fix them in place with gimp pins so you can replace them should the wood rot … they are exposed to water if rain is driven in through the entrance.
- While the floor is inverted add two short (16mm) screws equally spaced as ‘stops’ to prevent an entrance block being pushed back too far.
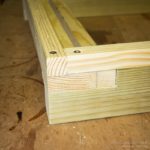
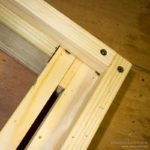
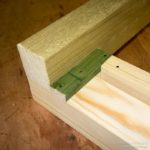
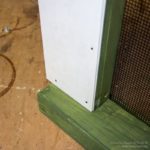
- Turn the floor the right way up again and add a strip of 21mm x 21mm all around the edge, glued and screwed down (see Figs. 4-8). The brood box will stand on these. The easiest way to do this is to cut them a few millimetres too long (say 45cm or so) then cut them down to length after fixing them in place (I never suggested this was going to be ‘proper’ woodwork!).
- Give the entire thing a couple of coats of bee-safe preservative such as Ronseal Fence Life (Fig. 9). Once it has dried cut the Correx landing board to size and fix it in place using gimp pins (Fig. 10 & 11). I usually have the landing board can protrude from the front by a couple of centimetres. However, if you move your hives a lot it can get in the way (and prevents them being packed together in the trailer) and so can be simply flush with the front of the floor. If it does get damaged it can easily be replaced.
- Cut a piece of mesh to fit and fit it in place with roofing nails. Remember to leave the upper entrance to the L-shaped entrance slot clear!
You can create an entrance block from an offcut of 21mm x 9mm softwood, about 1cm narrower than the width of the entrance slot. When in place this provides a narrow entrance on one or other side of the hive front (Fig. 12). To allow the use of a Varroa monitoring board add horizontal runners on either side of the side rails. Make the board out of Correx.
When you first switch over to this type of floor bees may cluster under the entrance, particularly if they’ve been used to landing on the hive stand and then walking up … help them by packing the space under the landing board with grass for a few days (or use this quick fix). They soon learn.
Check the entrance remains clear in the winter …
The only problem I’ve encountered using this type of floor is that, rarely, the entrance gets blocked with corpses during a long, cold winter. The best way to prevent this is to periodically clear the entrance using a bent piece of wire – a cut down coat hanger is ideal. If you do this on your fortnightly checks things should be fine.
A version of this article first appeared in Dr. Bodgit’s DIY column in Bee Talk, the monthly newsletter from Warwick and Leamington Beekeepers.
Join the discussion ...