More poly nucs
No space for a divider 8-(
The poly nuc marketed by Paynes can be usefully converted into an eight frame box by getting rid of the internal (infernal) feeder as previously discussed. I’d hoped to divide these into two, adding a second entrance, to use for queen mating. Two or three frame nucs take more bees but need less maintenance than mini-nucs. However, the eight frame box is fractionally too narrow to split down the middle to create two four frame nucs, even using a thin sheet of Correx. The central entrance – at least in the original versions of these boxes – is also poorly designed and would have needed modification.
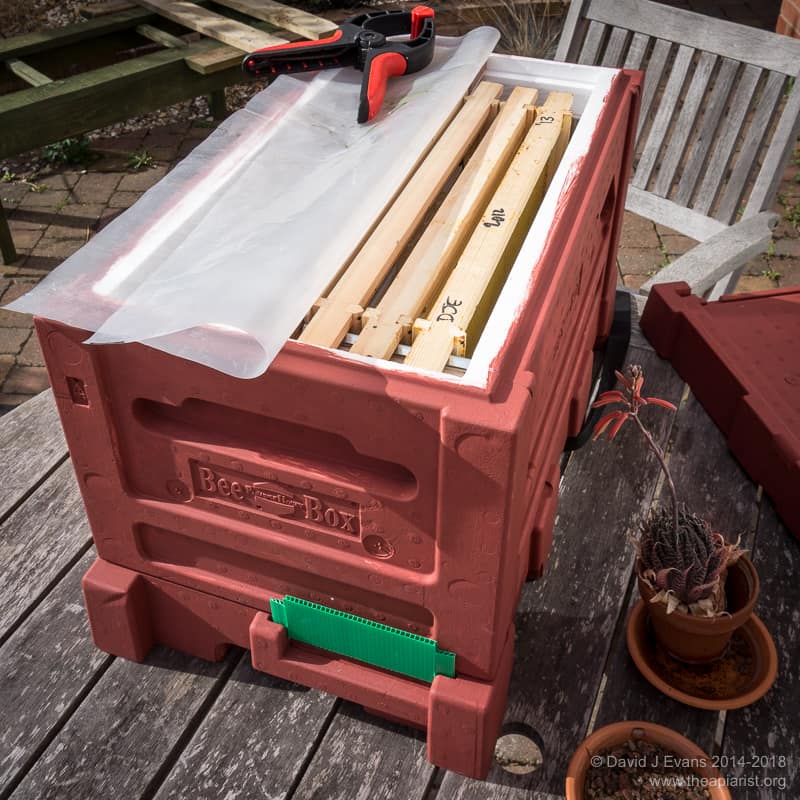
The final product
Until 2014 there were no generally available National poly nucs other than the Paynes offering (this is in the UK; Thorne’s have recently introduced one). I therefore purchased some Langstroth poly nucs from ModernBeekeeping in the sales. These are very high quality poly nucs. They are the Paradise Honey Bee Box’s, made out of very dense poly, with a separate removable open mesh floor. They also have a good thick roof – far superior to the Paynes box. They have the additional advantage of being designed to be divided, with lugs in the end panels, a shallow slot in the floor and twin entrances at opposite ends. The only drawback to these boxes is the sculptured exterior which makes painting them tiresome. I used 2-3 coats of thinned masonry paint.
Internal fittings
I wanted to retain the option to use these as standard 6-7 frame nucs in the future, so designed a removable divider that (non-destructively) created two x three frame nucs. Being Langstroth’s, they’re significantly bigger than a National box. However, with a little ingenuity, this extra space can be used to create an internal feeding compartment for fondant or sugar. In the first boxes I converted I blocked the top of the feed compartment with a removable scrap of perspex and drilled through the end panel. I’m going to try some this year without the perspex … simply allowing the bees to clamber over the end panel to access the fondant.
Perspex cover
I used these boxes for queen mating late in the season in 2013. I divided a colony – with the addition of a few frames of stores – to create five three frame nucleus colonies, four of which were queenless and housed in these three frame poly nucs. The queen from the donor hive went into a dummied down standard nuc with a frame of stores and brood. I moved the poly nucs to a separate apiary, added a sealed queen cell and got them all successfully mated. These small colonies were appreciably stronger than a mini-nuc and were better able to defend themselves against wasps (Kieler mini-nucs in the same apiary were robbed out by wasps). The bees did well in these boxes, soon built up and were moved on to larger colonies. Since it’s possible to overwinter colonies in Kielers, I see no reason why a strong three frame nuc – or rather two of them – wouldn’t be OK in anything but the harshest winter in one of these modified hives.
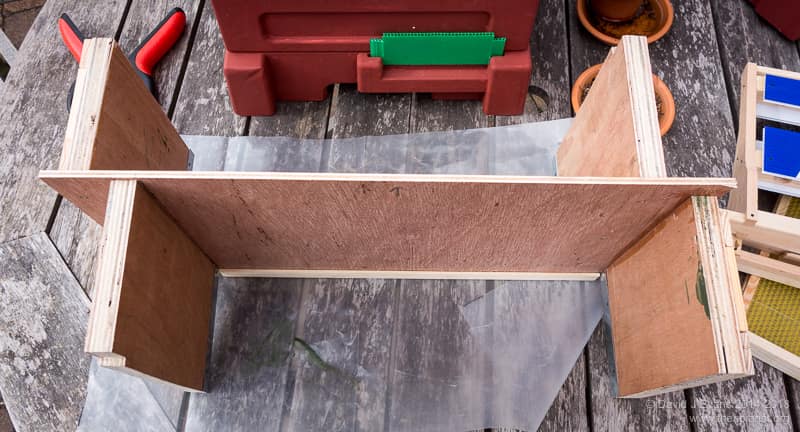
Construction
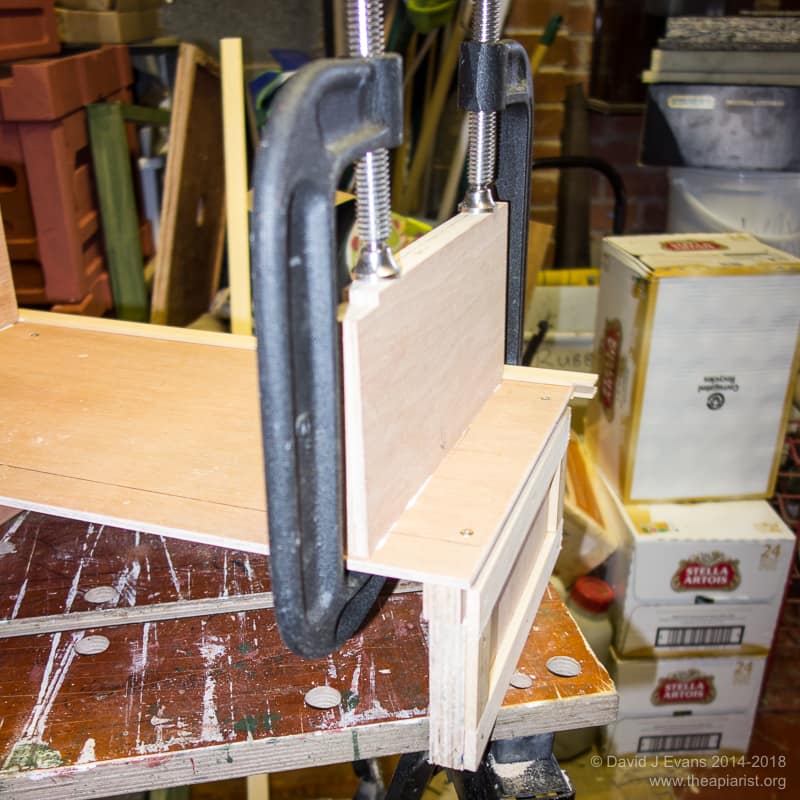
Glued and screwed
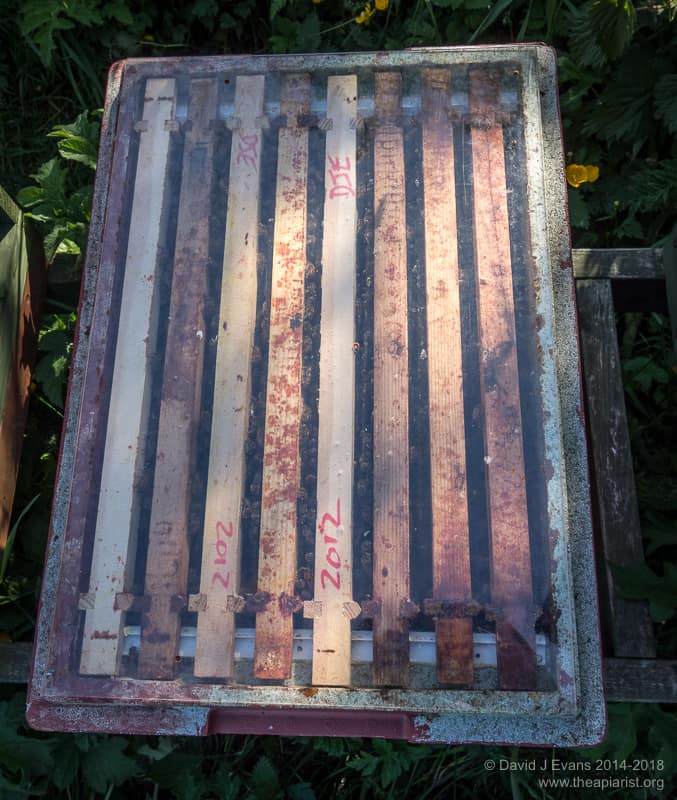
Construction is relatively simple, requiring little more than a sheet of 6mm ply, some offcuts from the scraps box, some softwood, a couple of G clamps, wood glue, screws and – inevitably – Elastoplast. I used the central divider as a sort of spine, to which I attached 15mm ply end panels, spaced the correct distance apart to fit a National frame. The easiest way to do this is to add some 8mm – beespace – softwood to the sidebars of a brood frame and then just mark where to attach the end panels to the divider. The four end panels need to be glued and screwed in place, using a set square to ensure they are perpendicular to the divider, and clamped until secure. It is easiest to make all the modifications (below) to these end panels before fitting them in place. The top edge of the divider is widened by the addition of two thin strips of softwood (3mm x 15mm) which extend to create the lugs that separate the original frame rests of the box.
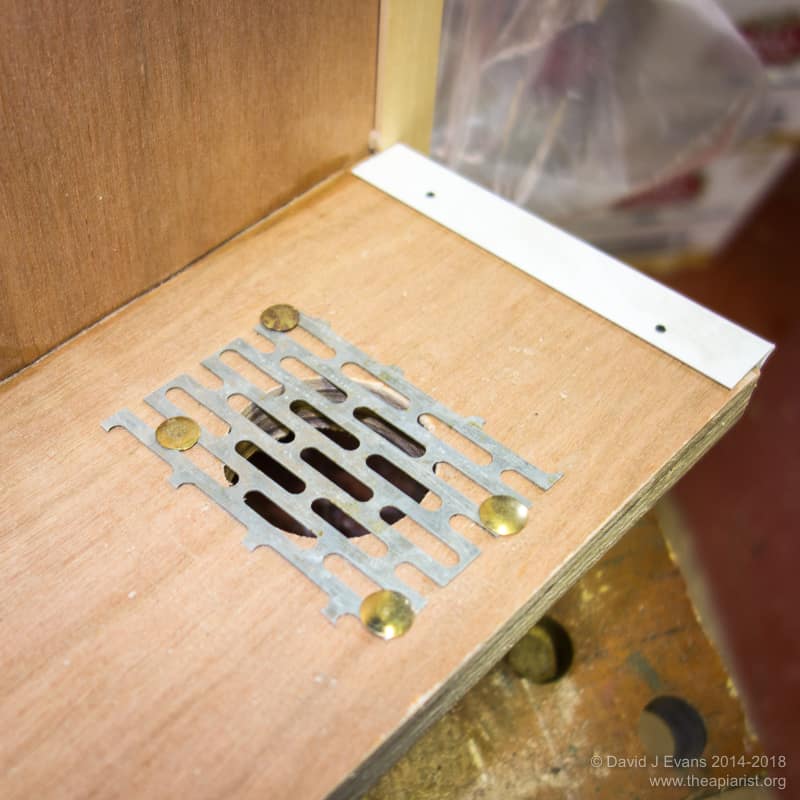
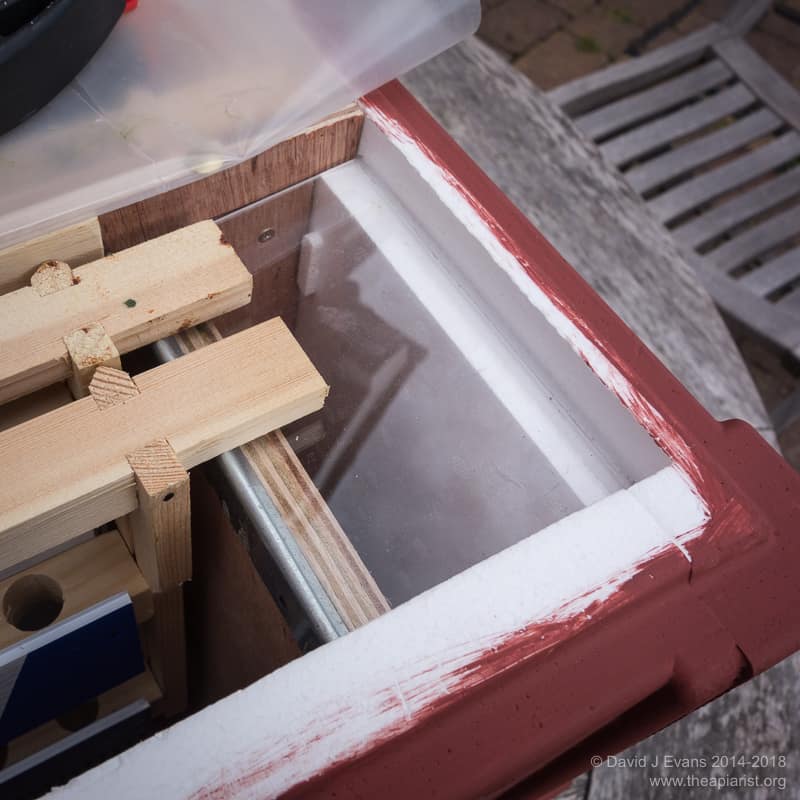
Access to feeder
The ‘entrance’ end panel must be clear of the floor, the other one must reach all the way to the floor. The entrance end panel also needs 6mm softwood spacers on the back to protect the small poly lugs that hold the central divider in place. The other one can have a hole drilled through it and covered with a scrap of queen excluder (though see additional comments above as to whether this is necessary – work in progress). Both end panels will need frame rests on the upper edge – those horrible plastic ones provided with Thorne’s second quality supers are just fine. The original boxes are top bee space and this is the way I’ve arranged mine.
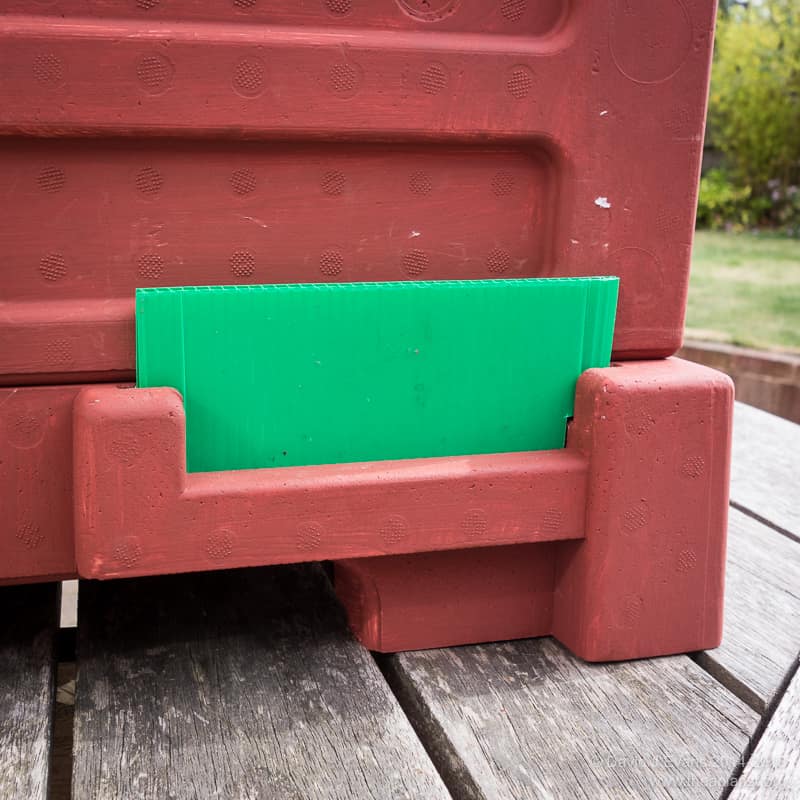
Correx entrance block
Running two colonies side by side is straightforward, but you need to ensure that each side is bee tight and that you can work with one colony without disturbing the other too much. I use a thick plastic crown board, fitted to the central divider with drawing pins. The bees can’t propolise this stuff down too easily, I can see enough through it to see colony expansion and it’s easy to peel back and hold down with you hive tool when you need access. Once it gets too mucky it can easily and cheaply be replaced. Don’t purchase the entrance reducers from ModernBeekeeping (as they’re a daft price) … use Correx offcuts instead, with different colours to help the bees orientate back to the colony.
Join the discussion ...