Paynes poly nuc boxes
Paynes make a reasonably robust 6 frame polystyrene nucleus box complete with an integral feeder for syrup. Having used these for a couple of seasons I’ve ended up modifying them to better suit my beekeeping. The resulting box now has eight frames, runners, a clear crown board and much improved roof insulation.

Space for 8 frames … just
Before providing the grisly details I should add that my Paynes poly nuc boxes are first generation models. The current ones have a different type of entrance.
Welcome!
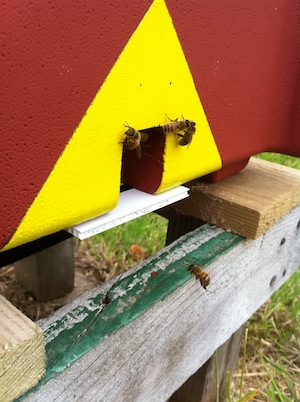
Landing board
The entrance is the first thing for modification. I use gimp pins to add a small Correx landing board. This encourages the bees to climb back into the hive, rather than accumulate under the mesh floor. It’s a daft design on the original, but easy to rectify. As an aside, when transporting the nucs I stuff the entrance with a single block of dense foam, cut slightly oversize. With this wedged in place all is secure. When painting the nucs I add some colour to the entrance in the hope it provides a pattern that is easy to recognise.
Frame runners and bee space
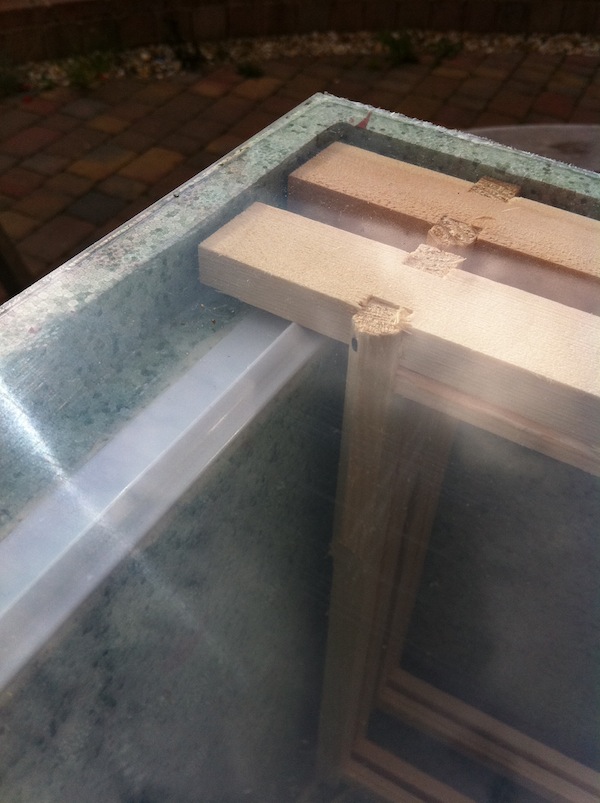
Runners
I install frame runners to make moving frames around easier. If you don’t do this you will need to thoroughly varnish the ‘lug rest’ or the bees will propolise everything together. Gorilla glue seems to work fine when gluing metal or plastic runners to the polystyrene. Adding frame runners makes the nucs bottom bee space … or at least removes the top bee space they started with.
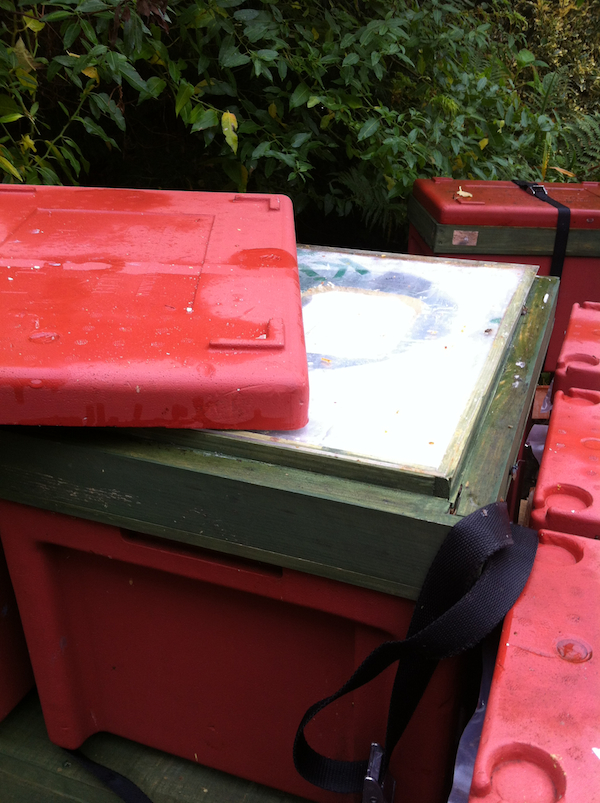
Crown boards
Crown boards will be needed, if only to stop the bees propilising the roof down (and it’s so flimsy I’d worry about it breaking when trying to lever it off). The cheapest and easiest solution is to use a sheet of thick clear polythene. Cut it exactly to size or the roof won’t ‘sit’ down properly. This works well – just lift the corner and give them a gentle puff of smoke when inspecting them, then peel slowly back. Alternatively, I’ve used 2mm Perspex sheet (just about visible in the photo above). Since this has some rigidity it can be gently slid back over the top of the frames and the bees will be pushed down or away.
That hopeless internal feeder
All the changes above convert the poly nuc from being OK to actually useful. However the weak part of the design is the inbuilt feeder.
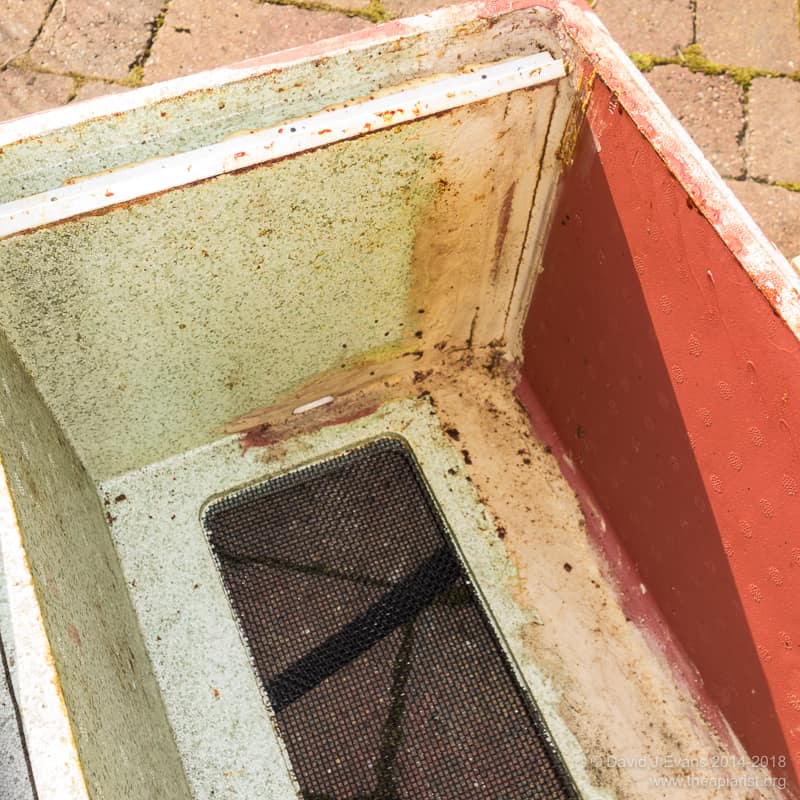
Look … no feeder!
It’s rubbish. It needs thorough painting before use or the syrup soaks in and goes mouldy, it’s far too narrow and it can’t be emptied without tipping everything upside down. It ended up being a fermenting grave for bees. At first I simply used duct tape to seal it off (remembering the entrance over the wall needs sealing as well) but then read posts by Adam on the SBAi and BBKA sites about converting the nuc into an 8 frame box. Using care and a considerable amount of brute force, a bread knife, a Stanley knife and a small saw it’s possible to remove the wall of the feeder completely. You’ll discover that the (inevitable) blood cleans off the poly relatively easily. By butchering the removed poly you can then rebuild the ‘lug rest’ region, sticking everything in place with one of those space-filling glues (I’ve used Mega Grip). Sand everything level and replace the frame runners.
Remember it doesn’t have to be pretty … just functional. I smeared the inside joins with wood filler to try and exclude any crevices that could harbour pathogens and to discourage the bees from nibbling the exposed, rough, polystyrene.
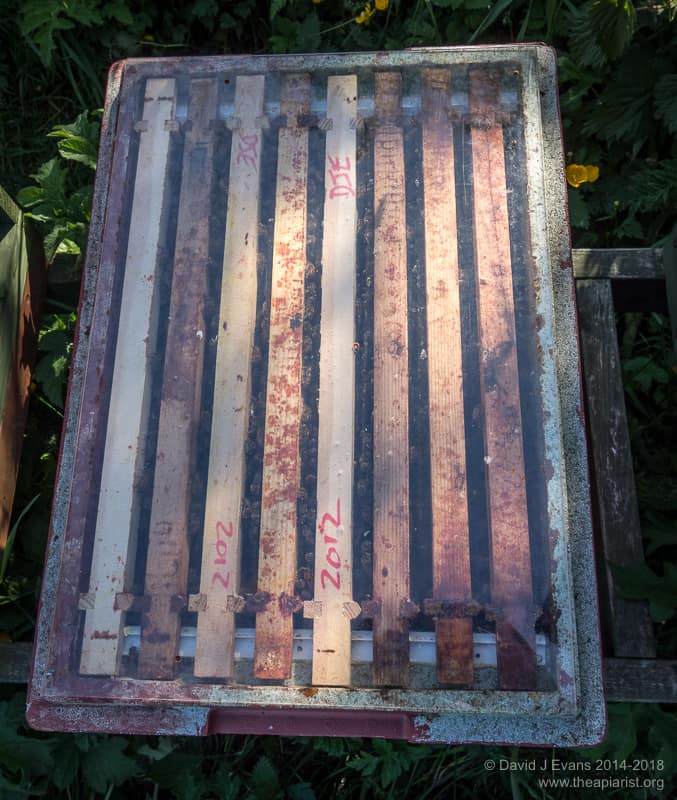
Packed 8 frame nuc
The end product is a very serviceable 8 frame poly nuc box. Much improved over the original design. You can use a standard frame feeder for syrup if needed, or bodge together an eke to both improve the roof and allow fondant to be fed.
Being lightweight and of reasonable capacity these make ideal swarm collection boxes. They can easily be held one-handed while balancing precariously on top of a ladder … at least when empty! I usually shake the swarm into the empty box, gently add eight frames with foundation, pop the lid on and either put them on the ground on a sheet or securely balance them somewhere suitable to allow the stragglers to arrive, then seal them up with a foam block and move them.
Improving the roof and insulation
Eke and fondant
The roof is a weak point in the design, being much too thin to provide really useful insulation. Using a little ingenuity, some strip wood and a block of Kingspan it’s possible to construct an insulated eke that can house a 1kg block of fondant in a fast food container. Using new materials I reckon these cost about £5 to make, much less than the price of the Paynes eke alone (which still has the problem of the thin roof).
In the future I’m considering converting one of these boxes into a twin 4 frame design, by adding a Correx divider, sealing the original entrance and adding new entrances at opposite ends of the box. This would be a useful size as a mating nuc, or could possibly be used to overwinter bees in a sheltered site … watch this space.
Update
It turns out that these modified boxes are a fraction too small to be split into a twin 4 frame design. Although a newly converted box will comfortably fit 8 frames, once they are propolised there’s too little space – even using a very thin central divider made out of Correx.
A far better solution is to modify a Langstroth poly nuc which, with some scrap plywood, can be converted into a twin 3 frame design with opposing entrances and an inbuilt feeding compartment. I’ll post separately on this in due course. I’ve posted details of these separately.
Join the discussion ...