The nucleus option
The definition of the word nucleus is “the central and most important part of an object, movement, or group, forming the basis for its activity and growth”.
Therefore a nucleus colony of honey bees is something smaller than a full colony, but that has inherent capability to grow into a full and active colony.
A nucleus colony is usually abbreviated to nuc (pronounced nuke), often prefixed by an indication of its size e.g. five frame nuc or 2-frame nuc. The very fact that the size of the nuc is often included is an indication that they can exist in a range of different sizes.
If the size is not defined a nuc is likely to have 5 brood frames. In this post I’ll stick to that convention; unless otherwise specified I’ll use the term nuc to mean a 5-frame nuc.
What’s in a nuc … ?
A nuc is a fully functional colony of honey bees, just on a smaller scale than a full colony. Therefore it will contain stores, adult bees, brood in all stages and a queen.
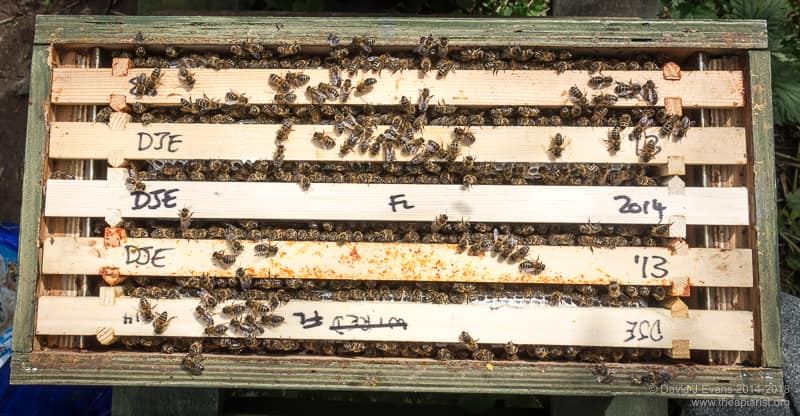
5 frame nuc colony …
Of course, when first prepared it may be missing some of these components. However, to be fully functional, and to have the capacity to grow into a full colony, it must contain everything that would be expected in a full hive, just less.
Other than queens. To be functional a nuc, like a full colony, needs no less than one queen 😉
And, of course, no more than one 🙂
Part of the skill in preparing good quality nucs – for whatever purpose – is to ensure they are a balanced and functional mini-colony. They need enough adult bees to rear brood, to defend the colony and to forage effectively. They need sufficient stores to avoid starvation during a bout of bad weather, and they need a mated, laying queen to help the mini-colony expand.
… and what’s it in?
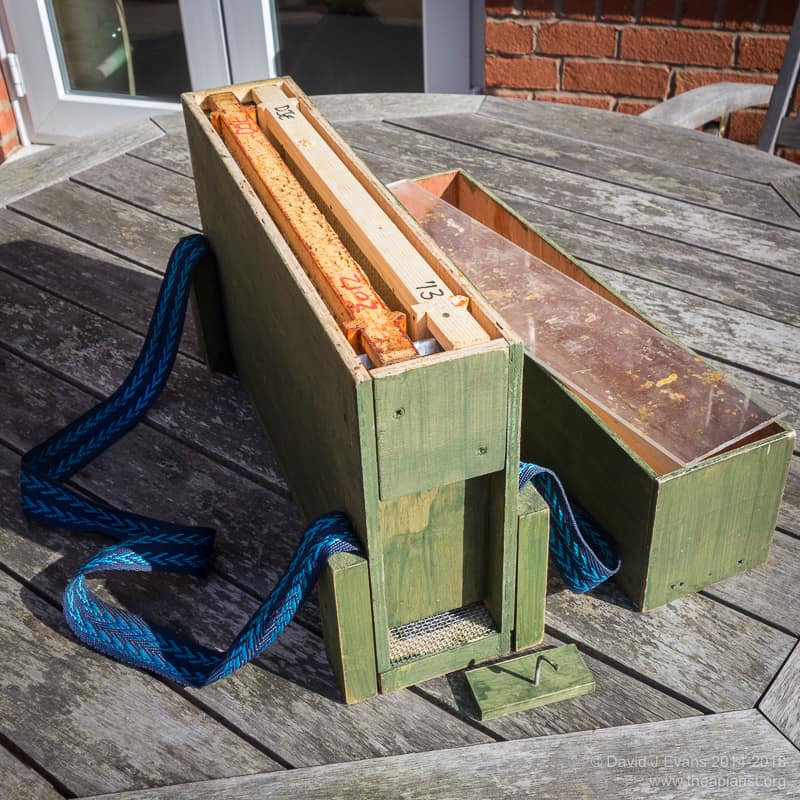
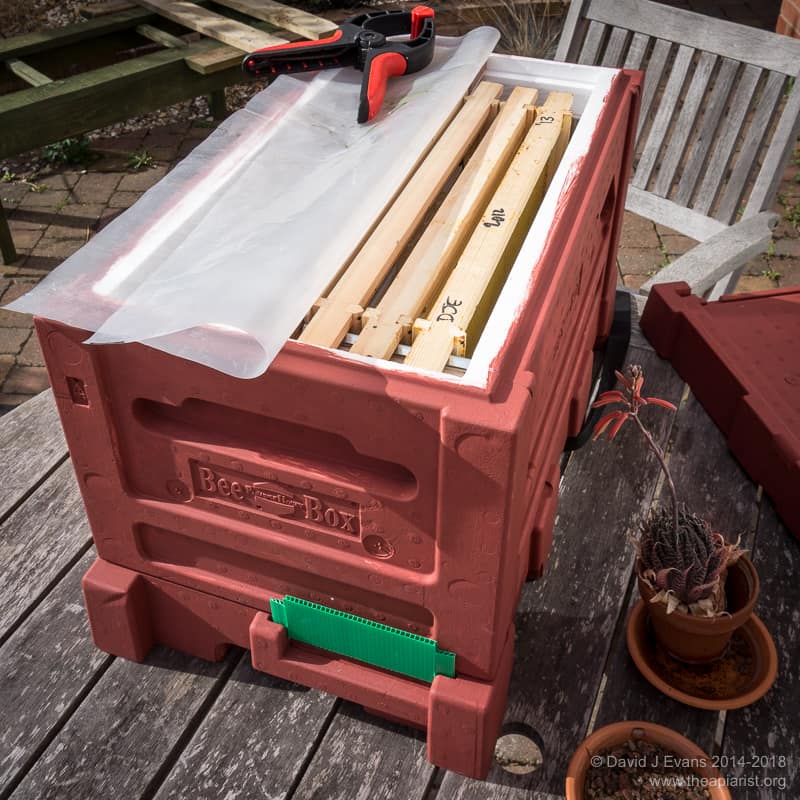
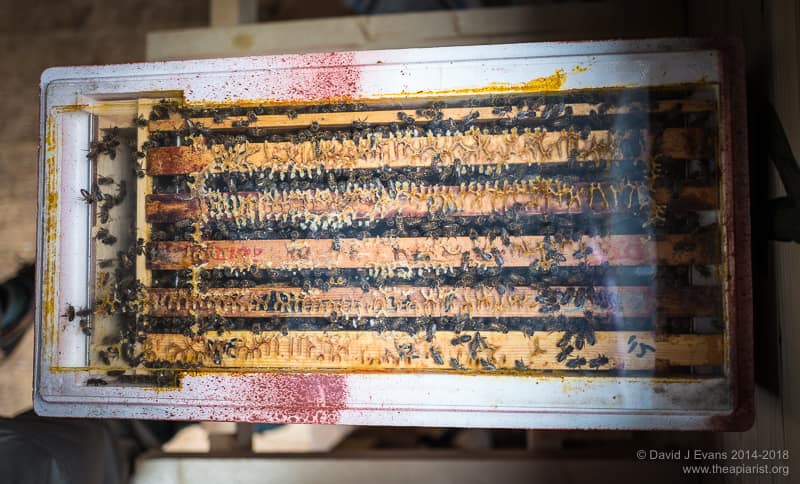
A nuc is usually housed in an appropriately sized nucleus hive, but actually doesn’t need to be. Commercially-purchased nucleus hives almost always take 5 brood frames {{1}}, though there are exceptions. Paynes Beekeeping sell a very widely used 6 frame National nuc. Paradise Honey polystyrene Langstroth nucs also take 6 frames and, to add further confusion, can be divided easily longitudinally into two 3-frame nucs.
Everynuc poly nucs
Of course, if you make your own – or butcher commercial offerings – a nucleus hive can be any size you want. As the need arises {{2}} I use two, three, five and eight frame nucs.
Two frame nuc box … a bit too small for the nucleus method of swarm control (but usable at a pinch)
But the nucleus colony does not have to occupy the entire hive.
A well-prepared nuc can expand in size quite quickly. One of the biggest problems in working with nucs is their tendency to get overcrowded. As I discussed a fortnight ago, overcrowding is a well-established trigger for swarming, and a nuc is perfectly capable of swarming … thereby undoing all your efforts in establishing it in the first place.
Therefore, bearing in mind the necessity to produce a functional and balanced mini-colony, it is not unusual to create the nucleus colony smaller than the hive it is housed in, so providing some space for future expansion.
Dummy boards …
As described below, three frames in a five frame hive hive can start a new nucleus colony. You can even put the frames into a full brood box. In both cases the unoccupied space needs to be reduced or at least separated from the developing colony. With the frames pushed against the sidewall of the hive the addition of a dummy board against the ‘open’ face of the colony is usually sufficient.
Warmth and weighty matters
Being smaller than a full colony, and containing fewer bees, a nuc is less able to keep the cluster warm if the weather turns cold. This isn’t usually an issue during the late spring and summer, but is a major concern if you want to overwinter nucleus colonies.
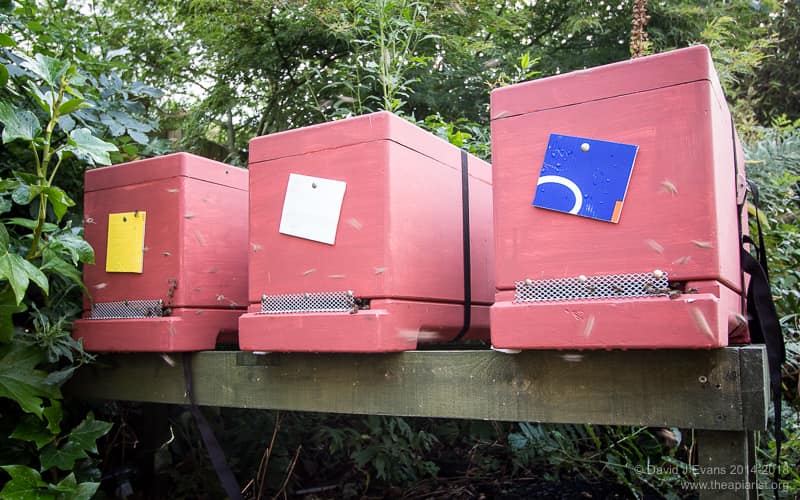
To make things a bit easier for the bees many commercial nucleus hives are made out of expanded polystyrene. These are mass produced from moulds and sometimes include integral feeders or other design ‘features’. Some of the features included are better than others … and some are pretty useless. In my experience {{3}} none of the poly nucleus hives sold are perfect, but some are very good and almost all are perfectly usable.
MB poly nuc …
I’ve discussed several – now rather ageing – commercially-sold poly nucs previously. I may mention them again in passing, but will focus on the contents of the nuc for most of this post.
The low weight of polystyrene nucleus hives is an additional bonus. Less weight to carry when moving them between apiaries, when selling them or when stacking them up empty for the winter.
But nucleus hives don’t have to be made of polystyrene. For summer use only (or when preparing nuc colonies for sale) you can get nucleus hives made of folded Correx for a few pounds. I’ve also got a few lovely cedar nucleus hives built by Peter Little of Exmoor Bees. These have separate open mesh floors, tightly-fitting removable Varroa trays and deep roofs. They’re beautifully made but usually languish unused in the shed in favour of the poly Everynuc’s I routinely use.
Why prepare a nuc?
There are all sorts of reasons to prepare a nucleus colony, but – at least in my beekeeping – the three main ones are:
- swarm control – the nucleus colony houses the old queen while the original colony requeens. If this is successful the nuc can either be expanded to a full colony or, after removal of the old queen, united with the original colony so strengthening the hive to exploit the summer nectar flows. I wrote about a nucleus method of swarm control last year.
- making (limited) increase – a strong colony can almost always be used to prepare a nuc without jeopardising the chance of getting a good honey crop. Depending when the nuc is prepared it will either be strong enough to fill a full hive by the season’s end, or can be overwintered as a nuc. Splitting a nuc off a strong colony can also help delay swarming.
- much greater increase – a variant of the above is to completely split a strong colony into 4 – 8 nucs. The final number depends upon the strength of the original colony {{4}}. Remember that you need a queen or queen cell for each prepared nuc. I’ve discussed this approach previously when queen rearing using a Cloake board and in doing circle splits.
Whatever the reason, the basic mechanics of preparing nucleus colonies is the same. The important point to remember is that the goal is to produce a fully functional colony, just on a smaller scale. Unless it has sufficient stores, enough bees of the right type or a functional (or soon to be functional) queen it will struggle, and it may not survive.
Stores
I start all my nucs with a frame of largely or completely sealed stores pushed up against the sidewall of the box in which I’m going to house them.
During the first or second inspection of the season I am usually able to remove at least one frame of stores from every full colony. This is leftover from the winter and, with the spring nectar flows underway, no longer needed.

Spreading the brood nest
I replace the removed frame(s) with either drawn comb or, more usually, a new foundationless frame. These are inserted at the edges of the brood nest – effectively spreading the brood nest – rather in the space directly occupied by the frame of stores.
The colony benefits from the additional space to draw new comb for the queen to lay, so delaying the urge to swarm. And I benefit from ~2kg (5lb) of stores in the removed brood frames which I carefully hoard until I need them 🙂
Make sure you store them somewhere safe where wasps, bees and rodents cannot get at them.
Bees
This is where things start to get a little more complicated. The amount of bees – both brood and workers – added to the nuc depends upon a number of things, most important of which are:
- where the nuc is going to be located after it has been made up. If it being moved to an out apiary more than a couple of miles away then you can usually add fewer bees. Conversely, if it is staying in the same apiary (or being moved nearby) you have to expect many of the flying bees will return to the original hive and make allowances for this by adding more at the start.
- whether the nuc will be started with a laying queen, a virgin queen or a queen cell. A laying queen can and will start laying eggs immediately, with the resulting workers emerging in ~21 days from making up the nuc. A virgin will have to go out and mate and start laying, so adding several days to this period. If you start the nuc with a queen cell there may be a few more days to be added as well.
Remember that the flying worker bees you add as you create the nuc will all likely have died before any new bees emerge from eggs laid in the nuc. Therefore, to ensure there is a continuity of foragers you need to prime the nuc with sealed brood and plenty of young bees.
So, the next thing to add to the nucleus hive, adjacent to the frame of stores is a frame of sealed brood together with all the bees on the frame. Unless you also intend to place the queen from the original hive into the nuc make sure the queen is not on this frame.
If there is also some emerging brood on this frame as well, all the better. These will help bolster the young bee population you add, enabling them to help rear more brood and get established faster.
If the original colony is particularly strong or you want to create a strong nuc you can add a second frame of brood (and adhering bees), but this is not necessary. What is necessary is to ensure there are enough bees to compensate for ageing foragers and the loss of bees back to the original hive.
Flying bees and hive bees
When you remove a brood frame from the hive it has two general sorts of workers on it – the so-called ‘flying’ bees and the ‘hive’ bees. The former are the foragers, the latter the younger nurse bees. You can crudely separate them by deftly shaking the frame once {{5}}. The flying bees are dislodged, the hive bees hang on tight.
Nurse bees will, as they age, mature into guards and foragers. These will be needed before adult workers emerge from any new eggs laid in the nuc.
Therefore, I almost always shake in a frame or two of nurse bees into the nuc that is being setup.
Doing this takes just a few moments …
- Lift a brood frame from the original colony and check that the queen is not on it {{6}}
- Shake the frame once over the original hive to displace the flying bees
- Shake the remaining adhering ‘hive’ bees into the empty gap in the nucleus hive between the frame of brood and the sidewall
- Return the brood frame to the original hive
Space to expand
The nucleus hive now probably contains two frames (one of stores and one of brood) and, assuming it’s in a 5-frame box, the bees have space to expand as the colony builds up.
But they also need frames to occupy.
Therefore, add a single foundationless frame, or a frame with foundation or – the 5 star deluxe treatment – a frame of drawn comb to the nucleus hive. The last is a real luxury and means the queen will have somewhere to start laying immediately.
Go on … spoil them 😉

My precious …
With the exception of a queen (see below), the nuc is now complete for the moment. Since I predominantly use foundationless frames I usually add a dummy board to isolate the colony from the echoing space in the 5-frame nuc box. For convenience I’ll usually place the two foundationless frames on the far side of the dummy board so I don’t need to remember them when the colony expands.
The arrangement of frames is therefore:
- Stores
- Brood (sealed and emerging), plus adhering bees
- Drawn comb, or undrawn foundation or foundationless frame
- Dummy board
- Foundationless frame
- Foundationless frame
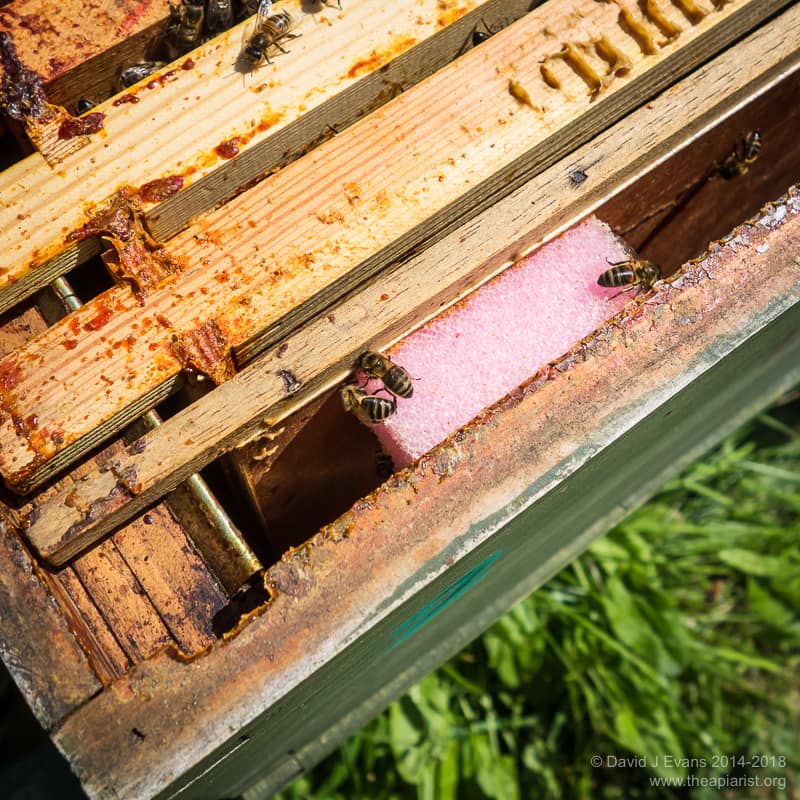
Foam block …
If the nuc is to be moved to a remote apiary I’ll also add a closed cell foam block to stop the frames moving about during transport.
Queen
When first created nucs are too small and unbalanced (in terms of the composition of bees in the box) to successfully rear a good quality queen from an egg or young larva.
They will try, but it is not a recipe for success. You’ll often end up with an undersized and underperforming scrub queen.
Don’t let them.
Why bother putting all those valuable stores, brood and bees into a box without giving them the very best chance of flourishing?
Instead, you need to provide them with a queen – either mated and laying, a virgin or as a mature queen cell. I don’t want to cover the sometimes tricky subject of queen introduction here, so will restrict myself to the two most common scenarios:
- using the mated queen from the hive you split the nuc off
- making up a nuc with a ripe queen cells
The first instance is straightforward. Either make sure the frame(s) transferred to the nucleus hive include the queen or find her in the original hive and transfer her to the nuc.
Transferring her on a frame is easy. Adding her subsequently means picking her up and gently placing her on the top bar of the transferred brood frame in the nucleus hive. Do this carefully and quickly and she will be accepted without any issues {{7}}.
Queen cells
Although also needing care, starting a nuc with a mature, ripe queen cell is even easier.
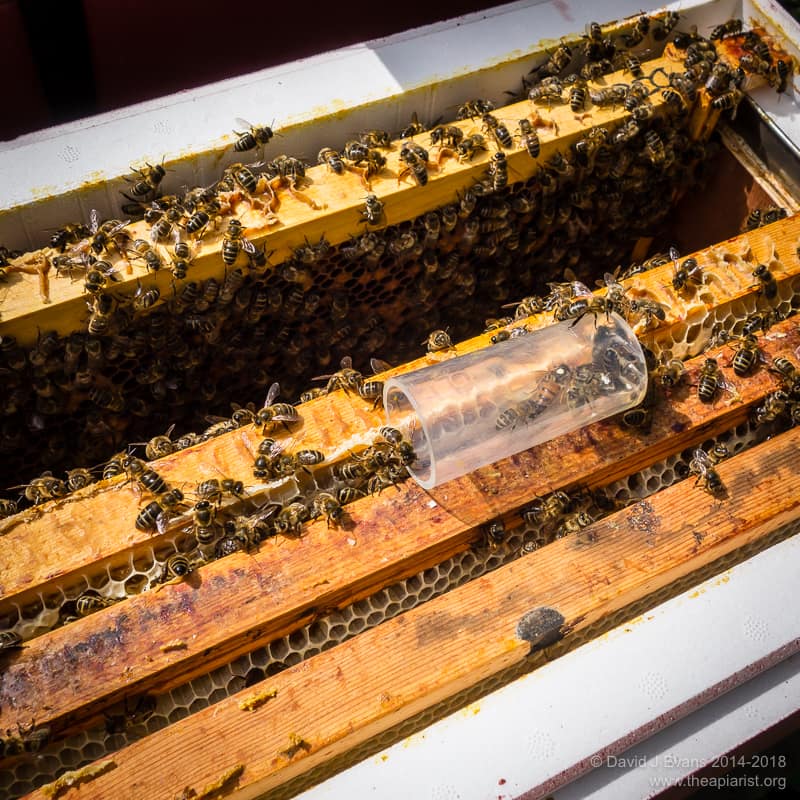
You can make up the nuc with a frame already containing a sealed queen cell. This is simplicity itself. Just ensure you do not bump, jar or bruise the queen cell during the transfer process.
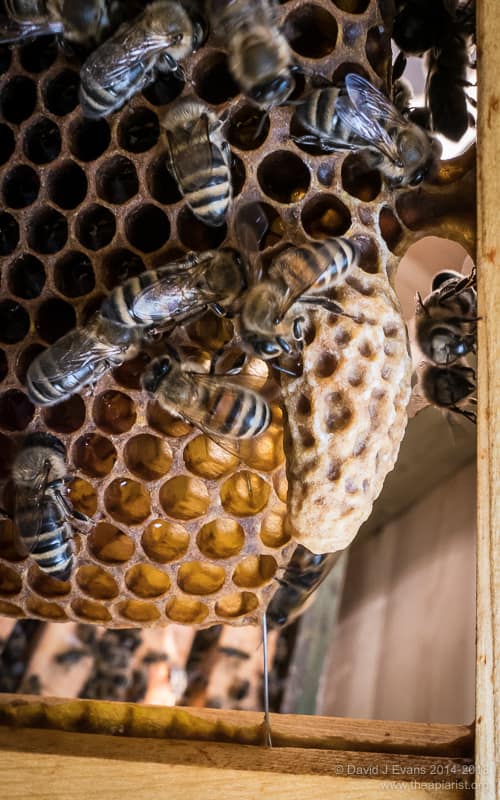
Sealed queen cell …
Alternatively you can add a queen cell from another frame. This can be from the original hive, or from another colony altogether {{8}}.
- Cut around the queen cell to leave a wide margin of comb. A couple of centimeters isn’t too much.
- Choose a space on the face of the brood frame in the nucleus hive. If there isn’t one, make one by pushing the comb down with your thumb.
- Place the sealed queen cell vertically in the gap and use the wide margin of wax to fix it in place by squeezing the wax together.
You want the queen to emerge onto brood, not stores, and you want the cell roughly central in the cluster of bees to ensure it’s well looked after until she emerges. I usually fix the cell under the top bar.
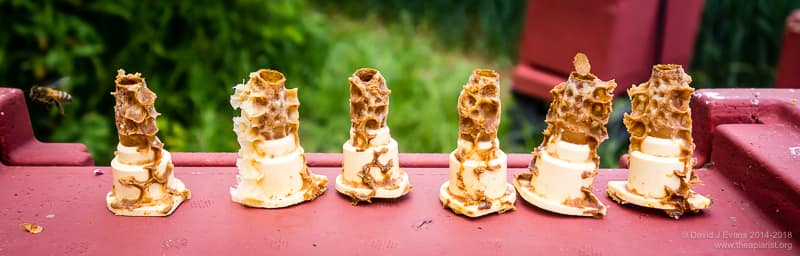
All gone …
Of course, if you rear your own queens (or have a friend/mentor who does), the queen cells are usually attached to small plastic cups which can simply be hung in place between the top bars.
Location and relocation of nucs
If the new nuc is to remain in the original apiary you should expect that many of the flying bees will return to the original hive. Help discourage them by stuffing the nuc entrance with grass for 48-72 hours.
By the time the grass has dried and the bees have pushed their way out they’ll realise things have changed and will reorientate to their new home.
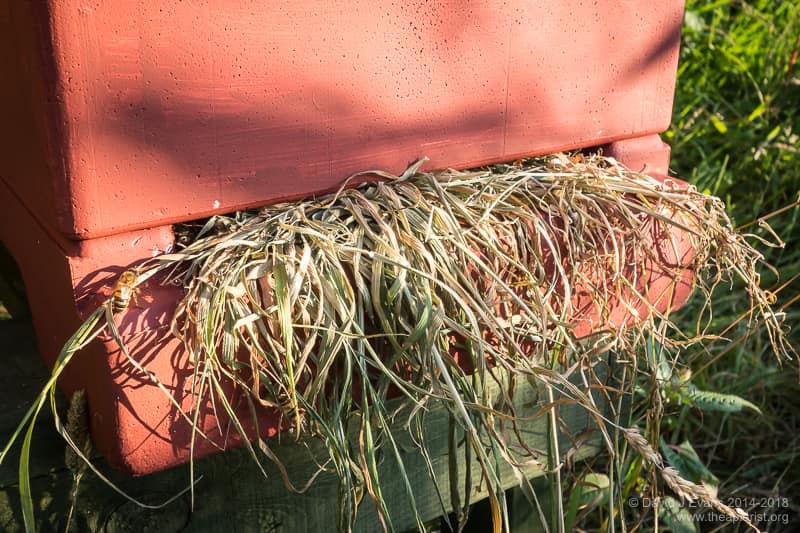
Stuffed …
It’s also worth checking the population of bees a few days after making up the nuc. If your nucleus hive has a perspex crownboard this can be done with minimal disturbance to the bees. If the nuc looks sparsely populated you can shake in more nurse bees from the original colony (see above).
5 frame poly nuc …
If you move your nuc a few miles from the apiary it was prepared in the bees will be forced to reorientate to the new location. You’ll therefore lose far fewer of the flying bees, so maintaining a reasonable foraging force during the initial establishment of the new colony.
When transporting nucs take all the normal precautions. Seal the entrance, strap the box up tightly and orientate them with the frames in line with the direction of travel.
Maintenance of nucs
Nucs need a little more TLC {{9}} than full colonies. Particularly when first set up they are less able to defend themselves as the population of bees is unbalanced.
This is a very good reason not to feed nucs syrup from the start. Workers returning to their original hive may take back news of a readily-available source of ‘nectar’ and induce robbing.
Later in the season, once a nuc is established it may still benefit from a reduced size entrance to give the bees less to defend.
Being smaller than a full hive they have less space for stores and less space for expansion. Unsurprisingly the two major problems are starvation and overcrowding. Both are readily avoided by regular inspection.
Requeening a nuc …
Finally, if you start a nuc with a queen cell it makes sense to find and mark {{10}} her before moving the colony to a larger hive. Queens are always easier to find in nucs than in full colonies.
There are far too many additional tips and tricks to preparing nucs than I have space for here, but at least it’s a start. The key point to remember is that nucs are far more likely to be successful if set up and managed with a balanced population of bees and ample resources.
Colophon
The title of this post is a modified version of the nuclear option. Formally this is a parliamentary procedure in the US senate. More generally, by analogy to nuclear warfare, it means the most drastic or extreme response possible to a particular situation.
Preparing nucleus colonies is nothing like this. Indeed, it is one of the most useful things to do in beekeeping.
I’ve no idea how this post grew to over 3000 words … my version of filibustering which the nuclear option can be used to defeat. Next week we return to science with an exciting new study {{11}} on the rise and rise of chronic bee paralysis virus as a threat to beekeeping in general, and beefarming in particular.
{{1}}: Irrespective of the hive type – Langstroth, National etc. – or the variety of frame sizes e.g. 14×12.
{{2}}: Or depending upon what I’ve already run out of …
{{3}}: Which is far from complete, though I’ve had a really good look at many of the available poly nucs at various conventions over the years.
{{4}}: A double brood monster might even yield more.
{{5}}: Shake too hard and all the bees are dislodged, shake too gently and most stay on the frame … this is more easily demonstrated than described.
{{6}}: You may have already place her in the nucleus hive of course.
{{7}}: Don’t drop her from a height, don’t chuck her into the bottom of the nucleus box … there’s always a risk that bees will ball (attack) a queen that appears in an unusual manner. Simply place her on a top bar and watch her walk calmly down into the nearest seam of bees.
{{8}}: Whenever you are selecting queen cells remember to choose them from your best colonies. You want to propagate good genetics and get rid of underperforming, aggressive or otherwise sub-standard bees.
{{9}}: Tender, loving care.
{{10}}: And possibly clip her as well.
{{11}}: As a co-author of the work, I’m a bit biased …
Join the discussion ...