The bee shed
Under construction …
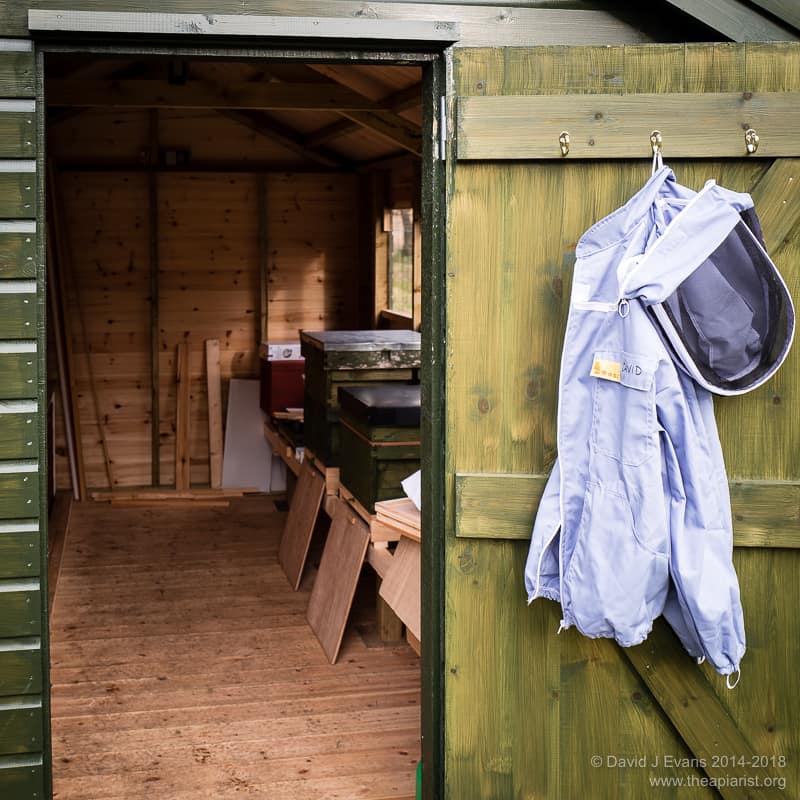
The bee shed is a new development in my beekeeping. It was built to house the colonies we need for our work on deformed wing virus. This requires access to larvae and pupae for as long as possible during the year … it therefore seemed worthwhile trying to keep colonies in a sheltered environment in the hope that the queen would rear brood for longer. An additional benefit is that colonies can be opened in poor weather. Due to the timing of the development cycle of bees we almost always have to harvest larvae or brood on a Monday, irrespective of the weather. I’ve previously had to open colonies in the middle of a thunderstorms, getting drenched in the process. The ‘operator protection’ offered by the bee shed will make this a much less unpleasant task in inclement weather (at least for the beekeeper 😉 ).
Location, location …
Bee shed …
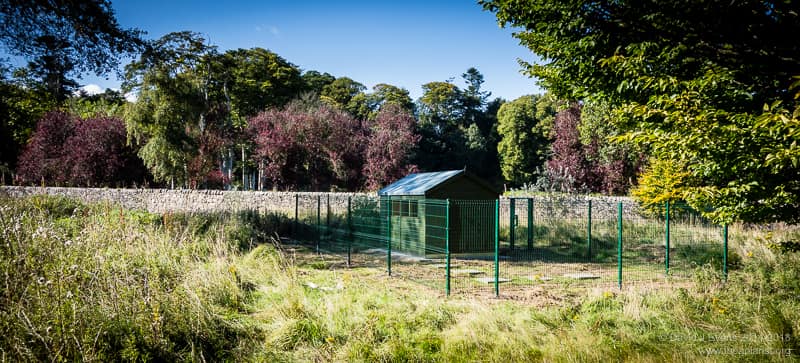
The shed is situated in a sheltered corner of thin woodland, with the long side facing approximately south-east to catch the morning sun. The spot is a real sun trap and well sheltered from prevailing winds. There is water nearby and a wide variety of forage available within flying distance. On a warm sunny morning it’s an idyllic spot. However, not everything is perfect. Access is a bit limited and there’s no electricity, so I’ll need to use my Kelly Kettle for making a brew. The shed is built onto a solid slabbed foundation that is pretty-much level so I don’t need to worry about levelling the hives when using foundationless frames which must hang vertically. The shed was built by Gillies and Mackay of Errol and the exterior is ~19mm thick T&G boards. They built it with four window openings all down one side … in retrospect I should have asked for a couple of additional openings on the opposite side as well and I may yet take a jigsaw to the wall if needed. Other than fitting metal edging all around the base to prevent little critters getting underneath, it’s a pretty-much ‘off the shelf’ (albeit custom-built if that isn’t a contradiction) 12′ x 8′ shed, liberally painted with something not particularly environmentally friendly (Sadolin Quick Dry woodstain I think). The fenced off apiary site has space for a further 6-8 colonies, with additional space for storage of spare nuc boxes, supers and all the other paraphernalia that beekeeping requires.
Hive stands
Feet through the floor …
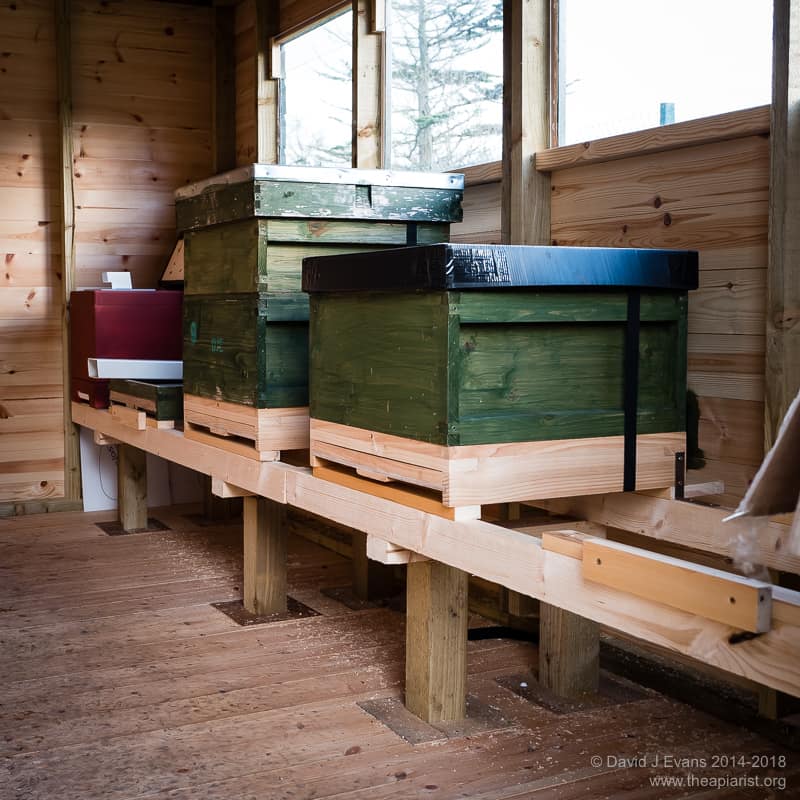
I’ve already briefly described the hive stands. These are completely unexciting. There are two, end to end, down the long-side of the shed. The advantage of two separate stands is that there are fewer colonies sharing the stand to get disturbed during inspections. I considered individual stands but realised that this would prevent the addition of ‘infill’ nucs should we need them. Actually, not really infill, but there’s space at either end for a 5/6 frame poly nuc. The only additional design feature of the hive stands is that the legs reach through the floor of the shed and stand directly on the slabbed foundations. This again reduces vibrations as I potter around in the shed opening other colonies … or brewing tea. This was a suggestion from an experienced bee shed user and contributor to the SBAi forums for which I’m very grateful. I slightly misjudged the height of the stands during design/installation … this has necessitated additional pieces of wood being added along the top runners. Without these the hive entrances were in line with the thinnest part of the wall (the T&G), rather than the thicker centre of the plank. D’oh! In due course I’ll add additional wood along the rails of the stand, incorporating Correx sheets underneath the colonies to catch debris that would otherwise fall onto the floor. These won’t be proper Varroa trays as they’ll be well separated from the open mesh floors, but simply a way of keeping hive rubbish off the floor. The hive floors we use were built by Pete Little and have a particularly well designed Varroa tray that is almost perfect for sealing off the bottom of the colony, both when counting mite drop and during oxalic acid sublimation.
Entrances
Correx …
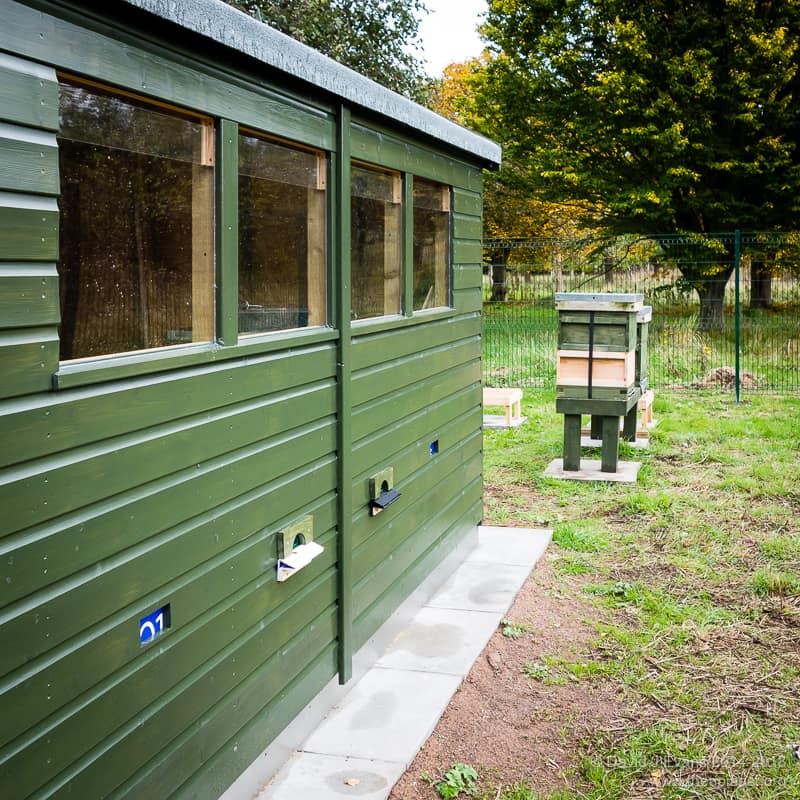
Many bee sheds I’ve seen have rather fancy entrances with sealable doors on the outside, the ability to add mouseguards and all sorts of entrance reducers. I decided that, a) I don’t know yet what features I need so can’t add them from the start and b) I can cobble-together almost anything from Correx if needed. I therefore opted for a simple hole through which I pushed some spare rectangular extractor hood ducting. This abuts the front entrance slot of the hive – I use standard floors on the hives in the shed, rather than my preferred Kewl floors. The ducting is a pretty tight fit through the side of the shed, so isn’t fixed in place. It rests on a small piece of softwood on the front of the hive floor, with the remainder of the hive entrance i.e. “outside” the ducting, sealed off with a piece of Correx nailed in place to both the bottom of the brood box and the top of the hive floor. The Correx has a flap that lifts up to accommodate the ducting. When I move the hives I simply pull them away from the ducting and close the flap.
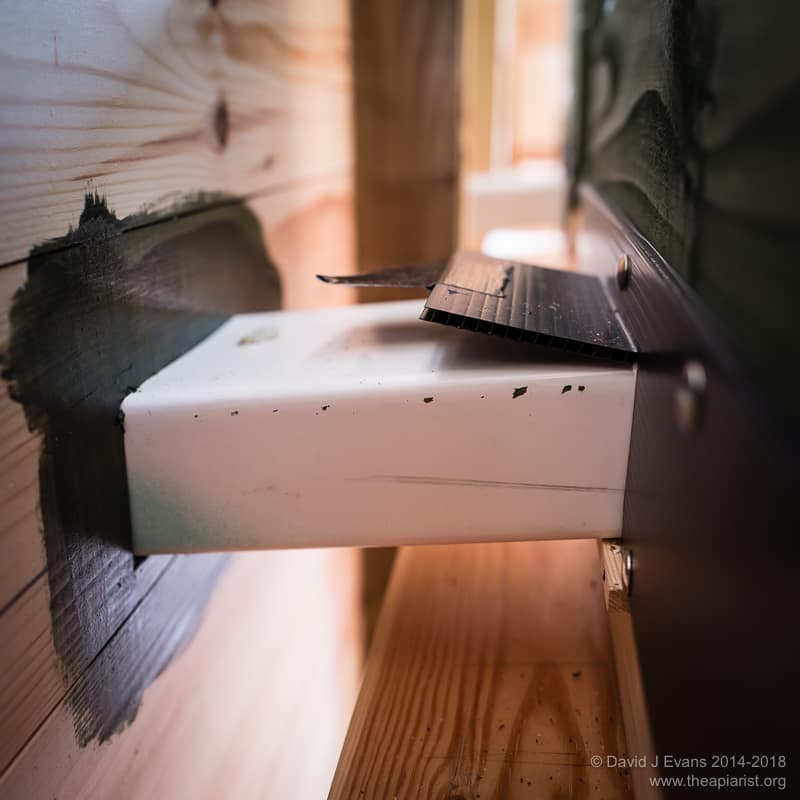
Ducting …
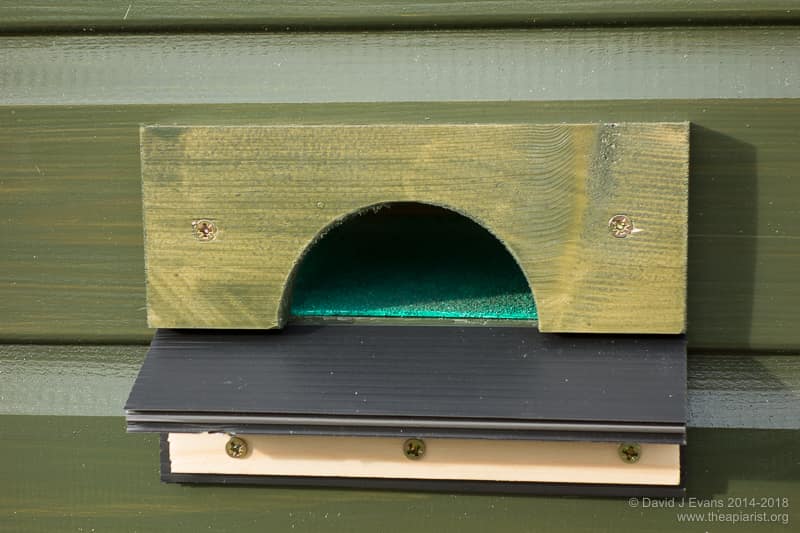
The ducting is only about 12-14cm in length. I didn’t want rain to be driven into the hive, or for water to run down the smooth-walled ducting. The ducting is therefore inclined upwards towards the hive entrance at about a ~15° angle. Additionally, there’s a ~1cm ‘step’ between the floor of the ramp and the hive entrance. I reckoned that this arrangement wouldn’t interfere with removal of corpses, but would maximise protection from the elements. I sprayed the inside of the outer end of the ducting with some gloss paint and liberally sprinkled it with sand to provide a good grip to bees landing. To seal off the exposed edges of the ducting from the outside I added an external entrance ‘archway’ (see picture) with the inevitable Correx landing board screwed on underneath it. I can add entrance reducers (Correx … no surprises there 😉 ) as needed simply by pinning them in place to the ‘archway’. The entrance was pretty-much bodged together (a speciality of mine) … we’ll see how they get on with them over the course of the season, make running modifications as needed and/or design improvements for the the future.
Exits
Bee shed window …
Opening a hive inevitably results in bees flying up and out. I’ve seen a variety of solutions to allow bees to exit bee sheds. These include:
- clear roof vents so the bees are attracted up to the roof apex of the shed and can then escape through the vent – if built properly this also hugely increases the available light inside the shed, but does require major roof modifications. These were beyond the budget and I was concerned about maintaining a fully weathertight structure, so didn’t choose this option.
- windows that are hinged along the bottom edge and that are left open a couple of inches during inspections. Bees attracted to the light (it’s always pretty dingy in the shed when compared to daylight) walk up the window and fly from the gap. Although the shed was pretty good value, the custom-built windows offered by Gillies and Mackay weren’t … so this option was abandoned as well.
Let there be light …
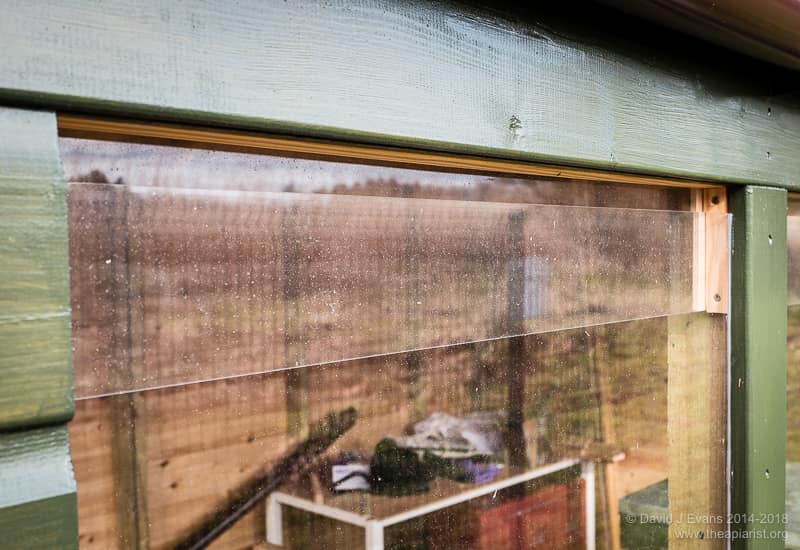
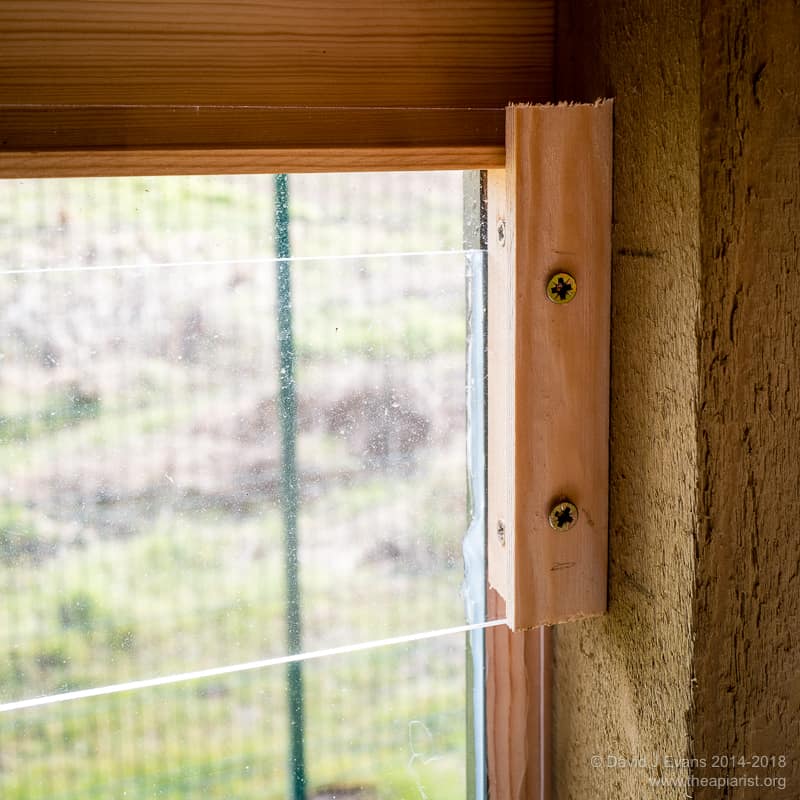
I wanted a no-moving-parts solution. Therefore, the windows consist of two sheets of Perspex with the outer sheet being 2cm short of the window frame height. This means that bees inside the shed that fly towards the light and crawl up the window eventually reach a gap from which they can fly out. To prevent ingress of rain and draughts the upper gap is overlapped by a short inner pane, perhaps 15cm in height, separated from the outer pane by about 20mm. This arrangement appears to work well. It means there are no moving parts to go wrong, no windows to forget to open (or close afterwards), no thick window frame to further reduce the lighting and yet still provides reasonable weather protection. The inner windows are screwed in place with the outers being secured with waterproof sealant.
Still to do
A combination of flooding, the short day lengths, an arm injury, lethargy and lousy organisation (as a previous student of mine once said, “He couldn’t run a bath”) mean that there are a number of tasks to finish before the season proper starts. These range from adding guttering and storage racks at the rear of the shed to taking a couple of deckchairs over for warmer days. Most importantly I need to prepare additional entrance holes for some nucleus hives. My preferred poly nucs fit flush to the sidewall of the shed (with a bit of bodging) and so should not need the same sort of entrance tunnel. I’m simply going to bore a wine-cork sized hole through the wall … this should be easy to defend and, if needed, seal with a cork. Note to self – drink wine.
But what about swarm control … ?
And all sorts of similar beekeeping questions. I’ve not a Scooby. The classic ‘artificial swarm’ (Pagden method) is out for obvious reasons {{1}} … this isn’t an issue as it’s not a method I use very often. The two choices would be the vertical Demaree method which I quite like (but which is better with an upper entrance that can’t be provided inside the shed) or simply removing the queen to a nucleus hive. It will be interesting to see what works best. However, since we harvest brood for research during the season these colonies may not get strong enough to swarm until the queen gets pretty old and tired. In the same vein, I don’t expect these colonies to be bulging at the seams and piling in the nectar all season, but – just in case – there’s headroom for about 4 supers 🙂 . It’s not likely that other standard beekeeping activities will be problematic … requeening, uniting, feeding, Varroa treatments and standard inspections should all proceed as required (just out of the rain and wind). The installed colonies are currently in hives identical to those I’d use outside … however, this is likely to change as there’s little need for a roof and so I’m likely to replace the crownboard-insulation-roof with a simple sheet of thick polythene with a block of Kingspan insulation on top.
First impressions last
Perspex crownboard …
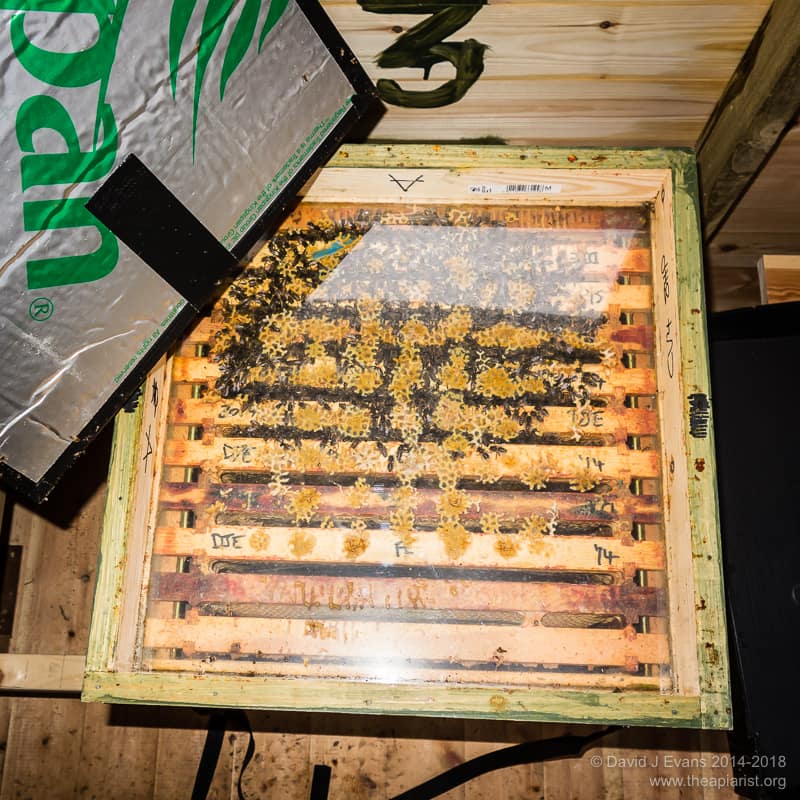
The first hives were installed in October last year, so I have almost no experience yet in handling colonies ‘indoors’. On a sunny day the lighting is good enough to see eggs and larvae but I might have to consider installing lighting for late-afternoon apiary sessions. We’ve had a reasonably warm, wet winter – very wet – and the colonies look strong at the time of writing (the image on the right is not representative as it was taken some time ago). Colonies within the shed are significantly more active than colonies headed by sister queens outside the shed in the same apiary. However, there may still be genetic differences between the colonies that account for this. This increased activity is twofold – more bees flying on warm days and more hive debris (presumably due to brood being reared and stores uncapped) on the Varroa trays. Only once the hives are opened will it become clear whether these apparent signs of increased activity really reflect stronger colonies that are rearing more brood.
What is clear though is that on days borderline for flying – the sort of day when only the odd bee ventures out – the colonies in the shed have no more bees flying than those outside. On these sorts of days a peek through the perspex crownboards shows that the clusters within the bee shed are ‘looser’, with more bees wandering about in the hive corners and with the bees spread across more frames. However, this increased activity inside the hive doesn’t appear to translate into more bees venturing out if the weather isn’t really good enough.
It’s going to be an interesting season …
Waiting for the season to start …
{{1}}: I’m wrong. It works just fine – note added in 2024.
Join the discussion ...