Queen excluders
If your season is going anything like my season you’ll now be conducting weekly inspections of colonies which have one or more increasingly heavy honey supers {{1}}.
Finally ?
At least, you should be doing weekly inspections and I hope the supers are filling nicely ?
If so, you’ll also probably be using queen excluders to stop Her Majesty from moving up into the supers. You don’t have to use queen excluders, but most people using stackable hives do. As I use a lot of drone foundation in my supers it’s a bit of a catastrophe if the queen lays up frame after frame of drones, so I always use queen excluders.
The good
I’ve used all sorts of queen excluders (henceforth QE’s for simplicity) over the years. Some are much better than others, some are awful and some fall into the “OK since I’ve run out of other equipment and I’m desperate” category i.e. useable, but not actually good.
The good ones are wooden-framed with rigid wires. They have beespace on one side {{2}} and generally don’t get stuck down to the tops of the frames. They are relatively easy to clean and you can buy a little scraper gadget to help with this task. Importantly, from an apiary hygiene point of view, they can be blowtorched if needed to sterilise them.
- Preferable to what?
- Framed wire QE …
- Dual use …
I build my own, using the wire-only grids available from Thorne’s. A 9 x 25mm frame with simple rabbet joints holds the wire, which I fix in place with Gorilla glue. I then add a narrow wooden rim around the top edge, flush with the wire, onto which the super is placed. The overall cost is about a tenner, about half that of the readymade commercial ones and only twice that of the el cheapo plastic ones.
The bad
I started beekeeping using the slotted steel or zinc sheets that get propolised to the tops of the frames and, as you prise them up, suddenly go ‘ping‘ firing bees up into the air. The trick to stopping this was lift from one corner but keeping pressure in the middle with one finger so they released slowly and gently.
These slotted zinc QE’s tended to bend or crease {{3}} and mine were butchered to make mini-nuc feeders years ago.
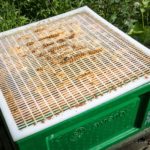
Unfortunately – because they’re the most recent QE’s I’ve purchased – I’d also add the current XP PLUS QE from Thorne’s to this category. These are moulded plastic with square holes but have the addition of a bottom rim and half a dozen standoffs that hold them a beespace above the top bars of the brood box. So far, so good.
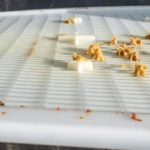
They’re described as non-stick, but in my experience aren’t. I’ve got about half a dozen in use at the moment and all of them have either (or both) been stuck firmly to the top bars of the brood box or – infuriatingly – to the underside of the super.
- XP PLUS QE
- Underside of XP PLUS QE
- Curly Wurly XP PLUS QE …
Irritatingly these QE’s also don’t appear to ever lay flat {{4}}. When purchased they were a bit banana-shaped, but I wrongly thought that stacking under some other boxes for a few months would sort them out. When reassembling the hive they always leave a corner or two bent up, under which the bees crawl … with inevitable consequences. Avoid.
The indifferent
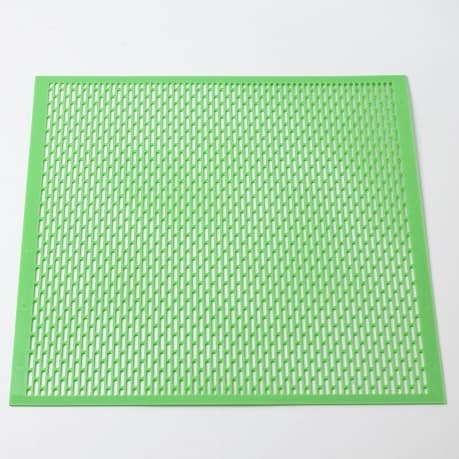
Plastic lay flat QE …
I also have lots of the plastic ‘lay flat’ QE’s. These are just about the cheapest to buy. Some have square, some rounded, holes. All are much of a muchness in my view. They get propolised to the frame tops and usually need the same sort of ‘finger press’ in the middle when removing them to avoid launching bees unceremoniously across the apiary.
All of these ‘lay flat’ QE’s are a bit tricky to clean. You can scrape them with a hive tool, but lots of the holes get blocked with wax/propolis. If you put them in the freezer overnight you can then flex them gently and quite a bit of the propolis can be released (and used for all sorts of things like tinctures).
Top tips
When removing the queen excluder, particularly the flat plastic ones that inevitably get stuck down to the top bars, gently twist it in a circular motion to loosen it from the wax. Also try the ‘finger in the middle trick’.
Before putting the hive back together give both frame top bars and the QE a scrape with the hive tool encourage it to lie back down flat. This makes subsequent inspections easier.
Finally, remember to always check the underside of the QE for the queen before setting it aside and continuing with the inspection. Take it from me … you feel a combination of stupid and relieved when you finally find the queen wandering around on the QE as you reassemble the puzzlingly queenless hive that’s got loads of eggs and no queen cells.
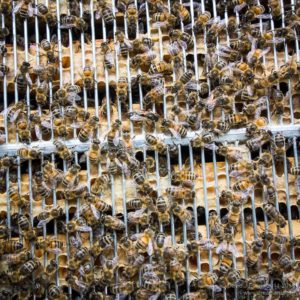
And it’s always worth checking the upper face of the QE as well …
{{1}}: After the magnum opus last week on swarm and mite partitioning I’m keeping this post short and to the point so I actually have time to conduct the inspections … and to deal with swarming which is in full swing at the moment.
{{2}}: This is the side that goes down when putting the QE and supers onto the hive.
{{3}}: The Thorne’s catalogue is a masterclass in understatement when describing these QE’s “… can be prone to buckling. This is due to the excluder lying flat and in close contact with the frames. The bees then propolise the occasional spaces between the excluder and frame top bar making their removal quite difficult at times.” My emphasis.
{{4}}: Even the photo in the catalogue looks a bit curved.

Join the discussion ...