The nucleus method
Almost all beekeeping associations – and most books – teach Pagdens’ artificial swarm as the recommended method of swarm control. It is tried and tested and reasonably dependable. However it can be a bit tricky to grasp for inexperienced beekeepers.
At least part of the problem is you have two hives that look the same, one on the original site, one adjacent. Conducted properly, the adjacent hive is moved to the other side of the original a week or so into the process.
Teaching this in a poorly lit, draughty church hall in late January, facing the audience with the inevitable confusion over left and right, and getting ‘new’ and ‘old’ hives mixed up, often bamboozles the beginner {{1}}. Or the instructor ?
Here’s an alternative … the nucleus method of swarm control.
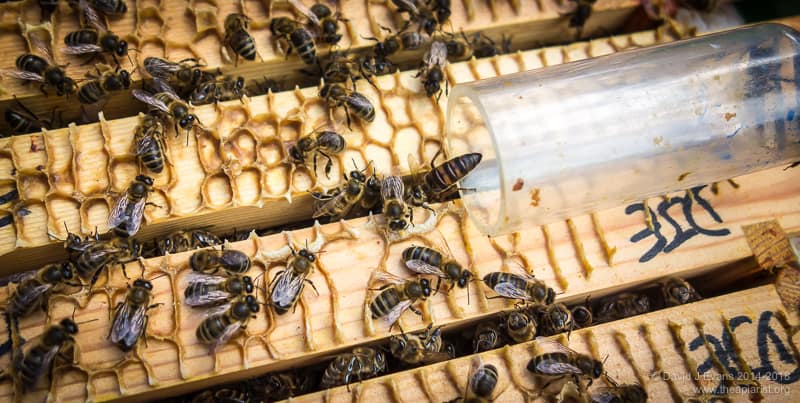
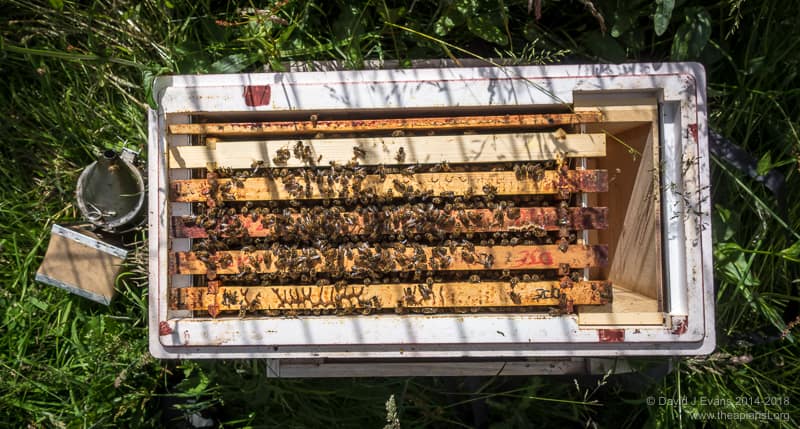
There she goes …
General principles
This method is simplicity itself. When the colony looks as though it’s preparing to swarm you remove the queen, some stores and some bees into a nucleus hive.
This keeps the queen safe in case things go awry with the original colony.
You then return a week later and remove all but one queen cell in the original colony. The virgin queen emerges, mates, returns and starts laying.
A month or so after starting the original colony is headed by a new queen and you have a ‘spare’ building up in the nucleus box. You can overwinter this, sell it, give it away or – after removing the queen – unite it back with the original hive.
And that’s it … I said it was simple ?
Here is a more complete account.
Equipment needed
It goes without saying that the nucleus method of swarm control needs a nucleus (nuc) hive {{2}}. Any sort of 5 frame nuc is suitable. Nucs are incredibly useful, so they are a good investment. If you’re buying one for the first time get polystyrene as they’re lighter, better insulated and much better for overwintering bees in. I’ve reviewed poly nucs a few years ago. There are even more makes to choose from now.
I’d recommend not using a two frame nuc as there’s not really enough room for stores and colony expansion {{3}}.
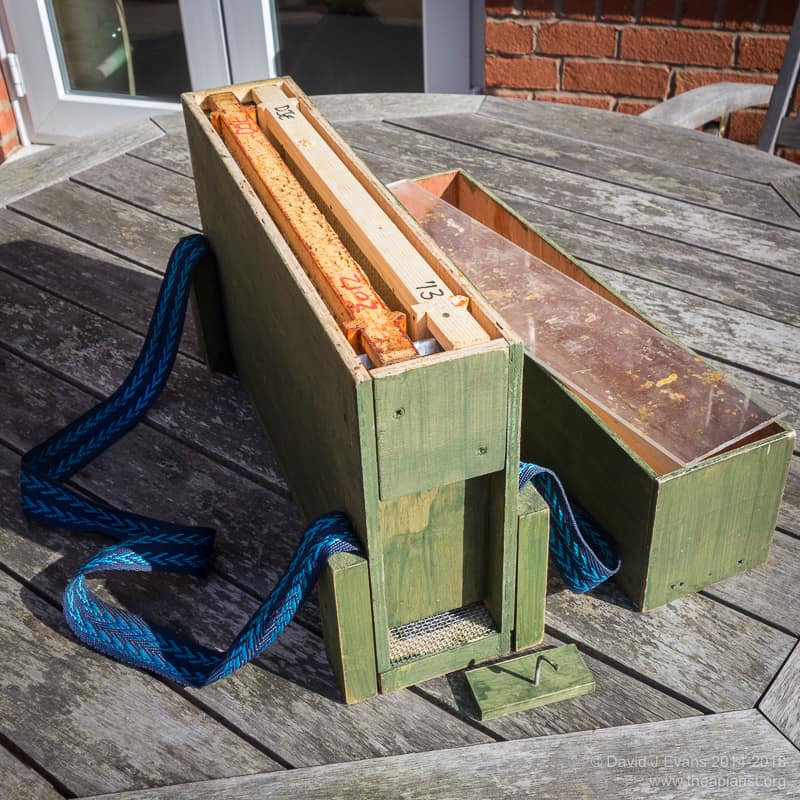
Two frame nuc box … a bit too small for the nucleus method of swarm control (but usable at a pinch)
In addition to the nuc you’ll need five frames that are compatible with your nuc and hive. Ideally, one or two of these should be drawn comb, but don’t worry if you just have foundation. A dummy board can also be useful. Like nucs, you can almost never have too many dummy boards.
Honey bee development
To properly understand honey bee swarm control you really need to understand the timing of the development cycle of queen bees.

Honey bee development
Queen cells have a characteristic appearance. Unlike the horizontally-oriented worker cells, larvae destined to become queens hatch from eggs laid in vertically-oriented queen cells. After three days as eggs and a further five days of larval development the queen cell is sealed.
A colony will usually swarm on or soon after {{4}} the queen cells are sealed.
~3 day old queen cell …
This is why it is recommended that colony inspections are conducted at seven day intervals. If the colony is thinking of swarming you’ll find an unsealed cell (because there were none last week when you inspected and they take 8 days to be sealed) and you can immediately start swarm control.
Day 1 – Making up the queenright nucleus colony
If you find one or more unsealed queen cells at a routine inspection … don’t panic. You’re prepared, you’ve done your homework and you have the necessary equipment.
- Stuff the entrance of a nucleus hive with grass and place it near the colony {{5}}.
- Remove one of the outer frames from the colony (you’ve probably already done this to give yourself room for the inspection) as this should have a good amounts of sealed and unsealed stores.
- Check again that the queen isn’t on this frame of stores (unlikely) and that it doesn’t contain any queen cells (again unlikely).
- Gently transfer the frame of stores plus all the adhering bees to the nucleus box.
- Continue the inspection and find the queen. Be gentle, don’t rush, don’t use too much smoke.
- Ideally you want the queen on a frame with some sealed and emerging brood. If you are lucky you’ll find her on a suitable frame.
- Gently transfer the queen and the frame she is on to the nucleus box. It is very important that this frame has no queen cells on it. Check very carefully. Destroy any you find.
- Your nuc colony is now queenright and has two frames of bees. Push the frames against the side wall of the nuc box, leaving a wide gap.
- Into this gap shake a further two frames of bees. Foragers are likely to leave the nuc and return to the original hive. You do not want the box to be short of young bees. If in doubt shake a further frame of bees into the gap in the nuc {{6}}.
- Add a frame of drawn comb if you have it then fill the box with foundation. Add a dummy board if needed. Gently place the crownboard and roof on the nuc, secure everything with a strap and turn your attention to the colony.
Notes
- The purpose of this exercise is to establish a small colony with stores, a laying queen, space to lay and sufficient bees to support her and the brood being reared. Remember stores, queen, bees, space and no queen cells you won’t go wrong.
- You will usually find the queen on a frame with eggs and young larvae. It’s very important that this frame does not have any queen cells on it.
- Ideally you want the queen on a frame of emerging brood. This offers a number of advantages
- The young bees will immediately strengthen the population supporting the queen
- The vacated cells can be used by the queen to lay eggs (so reducing the need for drawn comb, or for the bees to build new comb)
- The nuc colony will go through a period with no sealed brood and you can take advantage of this for Varroa management if needed (I’ll deal with this in another post)
- It’s unlikely (due to the age of the other brood) to have a queen cell on it
- One of the most common problems encountered with this method of swarm control is making up (or ending up) with a nuc that is not strong enough. A weak nuc will be unable to defend itself against robbing or wasps. There’s very little chance of weakening the original hive too much.
- One way to avoid losing foragers from the nuc is to move it to an out apiary more than 3 miles from the original hive.
- If you do leave the nuc in the same apiary check it a couple of days later. The bees should have chewed their way out through the dried grass. If they haven’t, pull a bit out at the corner of the entrance to encourage them to fly.
Day 1 – Preparing with the queenless colony
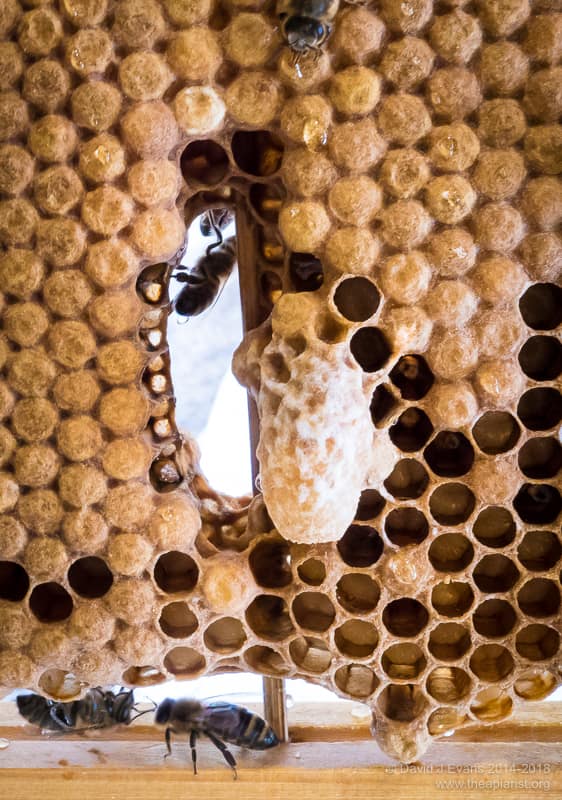
- Inspect every frame in the colony. Destroy all large queen cells {{7}}. Anything that looks like the queen cell in the picture above should be destroyed. The idea here is to only leave queen cells containing very small larvae.
- Mark the frames containing these remaining selected queen cells using a drawing pin or pen.
- Push the frames together, add two frames of foundation, add the crownboard and close up the colony.

Here’s one I prepared earlier
One week later – Ensuring the queenless colony does not swarm
The timing and thoroughness of this inspection is important. Don’t do it earlier. Or later. Don’t rush it and don’t leave more than one queen cell.
- Inspect the colony and look for queen cells on the frames you marked a week earlier. These had very young larvae in them then and so will now be sealed {{8}}.
- Select one queen cell to keep. Just one. Which one? Choose one that is large, well-shaped and has a sculptured exterior.
- Destroy all the other queen cells on this frame. All of them! If you need to remove the bees to see the frame better either brush them off gently or blow gently on them. Do not shake the bees off the frame as this might damage the developing queen.
- Gently return the frame with the selected queen cell to the box.
- Inspect all other frames in the colony (not just the ones you marked last week) and destroy all of the queen cells you find.
- You can shake the bees off these other frames to be sure of finding all other queen cells.
- Remember that some queen cells will be unsealed {{9}} … destroy them all.
- Return all the frames to the colony. Close it up and leave it for at least two weeks before inspecting again (see below).
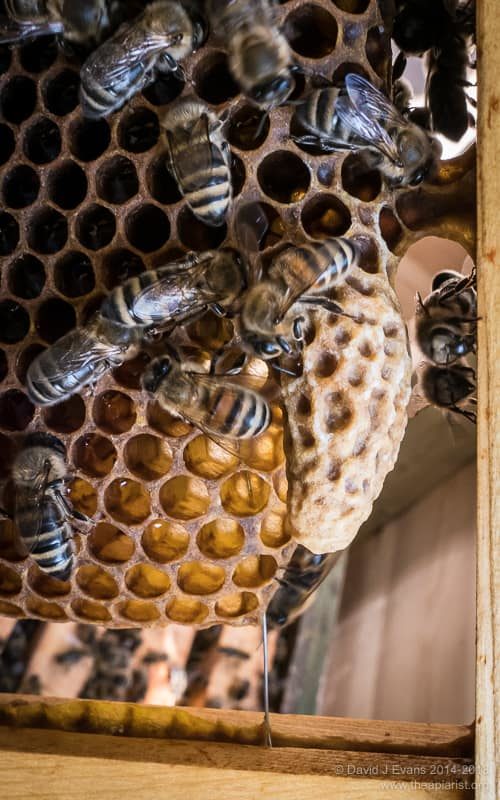
Sealed queen cell …
Notes
- The purpose of this return visit is to leave the colony with only a single queen cell.
- Because you removed the queen a week ago there are no other suitably aged young larvae or eggs for the colony to rear queens from. Therefore, the colony cannot produce multiple casts (swarms headed by virgin queens).
- The nucleus method of swarm control often leaves the queenless colony very strong {{10}}, if you leave more than one queen cell the colony may produce casts.
- What if the queen gets lost on a mating flight? Shouldn’t I leave two queen cells? Just to be on the safe side? No. If there’s a problem with the queen getting mated you’ve still got the old queen tucked away safely in the nuc box.
- Queen cells that are large, well shaped and sculptured have received a lot of attention from the workers and so presumably contain a well-fed and good quality queen {{11}}.
- Don’t be tempted to inspect the colony in less than two weeks. Ideally leave them for three weeks. If you inspect too early there’s a chance that the queen may not have had a chance to mate and start laying (so the point of inspecting is missed) or – worse – that she returns from her mating flight as you have the box open and is then confused or lost.
- Don’t meddle! Look for pollen being taken into the colony.
- Have patience. Bees have been around for a few million years. They would not be this successful if they weren’t pretty good at getting queens mated …
- Finally, particularly if the weather is poor, check the nuc as well. Ensure that it has sufficient stores. With reduced numbers of bees there’s a chance they could starve if the bees cannot forage (in which case the queen in the main colony is going to struggle to get out and mate as well).
Everynuc …
Pros and cons of the nucleus method of swarm control
With the exception of vertical splits almost all of my swarm control uses this nucleus method {{12}}. I particularly like the nucleus method because I have lots of nuc boxes ( ? ) and because it leaves manageable single-entrance hives rather than double height, multiple entrance stacks.
Almost all of the foraging bees are left with the original colony so the nectar-gathering capacity is not significantly reduced.
I almost never use the Pagden artificial swarm, largely because it ties up too much equipment.
Pros
- Limited amount of extra equipment needed – five frames and a nuc box … both of which are useful anyway.
- The old queen is kept safe and out of the way.
- Simple to implement, with just two visits at fixed times.
- Reasonably easy to understand the manipulations involved.
- No heavy lifting.
- You generate a nucleus colony to give away or to build up for overwintering.
Cons
- You need to find the queen.
- You need to find all the queen cells and use your judgement as to their age and quality.
- Unless you remove the nuc to an out apiary there’s a good chance lots of the bees will return to the original hive. Make sure you add enough at the start and be prepared to add more if you check the nuc after a day or two and find it heavily depleted.
- If you don’t want to make increase the nuc is a little more difficult to unite back with the original colony {{13}}.
Give it a go … what could possibly go wrong?
{{1}}: And so it’s tricky to remember when faced with half a dozen queen cells during an inspection on a hot May afternoon …
{{2}}: Except it doesn’t … you can make the queenright nuc up in a full hive, but use a dummy board to restrict their space. This isn’t ideal as the bees have lots of empty space to heat.
{{3}}: You can and I have, but the queenright colony risks getting overcrowded quickly, or – if the weather turns inclement – running out of stores.
{{4}}: The weather influences this … poor weather can delay swarming, but not queen cell development. Consequently, as soon as the weather improves many hives will swarm and all hell breaks loose!
{{5}}: If you intend to move the nuc to an out apiary more than 3 miles away just seal the entrance for travel – see notes below.
{{6}}: To preferentially add young bees you can gently shake the frame above the original hive to displace the flying bees, then firmly shake the adhering young bees into the nuc box. If you do it this way you’ll often have to shake three frames into the nuc.
{{7}}: Lots of books or websites use this phrase, but rarely say how to destroy the cell. Simply squish it flat between your thumb and forefinger, or tear it out with the corner of the hive tool.
{{8}}: Check the development diagram further up the page for confirmation of this timing.
{{9}}: These were started a few days after you removed the queen so are less well developed.
{{10}}: Particularly if some of the flying bees return from the nuc.
{{11}}: I don’t actually think there’s compelling scientific evidence that supports this conclusion but it seems to make more sense than choosing a oddly shaped or stunted cell!
{{12}}: This is the method I use for all colonies in the bee shed where vertical splits are not an option.
{{13}}: I usually do this using newspaper. Having removed the queen from the nuc I place an empty brood box on the original colony and transfer the nuc frame-by-frame into it. I then fill the spare space with a fat dummy, or simply squeeze the frames up with a dummy board.
Join the discussion ...