Vaporiser tips and tricks
Synopsis: Effective (i.e. minimum dose, maximum corpse count) oxalic acid vaporising involves getting the vapour into the hive and keeping it there. Here are some tips and tricks and the solution to those perished Sublimox seals.
Introduction
The crack IT gurus from Fujitsu and I have been manically busy over the last fortnight making the preparations to move this website to a new server {{1}}. There’s a lot to do, ~600 posts and almost a million words, all of which could probably distilled into a couple of punchy sentences:
Destroying queen cells is not swarm control.
and
Oxalic acid treatment must be done when colonies are broodless, which – in winter – is almost always before and not after the New Year
OK, there’s a bit more to beekeeping than that, but it’s a start.
As a consequence of all this geekery, gnashing of teeth and bemoaning the lack of standards or proper documentation, I’ve been a bit pushed for time. Therefore the post today is going to focus on one thing, hopefully relatively briefly.
Since it is now after the New Year your bees are likely to be rearing brood. Mine are. Slowly admittedly, just a small patch on the central facing frames perhaps, but enough to hide a few mites from the destructive impact of oxalic acid.
Sublimox vaporiser
I treated colonies with oxalic acid back in late November; other than occasionally checking the hive entrances are clear and the weight indicates there are sufficient stores in the box, there’s nothing much to do until early April {{2}}.
However, if they weren’t rearing brood, or if you want to treat with oxalic acid midseason when broodless (e.g. engineered by queen trapping, after swarming, during swarm control or for a recently occupied bait hive) then read on …
Delivery methods for oxalic acid
There are three approved methods to apply oxalic acid; trickling, spraying or vaporisation (which is also sometimes called sublimation).
If you read the instructions for Api-Bioxal – the only approved powdered oxalic-acid treatment in the UK and USA – these routes are described, albeit with little detail of the actual technique to be used.
In this post I’m going to only discuss vaporisation.
Trickling is easier, there’s less to get wrong, and it’s generally faster. It’s what I always recommend for beginners, and it’s the method I usually use. I’ve discussed it before (and might again).
Spraying is probably not appropriate for use in the winter as you have to remove frames, spray each side with the oxalic acid solution and return them to the hive … altogether too intrusive on a cold winter’s day. It’s also not an approved method for administering Api-Bioxal oxalic acid in the UK.
Vaporising is also easy, but there are numerous videos on the web of how not to do it, or at least how not to do it efficiently.
Active and passive vaporisation
Vaporisation involves the application of heat to powdered oxalic acid dihydrate, resulting of the conversion of the solid to a gas (vapour).
It’s sometimes called sublimation as this term describes the process a little more accurately:
The action or process of converting a solid substance by heating directly into vapour without liquefaction or decomposition, the vapour resolidifying on cooling. Also more widely: a process by which a substance undergoes a change of state from solid to gas (or vice versa) without passing through the liquid phase.
A small volume of powdered oxalic acid generates a large volume of oxalic acid vapour.
Therefore, if you heat the oxalic acid in a closed container you get an increase in pressure. If the container has a spout or nozzle the oxalic acid vapour is squirted out of the nozzle.
I term this active vaporisation. Maybe there’s a better term for it, but it helps discriminate between the two types of vaporisers on the market.
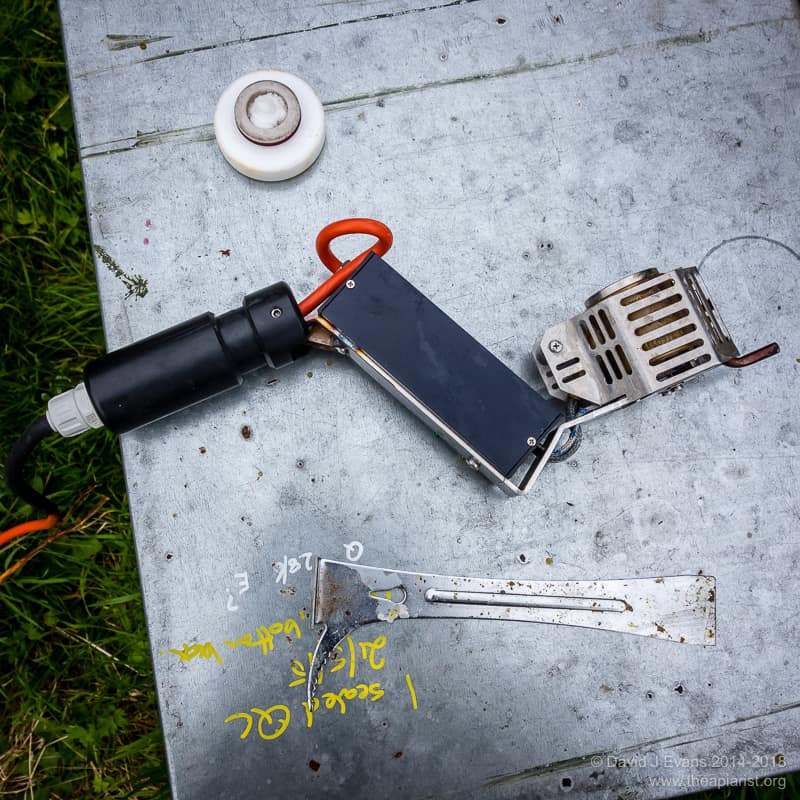
Active vaporisers include the Sublimox. This is the machine I have:
Sublime sublimation
There are several alternative active vaporisers and no, I’ve not tried the GasVap, the VarroaBlower or the BioxalSquirtalot. My clothes, car and attitude were once fashionable … and so was my vaporiser.
The alternative to active vaporisation is, you guessed it, passive. I use passive vaporisation to mean the heating (sublimation) of oxalic acid in an unsealed or open heater, like a small pan.
Passive vaporisers include the original Varrox vaporiser (and dozens of lookie-likie imitations):
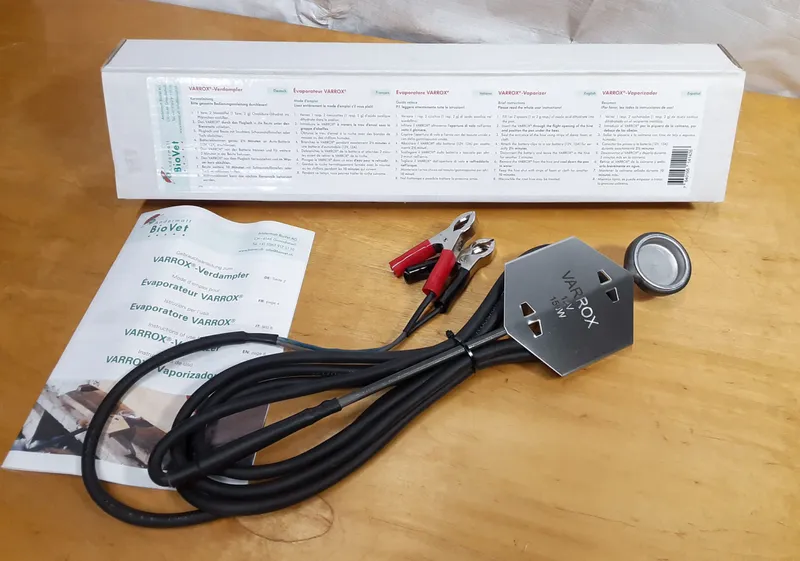
Varrox vaporiser
The majority of the rest of this post applies to vaporisation, whatever type of vaporiser you use. The final section is specific to the Sublimox and will save users a few quid a year in spares … you can thank me later.
Vaporise from the top or bottom?
The overall idea with vaporisation is that the oxalic acid vapour is distributed evenly throughout the hive and is deposited on all surfaces – wood, comb, bees etc. It then lingers for a few days, killing any (or up to ~95%) of the Varroa that come into contact with it.
Typically the vaporiser (passive-type) or the vapour (active-type) is introduced through the hive entrance i.e. below the frames. Indeed, the instructions for Api-Bioxal in the UK and US state:
Place the appliance through the entrance of the hive under the bees (UK)
or
Insert the vaporizer apparatus through the bottom entrance (US)
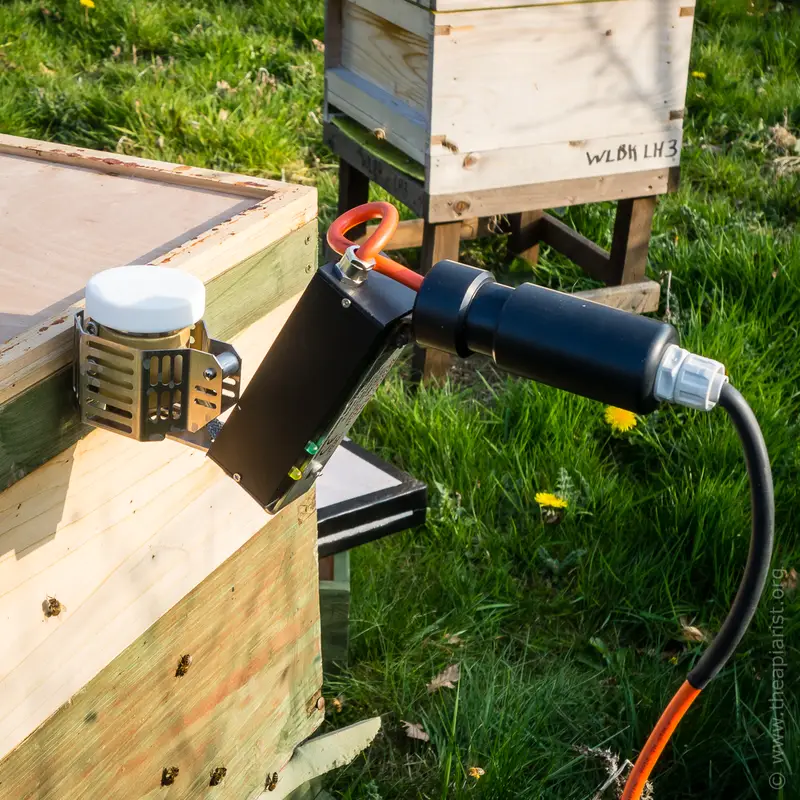
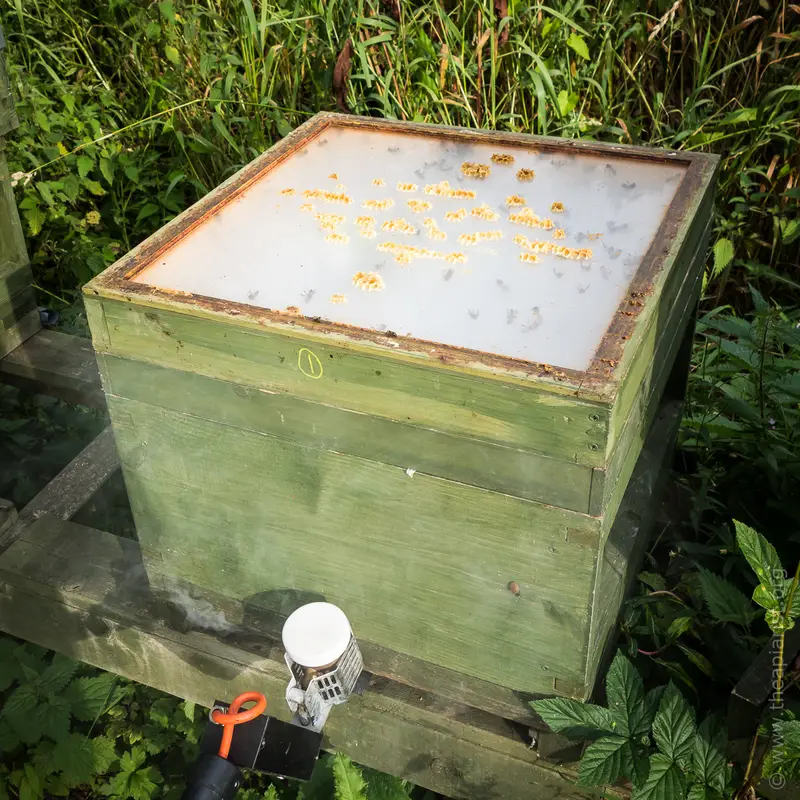
My floors have ‘L’-shaped entrances and so these cannot be used. Instead, all the floors have a small hole drilled through the rear, above the open mesh, allowing me to poke the nozzle of the Sublimox through to deliver the vaporised oxalic acid. The hole is usually plugged with a small piece of closed cell foam, or a twig, or twist of gaffer tape.
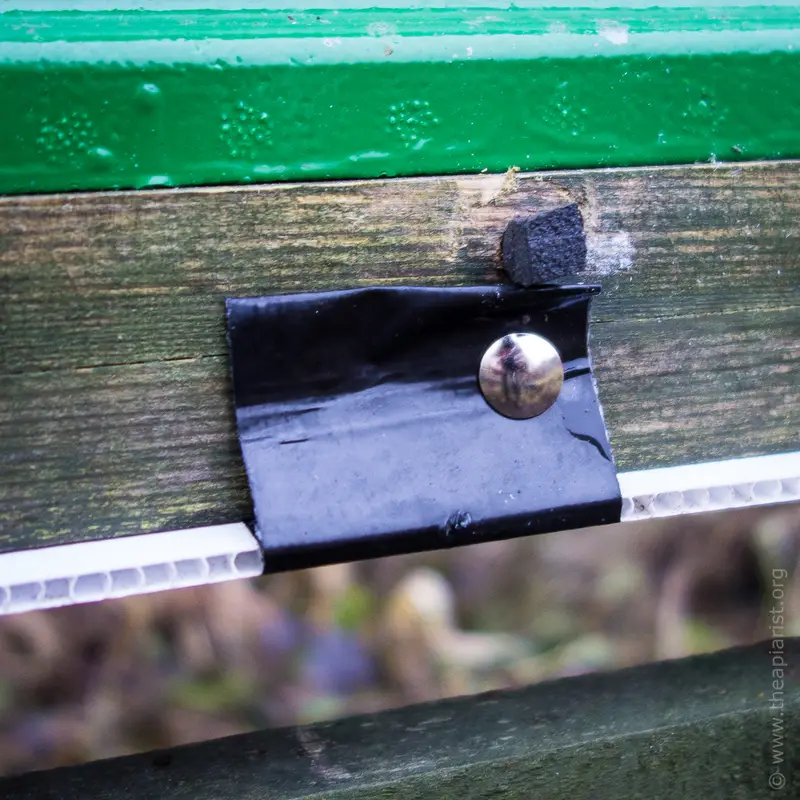
Foam plugged hole and pinned Correx tray
However, with an active vaporiser you can also vaporise from above the frames assuming the hive has a bit of ‘headspace’. Typically you can provide this with a 40-50 mm eke. My reversible insulated polycarbonate crownboards are also drilled (like the floors) for this purpose.
How do I know this works? I’ve done it and a little bit of oxalic acid vapour leaks out of the entrance.
I see no reason why a passive vaporiser could not also be used above the topbars of the frames with a suitable eke, modified to allow introduction of the – generally wider – heating pan. However, I’ve not done this … if you have, please comment on whether it works below.
Why would you need to do this?
The upper part of a vertical split perhaps, but there are other instances I can think of a well.
Without a suitable entrance, or a modification to the floor, it provides a workable alternative. It’s not clear to me why both the UK and US instructions are explicit about vaporising from below. Another case of poor documentation?
Seal the hive properly
Any oxalic acid vapour that leaks out of the hive is wasted.
There are dozens of YouTube videos showing hives being vaporised accompanied by dense clouds of oxalic acid vapour billowing out of upper or lower entrances, open mesh floors, poorly ‘mated’ surfaces between boxes or other gaps.
Aside from being wasted (remember that Api-Bioxal costs ~£0.80 per dose, depending upon the size of packet you purchase) all those clouds of oxalic acid are a potential danger to the beekeeper who is not wearing suitable PPE.
A lungful is a lot worse than unpleasant.
Keep the vapour IN the hive
So … seal the hive properly, and leave it sealed for at least 5 minutes after treating to allow all of the vapour to settle.
Open mesh floors
Use a tightly-fitting Varroa tray underneath the open mesh floor to minimise the escape of oxalic acid vapour.
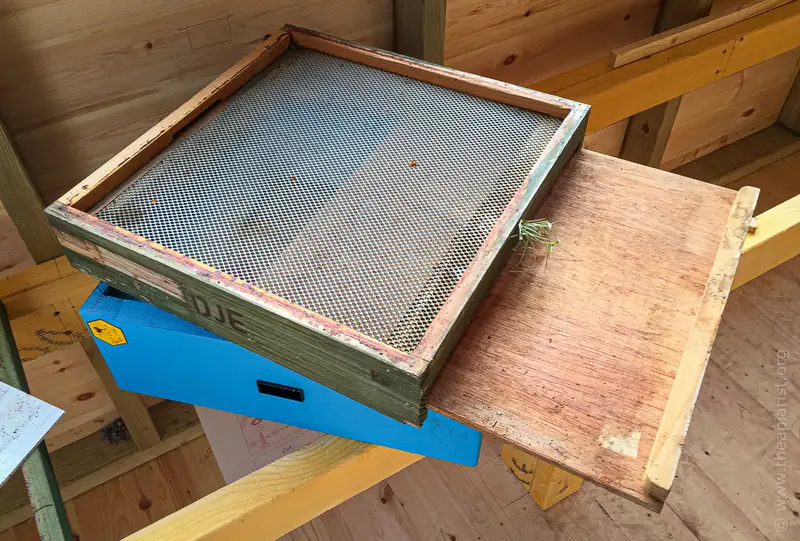
Excellent Pete Little floor
The best floors I have – made by the late Pete Little – have a tray that slides into grooves in the floor runners. These are excellent. Alternatively, use a sheet of Correx pinned or taped underneath the open mesh floor (see earlier photo).
I know some beekeepers vaporise through the open mesh floor. However, in my experience a lot of the oxalic acid is deposited on the cold mesh and so does not enter the hive.
Entrances
Any part of the entrance not being used to accommodate the vaporiser should be sealed.
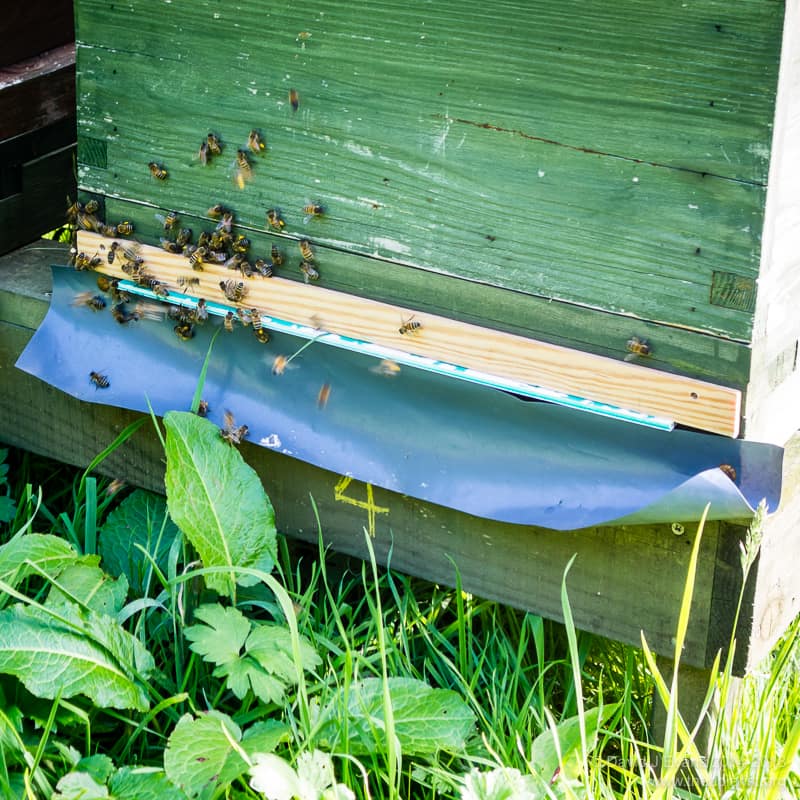
Entrance block in use …
I use an L-shaped wooden entrance block that is a tight fit between the Correx landing board and the floor, providing a (nearly) gas-tight seal. As an aside, these are also excellent when moving hives.
With passive vaporisers (which usually have a broad pan ‘end’ and a narrow handle/wand) plug any gaps around the wand with a foam block or cloth.
Theses comments apply whether we’re talking about hive entrances, or the entrance through which the vaporiser is inserted in an eke above the hive body.
Thorne’s Everynuc
All of the above applies to poly nucs as well. However, the open mesh floor is often difficult to seal and getting the vaporiser in the entrance can involve a little ingenuity.
Remember … the vaporiser will readily melt a poly nuc.
Maisemore’s nucs have a small entrance and a recessed open mesh floor. If you can find a solution to blocking the latter you might be able to modify one of their 14 x 12 ekes to vaporise from the top.
One of the benefits of Thorne’s Everynuc is that it is easy to vaporise with oxalic acid.
Firstly there is a reasonably tightly fitting Varroa tray.
Secondly, the entrance is so cavernous you could almost slide the Varrox and the 12 V battery you power it with inside {{3}}. As long as you are careful to avoid contact with the poly, there’s sufficient space under the brood frames to fit the vaporiser pan.
It’s even easier with the Sublimox.
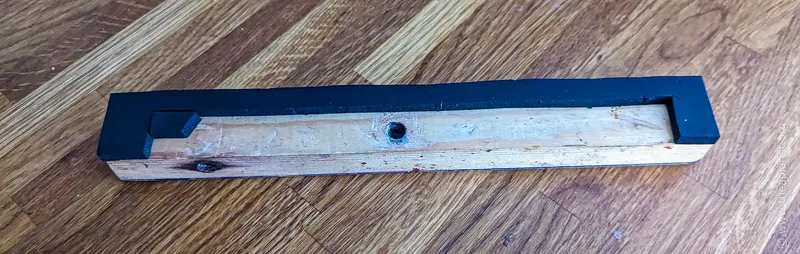
Everynuc vaporiser entrance adapter
I use a lovingly engineered lump of wood with a hole drilled through it to, a) block the entrance, and b) deliver the oxalic acid vapour. The (reasonably) gas-tight seal around the entrance is aided by a thin strip of squidgy neoprene foam on the hive-side of the wood. It works very well.
Wait
It takes several minutes for the oxalic acid vapour to settle onto the surfaces within the treated hive.
Don’t be in too much of a rush to unseal the hive.
The longer you wait – within reason – the less vapour will be wasted and the less the colony will be disturbed.
If you remove the entrance block too soon it’s not unusual to have several clearly disturbed bees exit, along with variable amounts of vapour. Instead, move on to treat the next hive, and the next … and only then go back and remove whatever it was you used to seal everything up with.
With no escaping vapour and no bees tumbling out of the entrance you can be pretty certain the maximum dose of goodness (unless you’re a Varroa) remains in the hive.
The bees will thank you for it.
The mites will be less grateful.
Clustered or not?
In very cold weather, when the colony is tightly clustered, I prefer to treat with trickled oxalic acid solution. My justification – made with zero evidence – is that the vapour is less likely to get down to the middle of the cluster than the solution is.
I usually switch from vaporising to trickling at 6-7°C, though I’ve vaporised at lower temperatures and trickled at higher … just not in a sufficiently controlled way that I could say one works better than the other.
Actually formally testing this is not straightforward (you’d need to know Varroa loads before and after treating, with matched colonies in a similar state etc.) so I prefer to stick with what’s worked before.
Summer lovin’ treating
Freshly hived swarms, whether newly arrived in a bait hive or dropped into a skep when bivouacked in a tree, predominantly contain the younger bees from the swarmed colony. Consequently, because Varroa mainly associates with younger bees, these swarms can carry a high mite load.
I therefore routinely treat them within a few days of hiving them … ‘few’ meaning within the first week so there is definitely no sealed brood present.
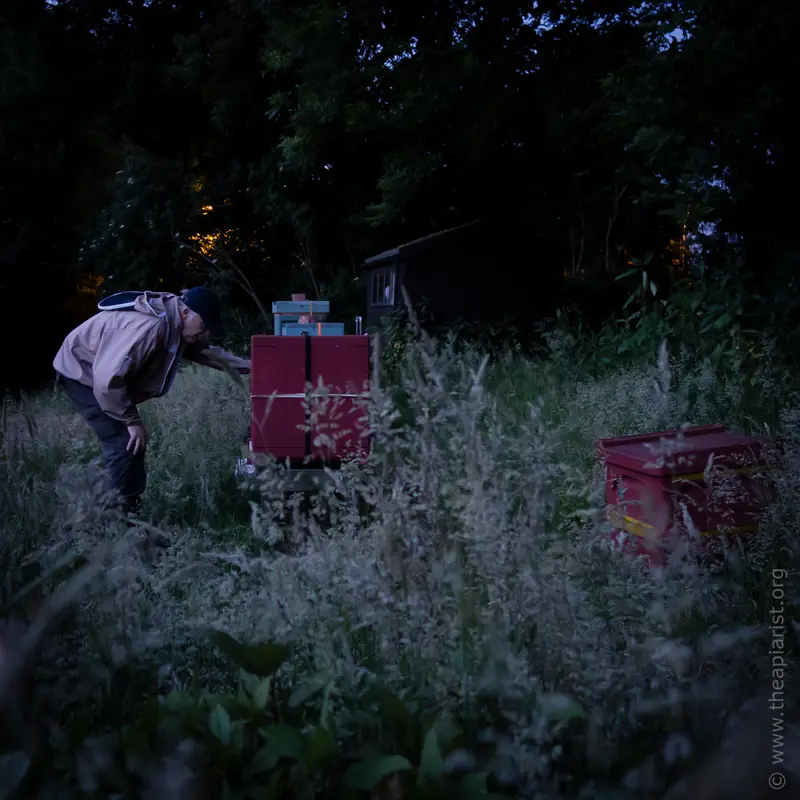
Late evening in the apiary
I’ll often vaporise these swarms late on a summer evening when I can be sure all the bees are ‘at home’. Doing it like this ensures all bees are exposed, but is also less disruptive to the colony.
There’s an added advantage … if the swarm is actually a cast, with a virgin queen, I can be certain she is also in residence. My bumbling around outside with the vaporiser will not disturb her returning from an orientation or mating flight.
I’ve not trickle treated at night. The bees do not like the crownboard being lifted after dark. If you do, wear a red head torch and a full beesuit!
Glucose
In comparison to pure oxalic acid dihydrate, the Api-Bioxal sold in the UK is a sub-standard product for vaporising because it contains glucose. It’s licensing in this formulation was a disservice to beekeepers and beekeeping. However, it’s the only approved product for vaporisation.
Them’s the rules.
In the US the Api-Bioxal is a different product and only contains 3% of ‘impurities’ (presumably some type of silica to keep it free-running) and appears to lack glucose.
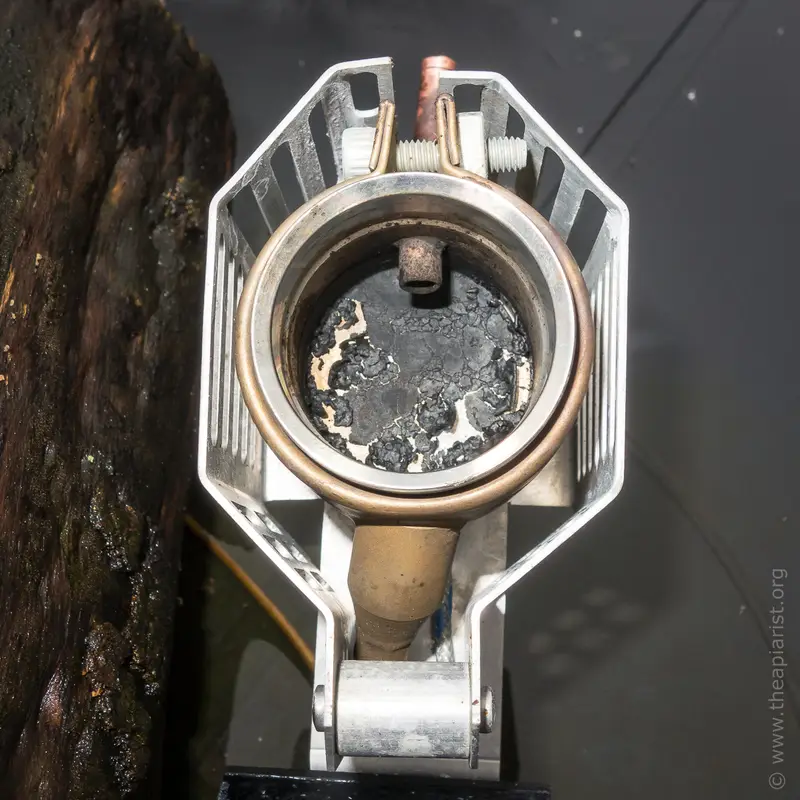
Sublimox + Api-Bioxal = caramel
Glucose caramelises at 150°C, well below the sublimation temperature of oxalic acid. Therefore Api-Bioxal leaves a blackened residue of caramelised, burnt glucose in the vaporiser pan.
You can avoid too much scrubbing/scouring of the vaporiser pan after use if you line it with aluminium foil.
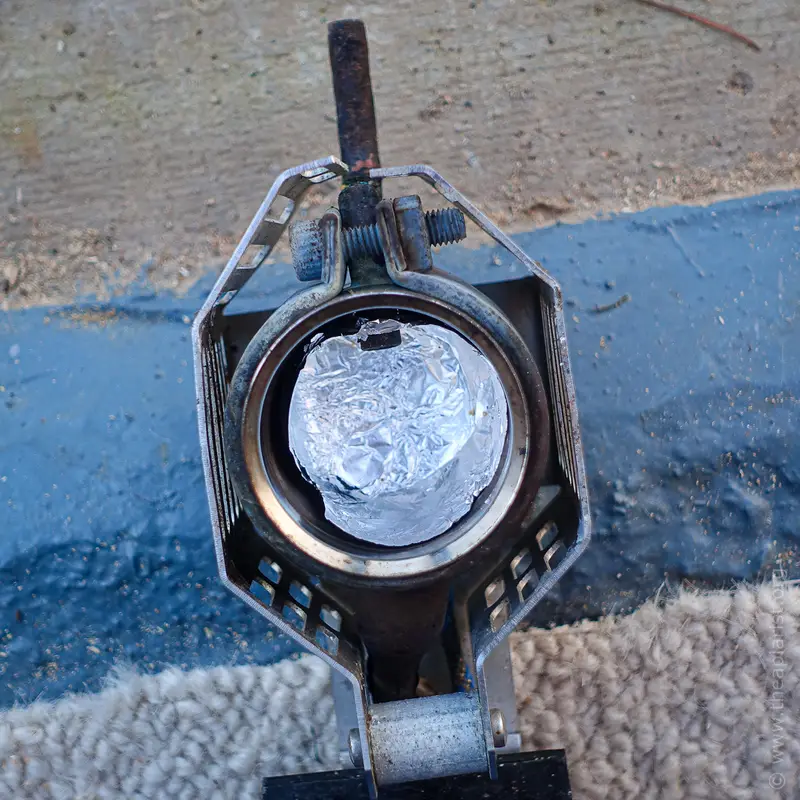
Foil lined pan
It’s not an ideal solution and probably works better with a pan-type passive vaporiser than my Sublimox, but it’s better than nothing. To work efficiently the foil needs to be in close contact with the heated pan/bowl. If it isn’t the heating is uneven and the vapour production much slower … if you don’t want to break the rules, persevere.

Most of the caramel is contained
If any US readers have had issues with residues after vaporising Api-Bioxal I’d be interested to hear from them.
Sublimox ‘O’ rings
My Sublimox has been great, working without issue for years. However, it still needs some periodic maintenance and TLC.
The delrin (?) white plastic cups have an ‘O’ ring seated in a recess around the upper rim which provides a gas-tight seal between the cup and the heated metal bowl. 230°C and a highly acidic environment is harsh on these ‘O’ rings and they eventually perish, usually splitting at the most inconvenient time.
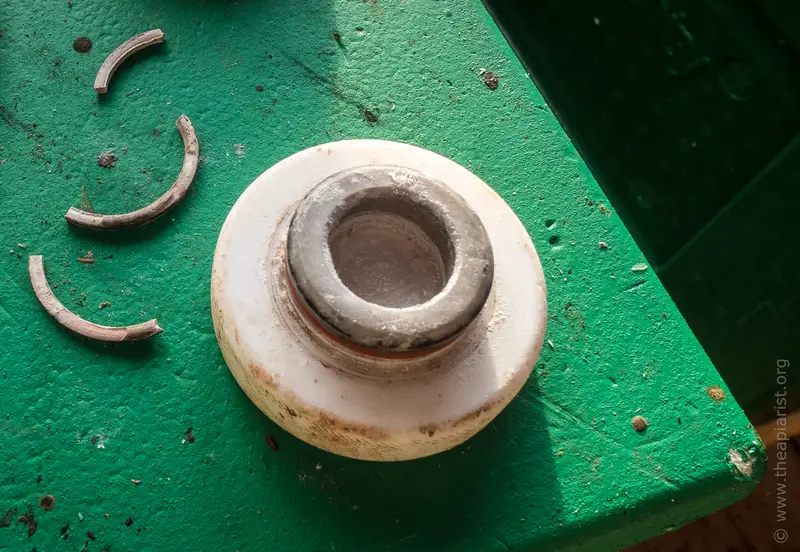
That’s blown it
Inconvenient because you have another dozen hives to treat and/or the beekeeping suppliers are out of stock.
I’ve previously looked at replacing them with ‘O’ rings sourced from engineering-parts supply firms and – thanks to prompting by ‘regular reader’ Elaine – have finally got round to sourcing the correct size.
‘O’ rings are sold in a bewildering range of sizes, usually expressed in terms of the cross-section and inner diameter. Some of the sizes are metric (e.g. 4mm x 26 mm) and others are described as Imperial, though – confusingly – often sized using metric measurements.
And, to add a little more confusion, often these measurements are accompanied by an ‘easier to say though less informative’ British Standard (BS) number.
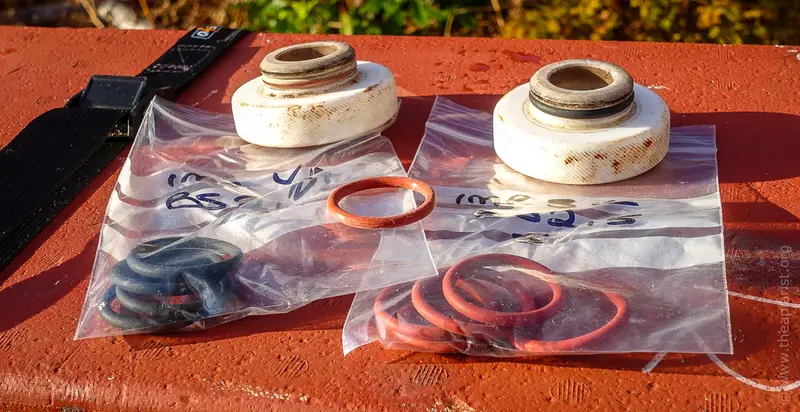
BS215
For the Sublimox you need BS215.
These are ‘Imperial’ ‘O’ rings with a cross-section of 3.53 mm and an inner diameter of 26.57 mm.
I arrived at these numbers by a combination of trial and error, accurate measurements using digital callipers, and by buying and using them.
Other sizes don’t work. Too small and the seal is not gas tight. Too large and the plastic cup does not fit into the metal bowl … again rendering the seal not gas tight.
Been there, done that, got the T-shirt.
Silicone and Viton
The manufacturer-supplied ‘O’ rings are made from silicone; red, reasonably flexible, slightly shiny in appearance. They currently cost £2 each from Abelo (plus postage). I’ve not searched for better prices.
I get through a couple of these every year or so.
You can buy silicone replacements from eBay from a variety of suppliers. I’ve purchased from sealsuppliesuk who sell 10 for £4.31, or as little as 17 p each for 50 (including postage). As far as I can tell these are indistinguishable from those sold by Abelo as ‘official’ Sublimox spares.
Alternatively I’ve now also bought and used BS215 ‘O’ rings made from Viton from the same eBay supplier; £8.60 for 10, or 53 p each for 50.
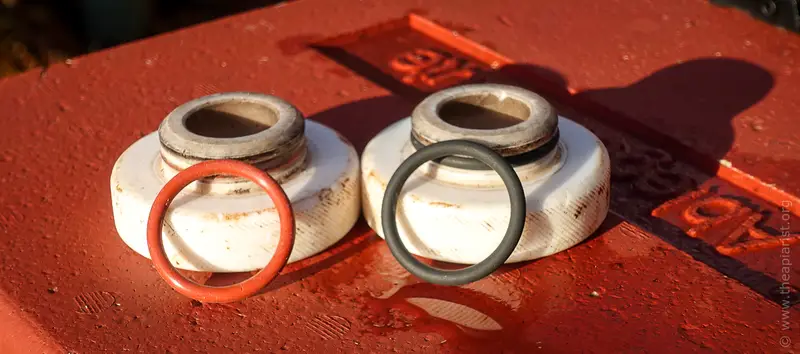
Silicone (left), Viton (right)
Viton is a Dupont brand name (now owned by Chemours) for an FKM fluoroelastomer.
I bet you’re pleased you asked.
Viton is black, a little less flexible or compressible than silicone, but BS215 ‘O’ rings fit perfectly.
Viton has a higher effective upper operating temperature(PDF) range than silicone (230°C) and exhibits increased chemical resistance; this seemed like a good idea since they are exposed to the organic acid vapour.
Time will tell whether they last longer than the silicone ones, but so far they appear to work just as well.
I doubt the business that Abelo might lose on account of this post will threaten their profits … particularly since they’ve been out of stock for weeks.
Fill your boots
{{1}}: At least it sounds like crack.
{{2}}: Or a week or three earlier if you are in more southern latitudes.
{{3}}: Don’t try this at home.
Join the discussion ...