Preparing honey
Whisper it … Christmas is fast approaching.
It may seem premature to be discussing this at the end of November, but there are some things that require a bit of preparation.
I presume you’ve already made the Christmas cake? {{1}}
I sell more honey in the few weeks before Christmas than almost any other time of the year … and I also jar a lot as gifts for family and friends.
Jarring {{2}} honey is one of those topics that hardly gets a mention on these pages, yet is one of the few ‘real’ beekeeping activities we can do in depths of winter.
Although I’ve written a few posts about jarring honey in the past, they’re scattered around the place and are several years old, so it seemed timely to revisit the subject again.
Quality and quantity
Let’s deal with these in reverse order so you appreciate the scale of things.
The average number of colonies managed by UK beekeepers was about 5. There are about 45 to 50 thousand beekeepers managing a quarter of a million colonies, with a few tens of thousands over that number managed by a small number of bee farmers {{3}}.
BBKA surveys report the average honey production per hive varies from ~8-31 lb per year {{4}}. Let’s assume, as I’ve done previously, that the ‘average’ hive produces 25 lb, so the ‘average’ beekeeper generates 125 lb of honey a season.
However, these averages probably obscure the real distribution of hives and honey. The majority of BBKA survey respondents run only 1-2 colonies, with others running ten or more. The real distribution of hives therefore resembles a U shaped curve.
More experienced beekeepers, running more colonies successfully, will produce disproportionately more honey. Annual averages of 50 – 75 lb of honey per colony are readily achievable with good management and good forage. Honey production is more likely to resemble a J shaped curve.
I’m a small scale beekeeper with 10-12 (honey) production colonies and the same number again for work, queen rearing etc., most of which usually produce little honey.
In a good year I produce enough honey to make jarring and labelling a bit dull and repetitive, but not enough to justify anything more automated than my trusty and long-suffering radial extractor.
No fancy uncapping machine, no automated honey creamer, no computer controlled bottling line and no bottle labeller.
In my dreams perhaps … but in reality just about everything is done manually.
Whether it’s 10 lb or 1000 lb anything I discuss below could be done using the same manual methods, and with the same overall goal.
And that goal is to produce a really top quality honey – in appearance and flavour – that makes an attractive gift or a desirable purchase.
Extracting
In Fife there are two honey harvests. Spring, which is predominantly (though not exclusively) oilseed rape (OSR), and summer which is much more variable. Some years we get an excellent crop from the lime, in other years it’s the more usual Heinz Honey containing 57 varieties of hedgerow and field nectars.
Heinz Honey
My production colonies are in two main apiaries and I extract each separately. That way, distinctive nectars that predominate in particular areas remain separate.
If customers want identical honey, jar after jar after jar, they can buy any amount of the stuff – often at absurdly cheap prices – in the supermarket.
Conversely, if they want a unique, high quality product they buy locally produced honey and expect variation depending upon the apiary and the season.
I run the extractor with the gate open, through coarse and fine filters, directly into buckets for storage. Warming the supers over the honey warming cabinet makes extraction and simultaneous filtering much easier.
I almost never get single crop honey and don’t harvest mid-season.
If you look at different frames it’s not unusual to have dark honey stored in one and lighter honey elsewhere, or as two distinct areas within the same frame. I know I’m missing the opportunity to produce some wonderfully distinct honeys, but pressure of work, queen rearing and a visceral loathing for cleaning the extractor restricts me to two harvest per season.
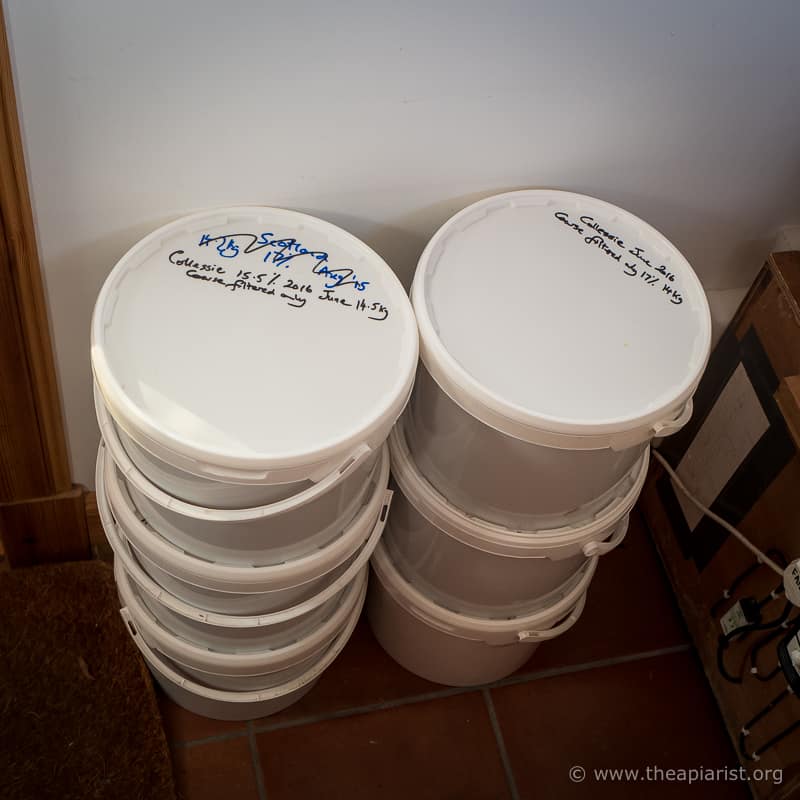
~90 kg of honey from my home apiary
Wherever possible entire supers are extracted into single 30 lb plastic buckets. Each is weighed, and the water content measured using a refractometer. Both numbers are written on the bucket lid and in my notes (an Excel spreadsheet). This becomes relevant when preparing honey for jarring.
Storage and crystallisation
Honey is stored in a cool location (~12-15°C), sealed tightly to avoid absorbing water from the environment.
High-glucose early season OSR honey crystallises rapidly. It usually sets rock hard well within a month of extraction.
Summer honey is much more variable and often takes many months to fully crystallise. I’ve just checked a few buckets that were extracted in early August and all are still liquid. However, if you looked carefully {{5}} you would almost certainly find micro-crystals already present.
All good quality honey will eventually crystallise. Tiny impurities – which are different from contaminants – such as pollen grains, act as nuclei onto which the sugars attach. These tiny crystals sink through the viscous honey to the bottom of the bucket.
Over time the honey at the bottom of an undisturbed bucket can be cloudy or gauzy in appearance with diffuse crystals. For the optimal appearance of the final bottled product these will need to be removed.
Clear summer honey
Clear summer honey is warmed and fine filtered again before jarring. I usually filter it through a nylon straining cloth. If you don’t do this then there’s a good chance it will crystallise relatively quickly in the jar.
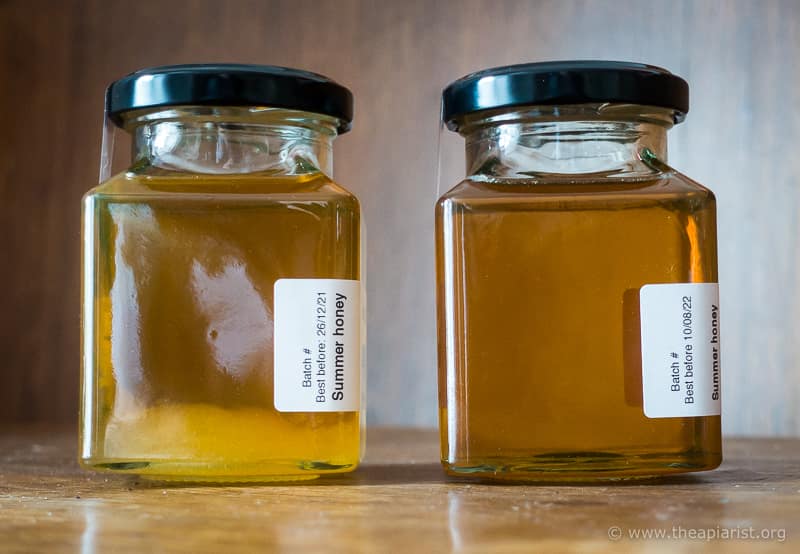
Clear and not so clear honey
This spoils the appearance (and texture) but has no effect on the flavour.
It will still sell, but it will look less appealing, particularly to customers who are used to the homogenous unwavering bland sameness of supermarket honey.
Soft set honey
Well prepared soft set or creamed honey is a premium product. The fact that it can be prepared from large quantities of predominantly OSR honey is a bonus.
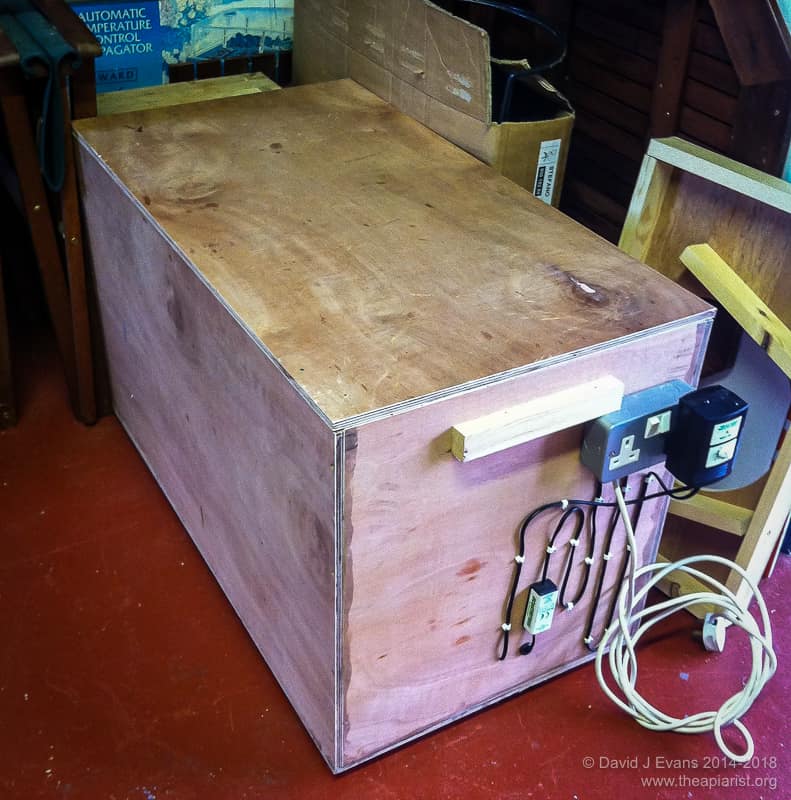
Honey warming cabinet …
Many customers automatically choose clear honey. There’s certainly a greater demand for it. However, it’s worth always having a tester jar of soft set available. Disposable plastic coffee stirrers are an efficient way of sampling the tester and avoid the coarseness on the tongue of wooden stirrers.
A surprising number who try soft set honey, buy soft set honey … and then return for repeat business 🙂
The key points when preparing soft set honey are:
- Have a suitable soft set ‘seed’ prepared. You can use shop bought for this, or grind a crystallised honey in a pestle and mortar {{6}}. You need ~10% by weight of the seed.
- Warm the set bucket of OSR honey sufficiently to melt the crystals. The honey should be clear and, when tested, leave no grittiness on the tongue. Mix periodically to aid heat transfer. I do this in my honey warming cabinet, but a water bath is much more efficient.
- Cool the OSR honey to ~36°C and warm the seed honey to the same temperature. Do not melt the seed … you’re dependent upon the crystal structure of the seed to create the final product.
- Add the seed to the melted OSR and mix thoroughly.
- Allow the mixed honey to gradually cool to ~12-14°C, with regular stirring (at least twice a day). You can do this with a spoon, but as the honey crystallises and thickens it becomes very hard work. An electric drill and spiral mixer works well {{7}}. This mixing may take several days.
- Warm the honey to ~36°C and jar it {{8}}.
- Keep some of the seed for the next batch. If you’re jarring more in the next week or two, just leave 2-3 lb in the bucket. If longer, I store it in clip-seal containers.
Small batches
Honey keeps for years if stored in buckets at a cool temperature.
I tend to bottle honey in relatively small batches. This allows me to be certain the honey will look its very best for the short time it sits on the shelf.
This applies whatever the location of the shelf – by you door, if selling directly to the public, or in an artisan cafe or food store if selling via a third party.
Or even if the shelf is in your cupboard before you give it away to friends or relatives.
Preparing one or two buckets at a time for jarring makes sense. It’s a manageable number of jars (no more than 120 x 227g, or a smaller number of 340g or 454g jars) so I don’t die of boredom when subsequently labelling them. That number also fits into the dishwasher and on the worktop without too much of a problem.
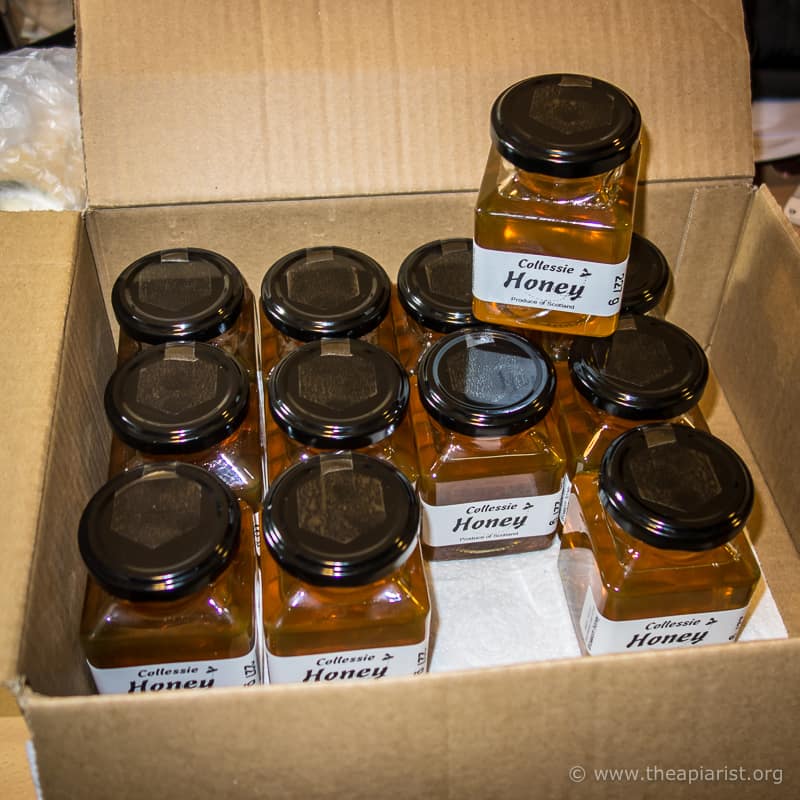
Ready for delivery
I use the stored buckets in order of decreasing water content. Whether this makes a difference I’m unsure as all of my stored honey is below the 20% cutoff when measured. Interestingly, some seasons produce honey with consistently low water content. Spring 2018 was ~2% lower than this season averaged across 10-15 buckets.
Bottling it
I wash jars prior to using them and only use brand new jars. When jarring honey I dry and heat the jars in a 50°C oven so that, by the time they’re under the honey tap, they’re still warm.
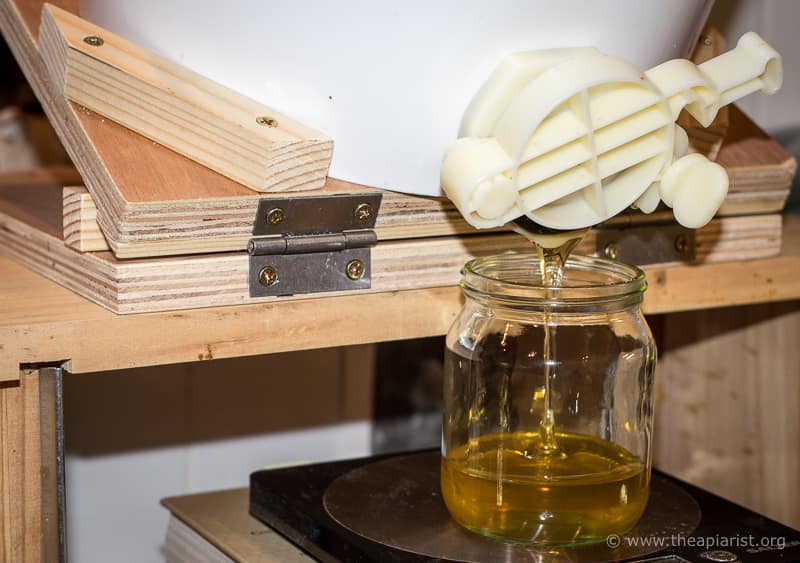
Honey bucket tipper
The actual process of bottling honey is made much easier with my honey bucket tipper. I built this several years ago and it’s been used for thousands of jars in the intervening period. Amazingly, for something I built, I got it almost perfect from the start {{9}}. I’ve changed the size of a couple of the wedges to tip the bucket, but that’s about all.
Almost always I can process the full bucket of honey, leaving only one final (incomplete) jar with the remnants of the bubbly scum from the surface of the honey.
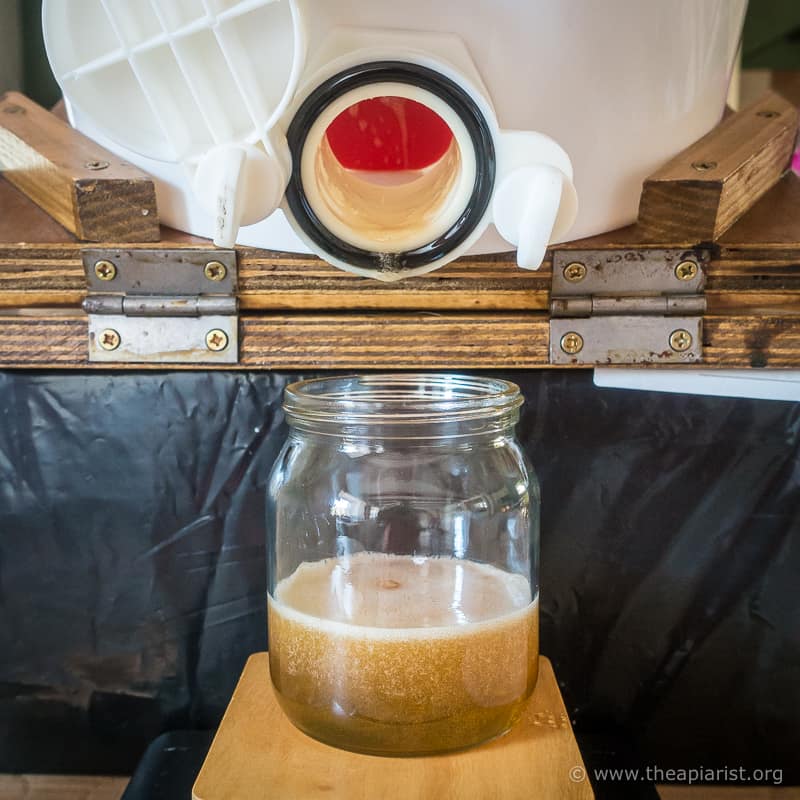
The dregs
These are the jars I use for honey to go with my porridge 🙂
It’s worth noting that you can remove excess bubbly scum from a bucket by overlaying it with a sheet of clingfilm, then swiftly and carefully removing the clingfilm. Take care to avoid drips. It requires some deft handwork, but is remarkably effective in leaving just jarrable honey in the bucket.
Settling in, or out
Inevitably the process of jarring honey can introduce bubbles. Even if you take care to run the honey down the pre-warmed side of the jar you can end up with very obvious bubbles in clear honey.
And invisible bubbles in the opaque soft set honey.
These bubbles reduce the attractiveness of the finished product.
I therefore add lids to the jars and return the honey to my honey warming cabinet set at ~35°C for a few hours. The bubbles rise to the top and … pfffft … disappear, leaving the honey bubble free and crystal clear.

Settling out
Except for soft set honey of course. This is full of tiny crystals which produce that magic “melt on the tongue” sensation. However, I think that this final settling period helps minimise frosting in soft set honey.
After a few hours in the warming cabinet the jars are removed, allowed to cool to room temperature and labelled, ready for sale or gifting.
Labelling
The honey labelling regulations are a minefield. I’m pretty confident my labels meet the requirements but – before you ask – will not provide advice on whether yours do 😉 Mine carry a unique batch number, the country of origin, a best before date (two years after the date of jarring), the relevant contact details and the weight of the metric jar contents in a font that is both the right size and properly visible.
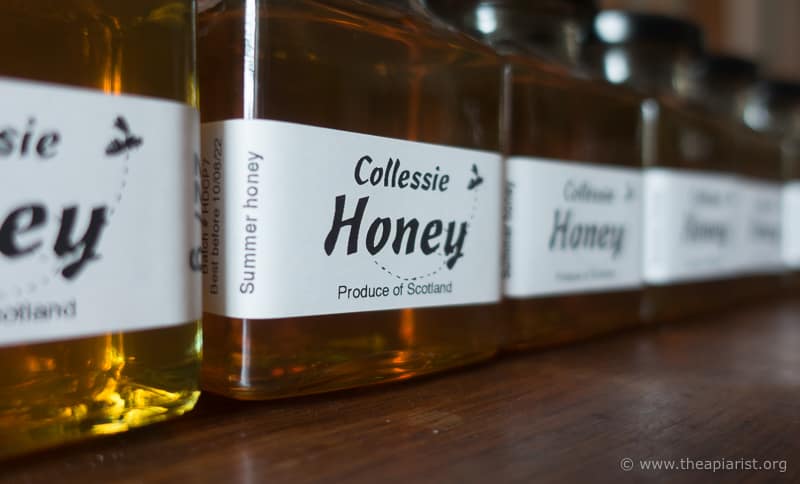
Honey label
All my labels are home printed on a Dymo LabelWriter. I’ve got nothing to hide and want the customer to see the honey, rather than some gaudy label covering most of the jar. This works for me, but might not suit you or your customers. I’ve certainly not had any complaints, either from shops, or customers who buy from the door as gifts for their friends or family, and plenty of people return time and again for more.
I always add an anti-tamper label connecting the lid to the jar. Even purchased in rolls of 1000 at a time these are the most expensive of the three labels – front (with weight and origin), anti-tamper and rear (batch number, best before date and QR code). DIY labels cost less than 8p/jar in total.
It should go without saying that the outside of the jar should not be spoiled with sticky fingermarks! If you use black lids, as I do, it’s worth wiping them before attaching a clear anti-tamper seal to avoid fingerprints being preserved forever under the label.
Provenance
The batch number is a unique five character code that allows me to determine the jar weight, bucket (weight and water content), apiary and season/year. If there was a problem with a particular batch {{10}} this would help recover any sold through a shop. The information is vaguely interesting to me; for example, looking back over the records it shows the inexorable rise in popularity of the 227 g jar as the proportion of these used increases year on year.
However, particularly in times of social distancing and when selling through a third party, this information on the provenance of the honey can be of interest to customers.
How many times did you sell a jar ‘at the door’ and get into a long conversation about whether the long avenue of limes north of the village produced nectar this year? Or whether the bees from my apiary could have pollinated the apple trees in the customers orchard?
Remember … many of the people who purchase local honey, or indeed any honey not carrying the dreaded Produce of EU and non-EU countries warning label, care about the origins of their food or the gifts they are making.
I’ve therefore been exploring linking the batch number to an online information page for the honey. By scanning a QR code on the jar {{11}} the customer can tell where and when the honey was produced. They can read about the area the bees forage in, the types of forage available and even the pollen types present in the honey. New Zealand beekeepers selling specialist manuka honey have been doing this sort of thing for a few years. My system is not ready for ‘prime time’ yet, but all the coding is done to get the information in and out of the backend database. Some customers already use it.
Even if the customer has no interest whatsoever, I still need to record the batch number, so it’s an example of added value to what I hope is perceived as a premium product.
{{1}}: With apologies to US readers who are only just getting over the excesses of Thanksgiving.
{{2}}: Jarring or bottling? I use the terms interchangeably, but acknowledge that the glass container that you sell honey in is a ‘jar’ and the glass container you buy beer in is a ‘bottle’.
{{3}}: Recent BBKA data reports they have a membership of ~25,000 who manage a total of ~120,000 colonies (i.e. reassuringly close to 5 each).
{{4}}: 2014 – 2019 data.
{{5}}: Which I didn’t … all I did was prod the side of the bucket to see if it flexed. STOP PRESS Since writing this in the first draft I’ve opened one of these buckets for jarring – sure enough, the honey was full of tiny little crystals.
{{6}}: I recommend you do this rather than buy the seed. It’s then all your honey and it only takes a short time.
{{7}}: If you want to do it entirely by hand you could use a honey creamer but I get better results and more consistent mixing with a corkscrew.
{{8}}: At lower temperatures the soft set will not flow properly and jarring takes an interminably long time.
{{9}}: As compared to many things I never get right at all.
{{10}}: Something that’s never happened, but honey labelling regs require a batch number or some way of uniquely identifying the honey. Some use a best by date, but I often jar several honey types/jar sizes on a single afternoon, all sharing the same best by date.
{{11}}: Simply using a mobile phone camera, so potentially even before making a purchase.
Join the discussion ...