Split boards
Since moving to Scotland my DIY activities have been restricted – by lack of time, by lack of space and by lack of any major shortages in the equipment I use. However, a couple of spare sheets of Correx became available after some non-bee projects and I decided to use them to knock up a few split boards for swarm control and requeening this season.
As an aside … I love Correx. It makes great roofs, temporary floors and landing boards.
Split boards are simple square boards with beespace both sides and – usually – a single entrance. With an entrance door (rather than a simple gap) closed they can double up as crownboards or can be used to stack supers late in the season.
They can also be built with mesh panels to allow the warmth and smell of the lower colony to spread through the hive. However, in this instance these were to be about as simple as possible so I omitted the mesh.
Opposing entrances
For additional flexibility you can provide two opposing entrances with doors. With these the split board is starting to look dangerously like a cut down Snelgrove board. The vertical split method I use involves turning the hive 180° on the seventh day. With opposing entrances on the split board (and a corresponding double-entrance floor) it’s possible to avoid any heavy lifting – simply close the front door and open the rear door on the split board and vice versa on the floor.
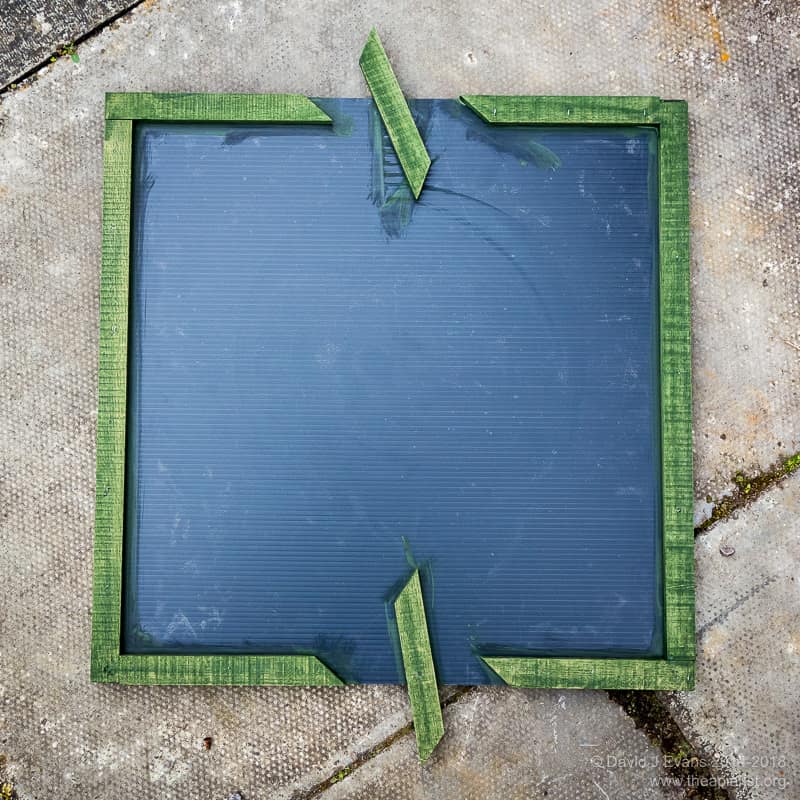
Split board …
Assembly instructions
Really? How simple could it be?
I don’t have a table saw (or space to hide store it) so asked the nice people at Haldane’s in Glenrothes to generate some 20mm x 9mm strip wood. They did this from oak (!) offcuts for about a tenth the price one of the DIY chain stores would charge for equivalent softwood. The latter would have been preferable, not least because I got some wicked splinters from the oak, but it was what they had to hand and would have otherwise gone to the wood burner.
The Correx I had was 4mm thick. I’d have preferred 6mm, but as this was ‘spare’ from another project, I had to make do. I was originally going to use two sheets arranged at 90° to each other to provide rigidity. However, the first single-sheet prototype I built was plenty rigid enough so I stuck with that design.
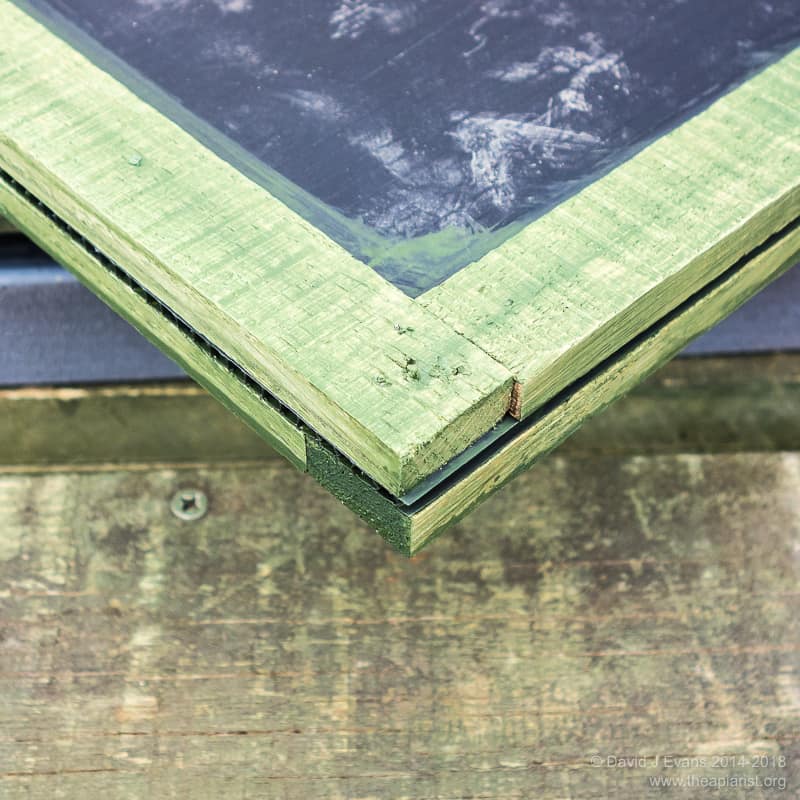
Corner detail …
I cut the oak strips to 44cm in length, arranged them around the periphery of the 46 x 46cm Correx sheet and nailed all but two – on opposing sides of the top face – in place. ‘Overlap’ the corners (see image right) to provide additional strength. It’s worth noting here that my nail gun was only just strong enough to penetrate ~20mm of oak. The few nails that protruded were driven home with a hammer, brute force and a lot of ignorance. With care, frame nails (gimp pins) can easily be used instead.
Doors
In preparing the wood for the last two sides I made two slanting cuts to create the ‘doors’, nailed everything down and added a simple hinge from a gimp pin. It’s worth noting that it’s much easier to place the door ‘hinge’ (pivot?) centrally, rather than at one end of the door. Firstly, there’s less chance the end of the door will foul the adjacent wood. Secondly, to open the door you just need to push one end inwards with the hive tool; there’s no need to add a handle (a screw or nail that protrudes) to open the door outwards. This means there’s nothing to protrude and catch on clothing, on adjacent stacked boxes or on the lower lip of the roof when you’re using it as a crownboard. Finally, the bees won’t care.
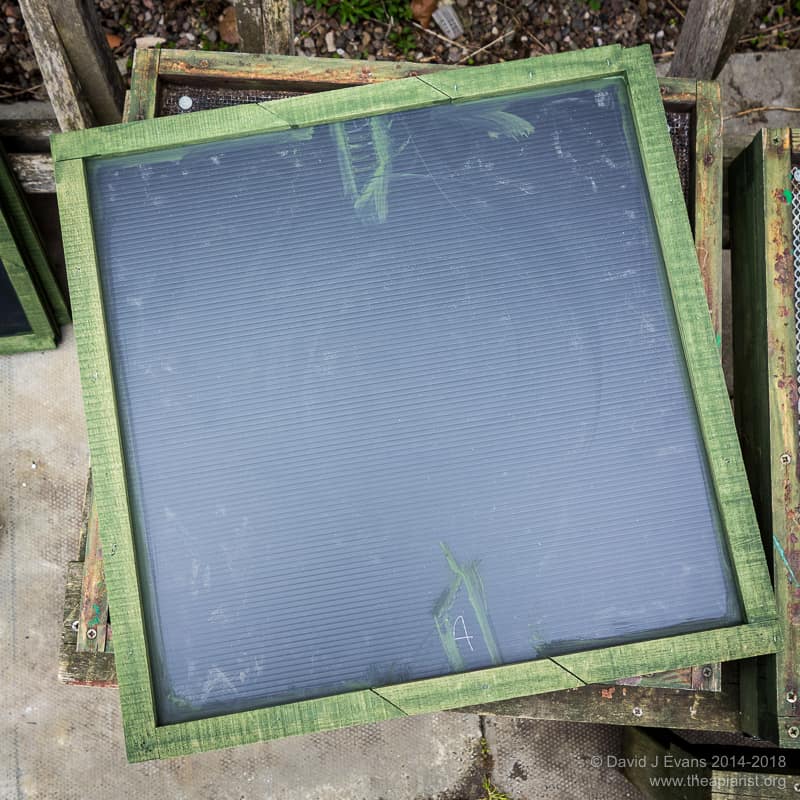
Doors closed …
I gave the wood a couple of coats of (ironically) One Coat Ronseal Fence Life which should protect it from the elements.
Cheapy, cheapy
The Correx was about a tenner a sheet – delivered 5+ sheets at a time – from which I could cut sufficient for 10 split boards, with useful offcuts to build nuc crownboards or landing boards from. The hardwood strip wood was about £2 per board. Therefore, aside from a few nails, the finished boards cost about £3 each. This compares very favourably with the £28-36 charged by most suppliers for a Snelgrove board. Of course, I appreciate that the latter are more complicated and offer additional confusion functionality, but these are perfectly serviceable for a vertical split and there’s a lot of pleasure to be gained by using something you’ve bodged lovingly crafted yourself 😉
By the time this appears these boards might even be in use …
—
There’s a good explanation of split board construction in a post by Calluna4u on the SBAi discussion forum (“the thinking beekeepers web forum”). Calluna4u has a wealth of experience as a commercial beekeeper and prepares these boards in industrial quantities. His design differs slightly as it’s for use with hives arranged four to a palette. His post contains links to suppliers for 6mm pre-cut Correx in Dundee which might be useful to Scottish-based beekeepers.
Join the discussion ...