Bee shed inspections
A brief update on how things have been progressing in the bee shed. This is my first full season keeping colonies full-time within a shed or building though I’ve successfully overwintered mini-nucs in an unheated greenhouse in the past.
Under construction …
When installed at the end of last season there was almost no need to open the hives, so it’s only this Spring that the pros and cons of the bee shed have begun to be properly understood.
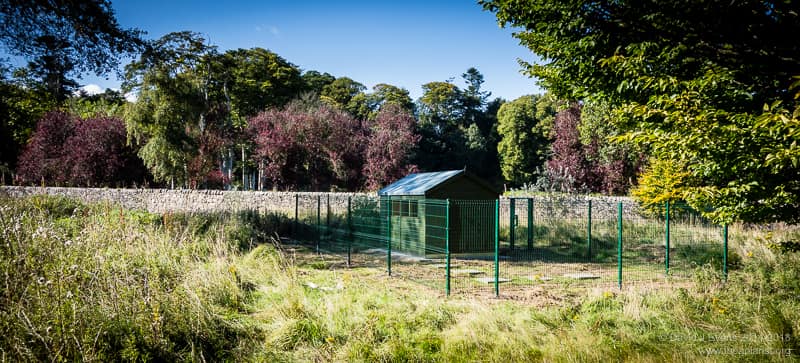
The colonies are completely enclosed with simple tunnels leading to exits on the East/South East face of the shed. All the colonies are housed in standard National cedar boxes or poly nucs. Other than clear perspex insulated crownboards, there is no additional insulation and the shed is not heated. The shed is situated in open parkland with woodland and arable land nearby containing good forage and there is a permanent water supply nearby.
Colony development and Varroa loads
Colonies went through the winter in single National brood boxes, fed with fondant and treated with oxalic acid by vaporisation in September (before moving them to the shed) and in midwinter. The first inspection was conducted in late March. Colonies were building up well and were significantly stronger than colonies headed by sister queens in the same apiary or in my other apiary. Between late February and early May colonies dropped only 3-4 mites in total, with Varroa boards located within pull-out trays in the hive floor. I’m sure I missed a few mites, but doubt it was very many. We’ve recently uncapped a full frame of drone brood – each cell uncapped individually – and found no Varroa present. Mite levels are therefore reassuringly low – for reasons to be discussed in a future post – with no signs of DWV-related disease.
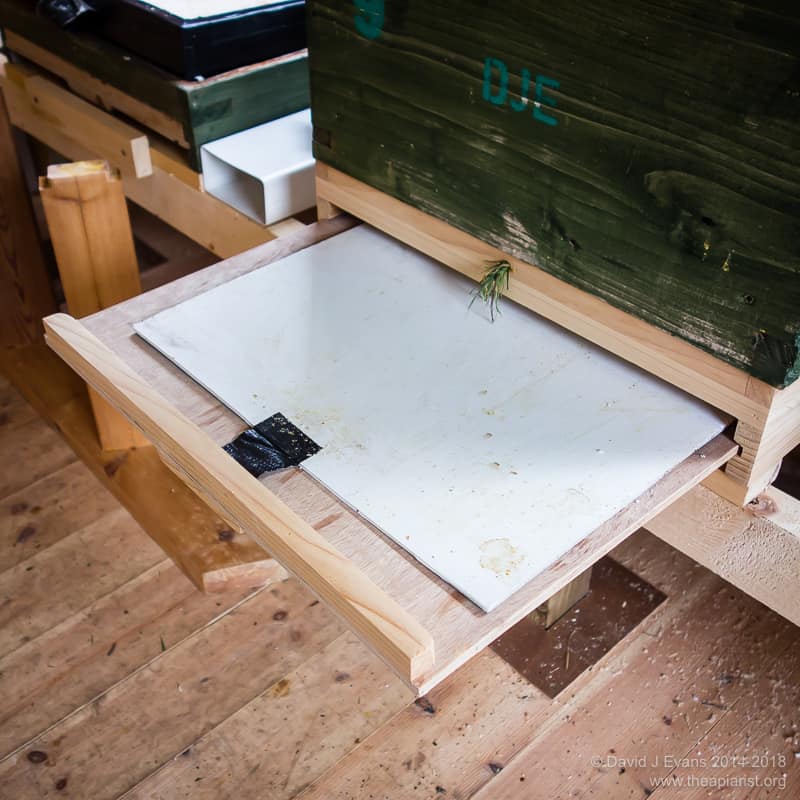
Varroa tray …
Since mid-April colony development has been very good and they are now on double National brood boxes with 2-3 supers. A fourth super went onto one colony on the 25th of May and the stack now nearly reaches the shed roof. A four frame nuc has been split off one colony already to cool it down a little. Quite a bit of developing brood has also been harvested at weekly intervals for our research, usually by simply cutting a big slab out of the middle of a frame. This has probably also held the colonies back a bit and it’s only now I’m starting to plan for swarm prevention/control.
Inspections
Inspections have been easier than expected. These colonies are headed by queens with reasonable genetics (Heinz queens – local mongrels of 57 varieties, reared by me in 2015). The bees are steady on the comb and tend not to fly up at you when the crownboard is lifted. They’re nothing particularly special, but would be considered reasonably placid and non-aggressive.
The colony is gently smoked from outside the shed (through the entrance tunnel) and a small amount is wafted under the crownboard or between the QE and the bottom super. After allowing them to settle the supers and crownboard are removed and placed outside on an overturned roof. The queen excluder and adherent bees are also left standing outside (unless it’s cold when the bees are shaken off into the open hive).
Inspecting the colony is straightforward. Any frames removed to make space are rested on the hive stand. Double brooded colonies are split into two, with one box stood aside on an eke on the roof of an adjacent hive roof. Inevitably, the queenless half of the split tends to get tetchy within a few minutes, so it’s best to deal with them first. When frames need to be shaken free of bees this can be done either over the open hive or, better still, directly into a gap between the frames. If done outside many of the nurse bees on the frame fail to get back to the hive (they’ve probably not been on orientation flights yet).
The smoker is usually stood just outside the shed door … if you keep it in the shed during inspections you can end up being kippered 😎
Flying bees
Perhaps surprisingly, even going through all 22 frames in a double colony, the shed does not fill with a maelstrom of flying bees. Undoubtedly this is partly because they’re reasonably calm colonies. Those that do fly rapidly find the window or open door and make their exit. When I first started doing inspections in the bee shed I’d manually help the stragglers outside after reassembling the hive. It turns out that there’s really no need … almost all the bees quickly vacate the shed by making a beeline ( 😉 ) for the bright lights of the windows or doors.

The great escape …
Just how quickly the bees leave the shed was emphasised last Sunday when selecting larvae for grafting. I opened and inspected a double brooded colony, found a suitable frame with 24 hour larvae on it and placed it in a two frame nuc for protection. Within 5 minutes I could work without a veil (I react very badly to stings to the face so take particular care over this) without interruption from flying bees.
Weather and temperature
I’m sure that the temperature influences the behaviour of the colonies in the shed. They certainly forage – or perhaps collect water to use fondant or crystallised stores – at lower temperatures than those situated outside. When inspections are conducted on a cold day (say 10-11°C) they are even more steady than usual. However, those that do fly take longer to leave the shed and they can end up clustering in small, rather pathetic, little groups which then need to be scooped up on a hive tool and dropped into the colony. On cool days I don’t leave the supers or QE outside the shed as the bees would rapidly get chilled. Work commitments mean that inspections must be conducted on certain days, so I don’t have the luxury of simply waiting until it’s a bit warmer. Although the shed is unheated the temperature differential between the inside and outside is significant – perhaps 4-8°C – or more if the sun is shining on the window side of the shed. On a warm, sunny day the temperature inside the shed can easily reach the mid-20’s which makes inspections a hot and sweaty activity.
Needless to say, inspections on damp or wet days are much better than on colonies located outside. I avoid days when it’s raining hard, partly for my own comfort to avoid getting wet accessing the apiary, but also because I’d prefer not to force the bees to fly on a really wet day. However, on damp or drizzly days, inspections proceed as normal.
And the bad news is …
Almost everything I’ve written above is positive and my overall initial impression is that the bee shed offers very significant advantages for the sort of beekeeping I need to do. However, there are some drawbacks and design issues that either currently cause problems, or might in the future.
The first is that it’s too small. The shed is 12 x 8 feet and I should have got one at least half as long again. This is largely because it’s also used for equipment storage and has a small table for working on. With four hives I need storage for 8-12 supers, additional brood boxes and spare frames. If I was starting again, knowing what I know now, I’d get an 18 x 10 shed with the intention of housing at least 6 colonies and some additional nucs (by contrast mine will accommodate 4 full colonies and 2 nucs down the sunny side of the shed, with the possibility of 2-3 additional nucs at a squeeze). It’s not only equipment storage that takes up the room … you need considerable room to work as well, with space for turning, stacking and temporary placement of hive parts. Working in the bee shed encourages an efficiency of movement – or causes a lot of collisions – I’d not expected.
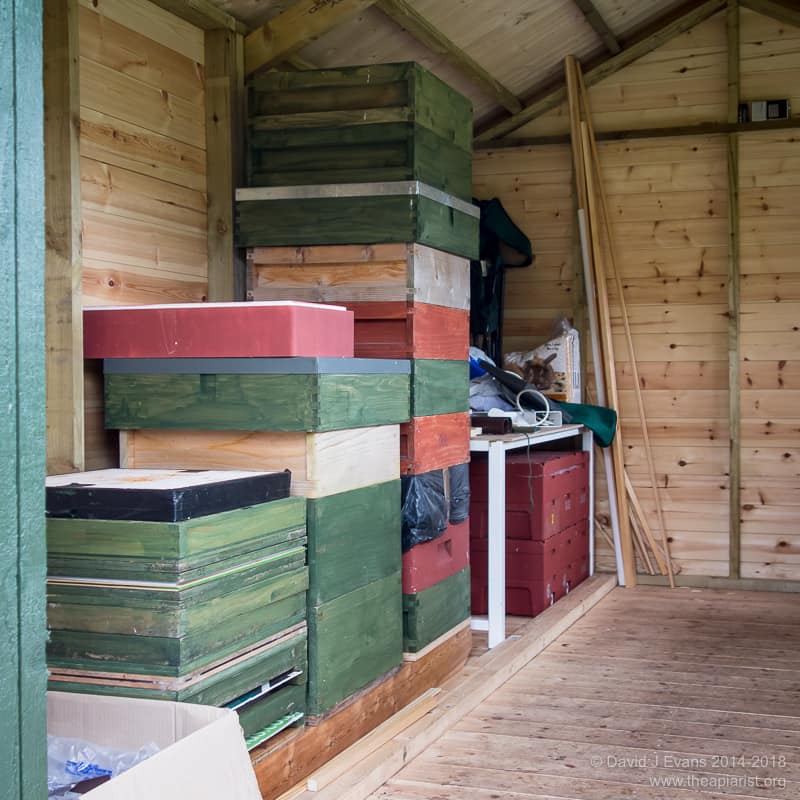
Essential storage …
Secondly the lighting is – at best – variable. On a sunny morning there’s ample light to see eggs and tiny larvae. However, as the colonies have grown, the added supers restrict the amount of light getting through the windows. On an overcast day, or late in the afternoon, the lighting is pretty hopeless – good enough to see queen cups/cells, good enough to locate the queen, but (particularly on dark frames) too dim to see eggs, small larvae or to check frames for signs of disease. It’s not unusual to have to carry frames outside to inspect them fully. I’m currently investigating 12V LED systems run from a solar panel-charged caravan battery. My only concern is that this might disorientate the bees and slow their exit from the shed during inspections.
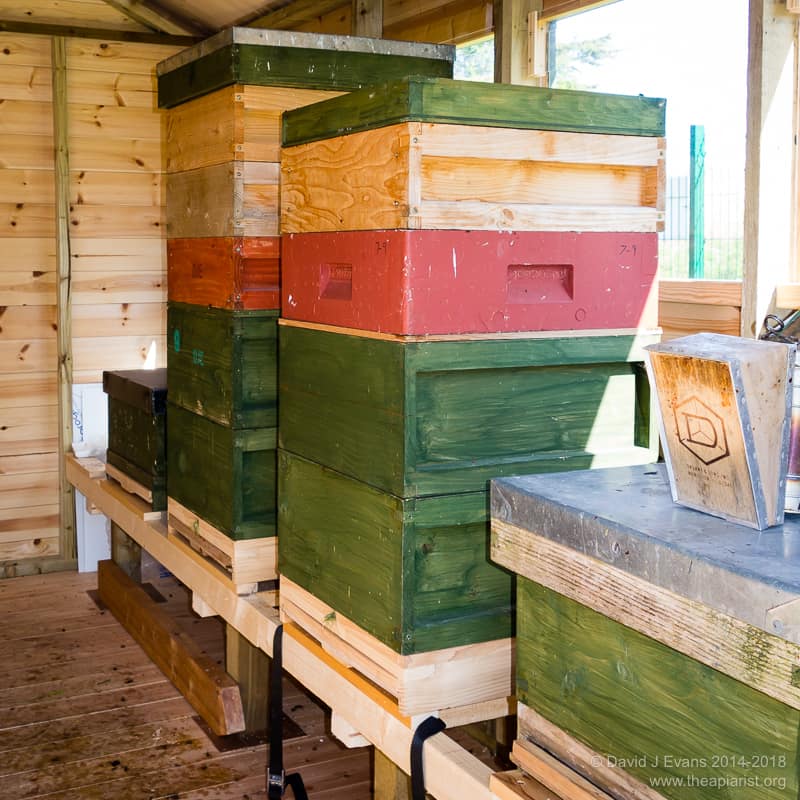
Multiple supers …
Thirdly, I should have spent more time designing the hive stands. I made them an inch or so too low which caused some problems with locating the hive entrances centrally in the T&G planks, but was not insurmountable. More problematically, as a consequence of the leg locations it’s difficult to keep the floor clear of hive debris that falls through the OMF. With the Varroa boards in place this isn’t an issue, but when they’re out – which I prefer if there’s a chance of the shed getting very warm – the debris needs to be regularly swept up to keep the shed clean. Some sort of removable debris trays would have been a good addition, but are not easy to fit retrospectively. However, the overall hive stand design – with the legs going through the suspended floor to avoid vibrations – works very well.
Finally, swarm control has yet to be tackled. My preferred simple method is doing a vertical split (or using a Snelgrove board that I’m experimenting with this year) but this requires an upper entrance which, obviously, cannot easily be arranged. One possibility is using the Demaree method of swarm control. Alternatively, it would be straightforward to remove the queen into a nuc and let the colony requeen. Currently I’m trying to postpone the inevitable by removal of some brood, ensuring they have enough space within the brood boxes which I swap (top to bottom, bottom to top) periodically, ensuring they have sufficient space in the supers and keeping a close eye on them. The queens are clipped. If they do swarm they’re likely to end up in a lump outside the hive entrance – the ground is flagged and so they should hopefully be relatively easy to scoop up.
Join the discussion ...