First impressions
There’s always a slight feeling of trepidation when I lift a roof for the first hive inspection of the season.
What’s in the box?
Is the colony going to be thriving or just hanging on?
I know they’ve got sufficient stores and that the bees have been flying on good days, but that’s not the same as the reassurance that comes from finding 3-4 frames of brood in all stages, well-tempered bees, and a marked queen with a good laying pattern.
Iffy weather
It takes bees to make bees, the saying goes. The colony cannot rear large slabs of brood without large numbers of nurse bees to feed them and clean them and cap the cells.
After a midwinter brood break (which we get, but you may not if you live further south than my 56°N) the queen lays a small patch of eggs which eventually develop and emerge. Over the next few weeks the amount of brood slowly but inexorably increases. The numbers of new bees in the hive increases.
But remember that the total number of bees in the hive is actually still decreasing as the winter bees continue to die off.
And, although brood rearing can (and does) continue like this for weeks – through January and February at least – it needs the better weather, warmer temperatures and early forage to really start ramping up.
So the further north your bees are, the later in the season that things get going.
Unlike last year, the weather this spring has been decidedly ‘mixed’. I barely saw a bee until the penultimate day of February and, with average temperatures of ~6.5°C March wasn’t a whole lot better.
And since then it’s got colder …
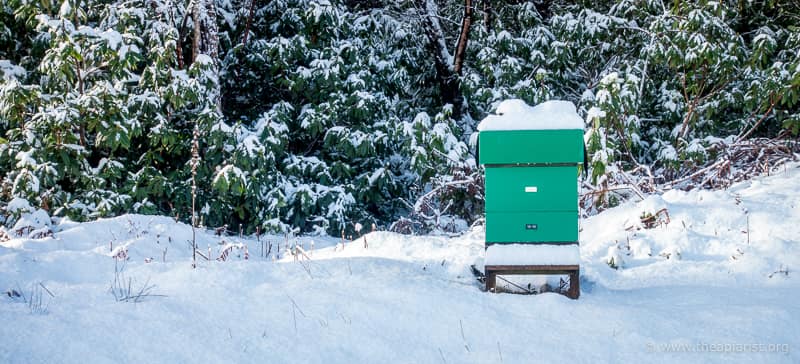
I’m writing this after four days of ‘sunny periods’. These sunny periods were interspersed with snow, hail and bitingly cold northerly winds.

Sunny periods … but 4°C with squally snow showers being driven down the Sound of Mull
Although the average temperature is under 5°C the bees are busy foraging when the sun is out. I spent some time yesterday trying to (unsuccessfully) photograph pollen-laden foragers returning to the hive in a snow shower.
Shirtsleeve weather
The usual advice is to not rush the first hive inspection. Wait until it’s a warm spring day. Often it’s recommended to choose a day with ‘shirtsleeve weather’.
Which here might mean July … 🙁
Actually, that’s a bit harsh. We often have excellent weather in late April through until early June.
However, this is my first season with bees on the west coast and I was very keen to see how they were progressing. I also wanted to remove the nadired super and check the levels of pollen.
It certainly wasn’t shirtsleeve weather, but I needed no more than one fleece under my beesuit and I haven’t had to wear long johns since mid-March 😉

Ribes …
The other advice you’ll often hear is that a good time to conduct the first inspection is when the ornamental currant (Ribes sanguineum) is flowering.
Treat this advice {{1}} with some caution. In St Andrews there’s a large amount of these flowering currants near the bus station that would always be in full bloom by mid/late March, whatever the weather.
We have no Ribes on the west coast. If we had, the deer would eat them all.
But we did have an unseasonably warm day on the first of the month.
So I had a quick look.
Very disturbing
A hive inspection inevitably disturbs the colony.
However gentle you are the activities of the bees are interrupted, the humidity of the hive changes and the temperature decreases.
The odours and pheromones, so critical for the organised functioning of the colony are also affected.
For these reasons alone there must be a good reason to inspect a colony.
And that’s before you consider the increased opportunities for robbing {{2}}, potential damage to the queen, or a myriad of other reasons.
But none of this means that hive inspections should not be conducted if and when they are needed.
What it does mean is that you need to have a plan in mind when conducting a hive inspection. In addition, you need to have all the things you might need close to hand, and have a mental checklist (your hands will be full) of the order you’re going to execute the plan.
All of which sounds very contrived.
It doesn’t need to be.
What you don’t want to be doing is realising half way through the inspection that you need a clearer board … and it’s at home in the shed {{3}}. Or that your queen has been superseded and the new queen needs to be marked … with the non-existent Posca pen which you lost at the end of last season 🙁
Be prepared
So, although I was only having a ‘quick look’ I did make sure I had everything I needed before I removed the hive roof. This included a:
- smoker with sufficient fuel to last the duration
- clearer board to allow the simple removal of the nadired super
- queen marking kit and snips
- hive tool with a wide blade to clear the floor
- spare frame or two
- pollen pattie {{4}}
- wrapped fondant block ‘just in case’ {{5}}
All this needs to be close to hand but not so close you trip over it. The roof of an adjacent hive is as good a place as any for the small stuff.
Since I was going to rearrange the boxes I kept space immediately adjacent to the hive free to give me room to work.
Ready, steady … Go!
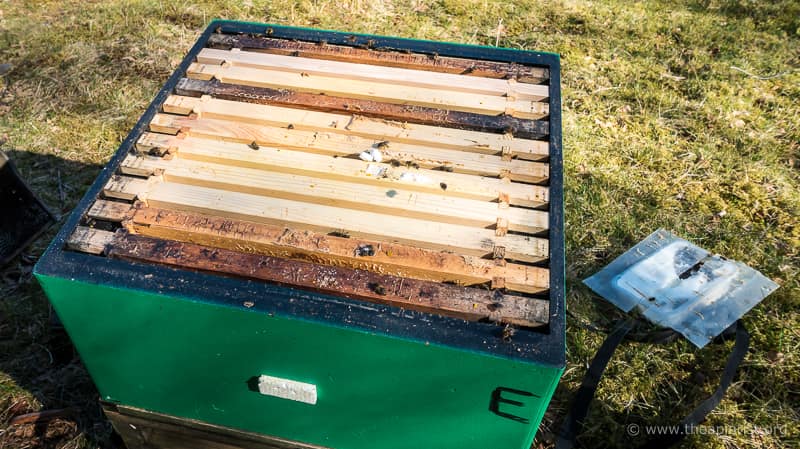
The hives I inspected were single brood Nationals with a nadired {{6}} super containing (or not containing?) honey from last season.
Nadired super and single National poly hive
Immediately over the top bars of the frames was the remnants of a block of fondant in a ‘carry out’ food container, with the headspace over the hive provided by one of my inverted deep-rimmed perspex crownboards. This was topped by a block of insulation and the roof {{7}}.
The colonies were installed in these hives from 5 frame nucs in July last year. They had built up reasonably well and collected a half super of heather honey.
However, most of the old, dark frames from the nuc were still in the box as I’d not managed to finish rotating them out of the hive before the season ended.
Corpses and accumulated debris
I removed the roof and the insulation. I then lifted both the nadired super and the brood box together and carefully moved them aside.
This gave me access to the floor.
Sometimes the floor is clear at this time in the spring. At other times you can find a thick accumulation of corpses, or a scattering of mummified larvae with chalkbrood.
Rarely you’ll find a dead mouse … or a live one {{8}}. It’s not at all unusual to find slugs in the hive. These appear to particularly like the damp environment underneath the frame lugs in Abelo poly hives.
Old floors …
Usually I’d choose to replace the floor with a recently cleaned one.
One spare is all you need. You place the new floor down, complete the inspection, close the hive and then scrape clean and blowtorch the old floor before using it as a replacement for the next hive in the apiary.
However, despite my careful planning (!) I had no spares as they were all back in the bee shed, 150 miles away. D’oh! At least I was aware of this before I started which is why I’d made sure I had a wide-bladed hive tool with me.
I scraped the floor clean of a few bee corpses and checked that the entrance channel was clear before putting the floor back in its original location.
I gently separated the brood box from the nadired super. During this process I checked the amount of bees in the super, making an immediate judgement whether the brood nest extended that far down in the hive.
Had the super contained a lot of bees (and therefore potentially brood) there would be a risk that the queen was also ‘down below’. This would have necessitated a quick rethink.
As it was, the super had just a couple of hundred bees in it and it was clear – just by looking down the seams between the frames – that there was no brood present.
It was safe to proceed.
Elbow room and the queen
Only now did I remove the crownboard, lifting one edge first and giving the bees a gentle puff from the smoker to encourage them to stay put.
I removed the fondant block and left it nearby. The bees would return to the hive unaided, or I’d shake the last few in before closing the hive.
The colony inspection was brief and focused. The first few frames contained no bees and so were ignored. Other than the outer dark frame – see below – they weren’t even removed from the hive.
Ready for inspection
I quickly and carefully went through the frames occupied by bees, checking for:
- sufficient stores (there were still stores on some of the frames I’d not lifted from the hive as well)
- levels of pollen
- brood in all stages – eggs, larvae and sealed brood
- the queen (was she the same I’d last seen in the box over 7 months ago?)
which took no more than a minute for each of the 4-5 frames. Each frame was lifted, inspected on each side and – with one exception – replaced in the same position it had come from.
The brood nest was off-centre, pushed up against one of the side walls of the hive. This isn’t unusual with poly hives as they are so well insulated. However, it means that expansion of the brood nest can only go in one direction.
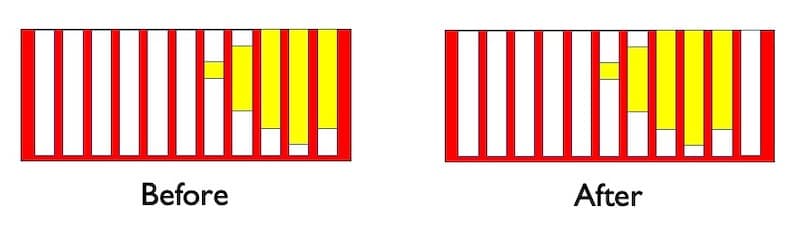
Giving them a little more elbow room
So, the exception was a frame, with some stores but mainly nice empty comb. I placed this between the brood nest and the side wall of the hive. This gives the expanding colony the option of growing in two directions.
Later in the season, when it’s warmer and the colony is growing faster, you can expand the brood nest further. However, this early in the year {{9}} just giving them the option to go in either direction is a start.
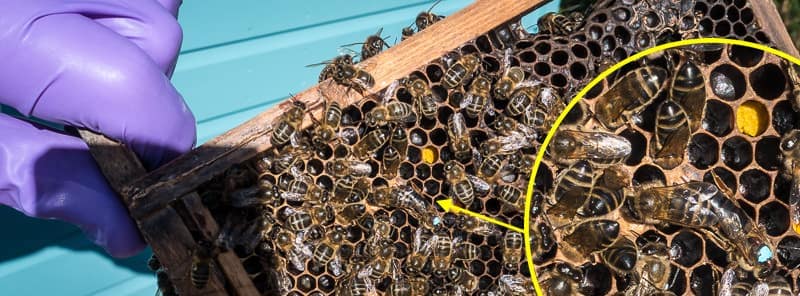
Marked, laying queen
The marked, clipped queen was easy to spot. I managed to disturb her while laying an egg which you can just see at the tip of her abdomen in the picture inset above.
Replacement of dark frames
Unfortunately the queen was laying up one of the old dark frames in the hive. I couldn’t therefore move this to the outside of the brood nest, but made a mental note to in a month or so.
On the opposite side of the hive were a couple of old dark frames that had been largely cleared of stores.
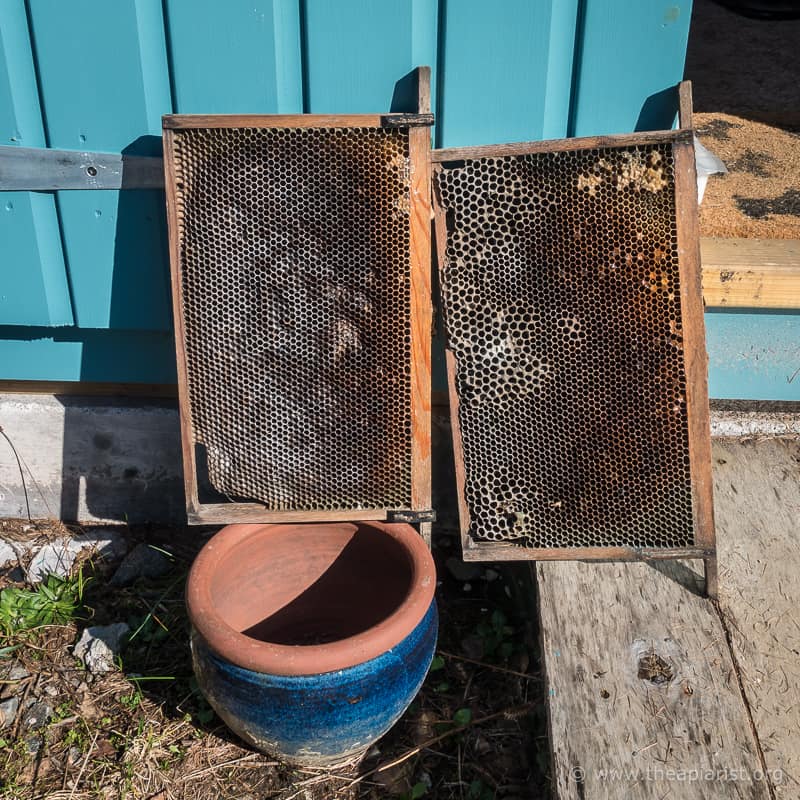
Old dark frames rotated out of the hive and replaced
These were removed and replaced with new frames. In a few weeks I’ll move these close to the centre of the hive. With abundant spring nectar, and warmth, they will draw fresh comb for the expanding brood nest.
Both the frames above show slight signs of mould. This isn’t unusual to see on frames at the end of the winter, and is generally nothing to worry about. The hive is a humid environment and the outer frames often get very little attention from the bees.
Emptying the super
The super contained a few hundred bees. It also clearly contained a bit of residual honey.
On a warm day I might have simply shaken the bees out. Quick and easy and all over in a single visit. However, it was not warm and this would have been even more disruptive. I therefore added a clearer board and placed the super on top of that. I replaced the crown board, the roof and strapped everything up securely.
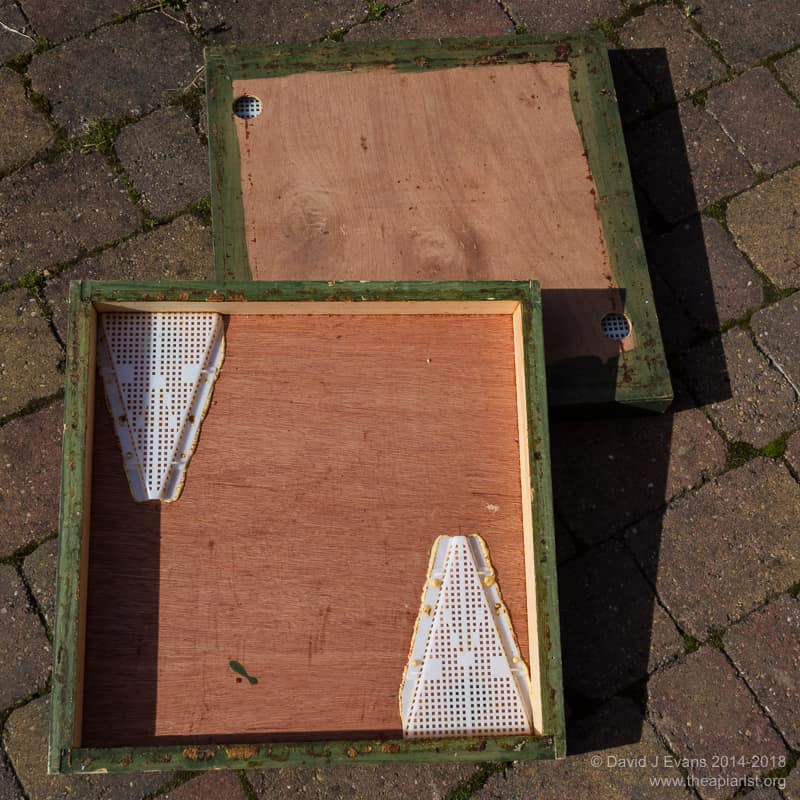
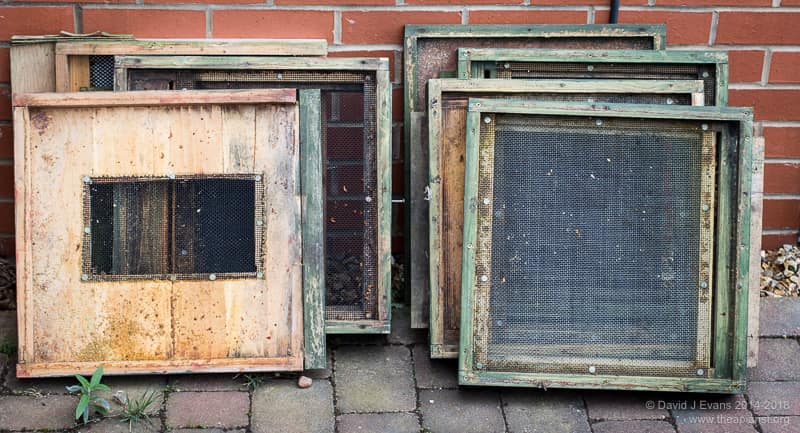
Clearer boards …
The warmth and odours of the hive quickly draw the bees down to join their nest mates, leaving the super empty. This was removed the following day.
The super still had a bit of capped honey in it, as well as a frame or two of uncapped ‘nectar’.
This wasn’t fresh nectar. There’s precious little about at the moment and any the bees are collecting is being secreted around and above the brood nest so that it’s immediately available. Remember, this super had been underneath the brood box since mid-September.
Much of the nectar could be shaken out of these frames. I assume it was uncapped from last year and that it has absorbed moisture from the atmosphere {{10}}. It didn’t have the wet bubbly, yeasty smell and appearance that fermenting stores have … presumably because it’s been too cold 🙁
Thriving or just hanging on?
The two colonies I inspected were doing OK.
More brood than I’d feared, but less than I’d hoped for.
Beekeeping is greatly influenced by the climate, the geography and the local flora. This was my first west coast spring inspection, so there’s lots new to me. It feels like a colder spring than 2020, but I didn’t have bees here then, so have nothing to compare it with.
Once the spring migrants start arriving I’ll have a better idea how it compares.
All of which emphasises the importance of the final part of the inspection. Writing up the hive records. Comparison of notes about both the bees and the environment will, over time, mean I have a much better idea of what’s happening when. And whether the colonies are doing well or badly considering the state of the season.

Black throated diver (Gavia arctica) in full summer breeding plumage
The sand martens are already here, and there are black throated divers on the hill loch. I expect blackcap, cuckoos and wheatear in the next 7-10 days. Much longer than that and it will officially be a cold, late spring.
I’ll be checking my east coast colonies, including half a dozen that have luxuriated in the bee shed overwinter, in the next fortnight or so.
Fife has been warmer and drier, so I expect those colonies to be further advanced.
I hope I’m not too late 🙁
{{1}}: As you should any advice that makes bold statements about beekeeping and dates …
{{2}}: Though that’s unlikely this early in the season.
{{3}}: Remember … although the subtitle of this website is “Beekeeping, so much more than honey” it should be “Don’t do as I do, do as I say”
{{4}}: I’m going to discuss this in a future post, so it won’t get mentioned again.
{{5}}: The hive weight was good and my ‘hefting’ would have had to be way off the mark to need to add food. However, rather than risk having to close and re-open the hive I usually carry a 1-2 kg block in the bee bag at this time of the season.
{{6}}: i.e. underneath the brood box.
{{7}}: The photo above is not from the day I did the inspection, but it does show the arrangement of the boxes.
{{8}}: Usually the live ones take a flying leap out of the entrance when you first open the hive … don’t stand in the way or they might end up in your wellington boot.
{{9}}: Reminder … relatively speaking. Early April is early here … you might be putting on your third super. I’m not jealous.
{{10}}: I did a ‘taste test’ and it was very dilute.
Join the discussion ...