Lost and found
It was the Welsh Beekeepers’ Convention last weekend {{1}}.
This is a convention I’ve previously enjoyed attending. I remember strolling through the daffodil-filled Builth Wells Showground in lovely spring sunshine to visit the trade show.
And I remember staggering back to the car, laden with items that were:
- too inexpensive (not cheap … there’s a difference 😉 ) to ignore,
- exactly what I’d been searching for, or
- essential.
Some items qualified on all three criteria, so I’d bought two of them 🙁
And then ‘at the death’ I did a quick trip again around the trade stands buying a few things I’d spotted and dismissed earlier as not absolutely essential, not inexpensive enough or not quite what I’d been looking for.
It would be another year until the next convention … it would have been rude not to 🙂
None of these things were big ticket items.
Although I’m naturally drawn to the gleaming stainless steel extractors, the settling tanks and the wax separators, I’m a small-scale beekeeper and cannot justify (or afford) these sorts of luxuries.
Instead I browse the ‘show specials’ bin, the remaindered items and the shop soiled or ex-demo stock.
And, like a moth to a candle, anything to do with queen rearing.
Non, je ne regrette rien … but
All this purchased ‘stuff’ takes up space.
Normally this isn’t a problem. It migrates from the car to the workshop to the bee bag.
Or just as far as the workshop.
Or – I’m ashamed to say – it’s forgotten for years and discovered in the glove compartment when I’m searching for something else entirely.
But I’ve just moved house.
And when you move house you have to pack everything and, worse, unpack everything and find somewhere for it to be stored {{2}}.
And it became very clear, very quickly, that I had a large amount of beekeeping essentials that were anything but essential. You could tell this because they were still wrapped, still had the price-tags attached, or were otherwise very obviously unused.
And, it turns out, it wasn’t clear how to use some of them … or even what they were used for.
Which begs the question ‘Why did you buy it in the first place?’.
I know this because I was asked it.
Several times 😉
So I’ve had a clear out.
Some of the things I unearthed were essential, or at least very useful.
Others were useful, but might be improved upon for this season.
And a soberingly large number of items were now – and in retrospect never had been – any use whatsoever 🙁
The Why did I ever buy that? category
I’m actually going to ignore most of the stuff in this category. Other than teaching me a bit more wallet-control there’s little to learn from it. Also, the stuff with the price tags still attached is a rather pointed reminder that I should increase the price of my honey or risk penury.
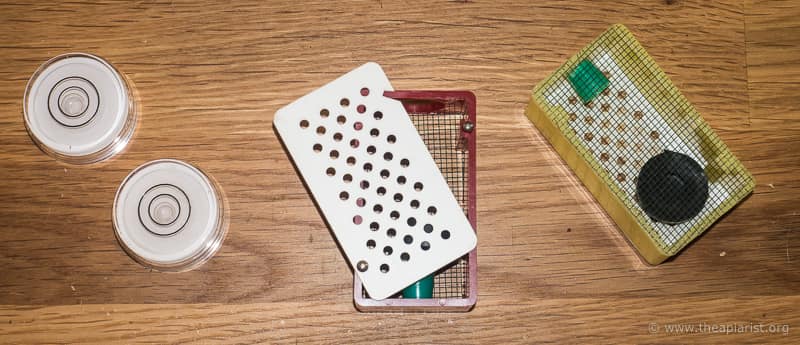
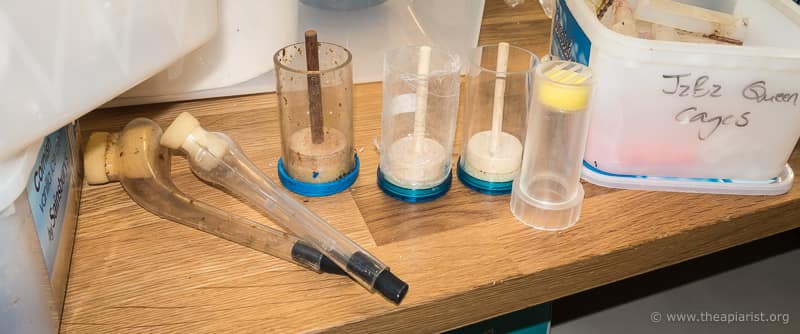
Ventilated queen cages and two spirit levels
Strange oversize ventilated queen cages. These are a bit weird. They have a fixed mesh side and a twist open cover. Inside is a rather ugly plastic queen cup and the other end has a loose-fitting plug. I have no idea how to use these, or even what they are really for. Discarded.
In the same box were two small spirit levels. These are invaluable if you use foundationless frames because the hive needs to be level to get the comb drawn vertically. Most smartphones have a spirit level function, but these are a bit more propolis-resistant and were put into the bee bag … where they should have been in the first place. I’d lost them.
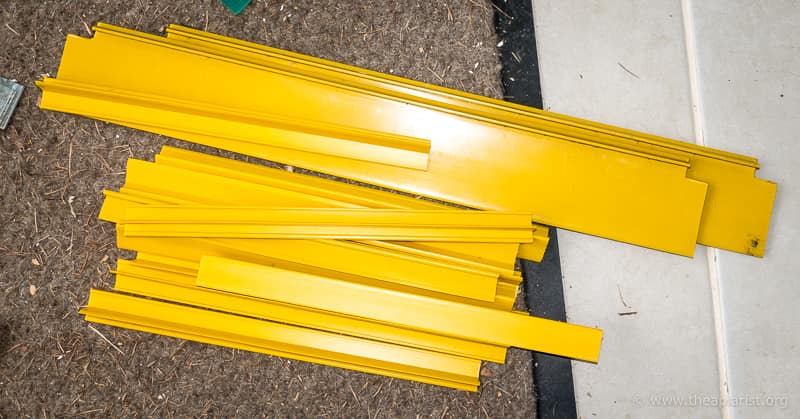
Plastic bits
I have a suspicion these rather lurid plastic bits are from Paradise Honey hives. If so, the boxes have been in use for about a decade (mainly as bait hives) without needing whatever function they provided. They’ve gone for recycling …
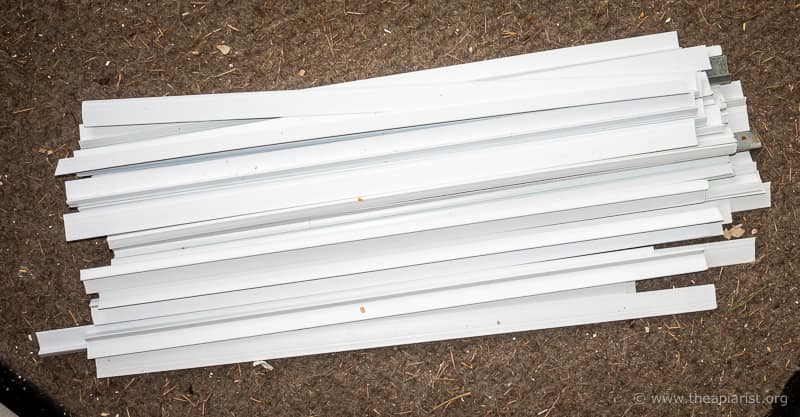
Plastic frame runners
These plastic frame runners should be in the Why did I buy so many? category. I suspect they were inexpensive (or, in this case, cheap). You can’t flame them with a blowtorch {{3}} but they are resistant to acetic acid {{4}}. I use a couple each year when upgrading the feeder on poly Everynucs. I’ve kept them as “I’m sure they’ll come in”.
The ‘Big mistake’ category
Castellated frame spacers are an abomination. I know because I tried them and abandoned them. But, to emphasise what a failure they were I kept them as a reminder … periodically cutting myself on the sharp corners as I rummaged through the box of bits they were in, looking for something else.
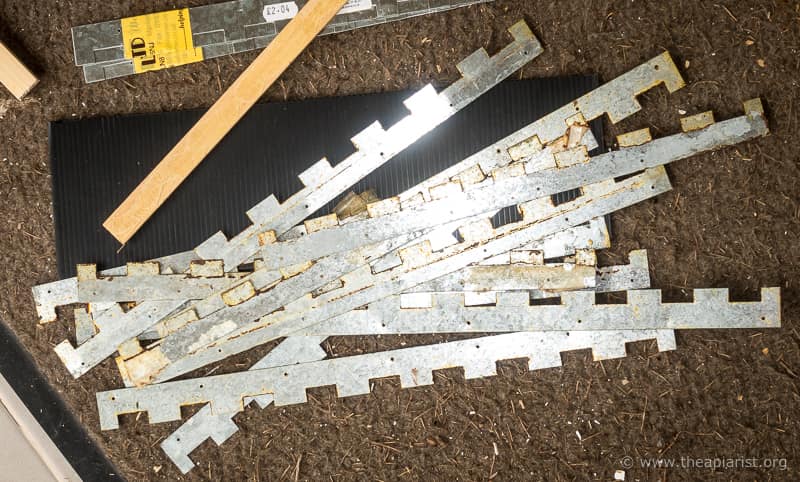
Just say no
Rather than just try them on a super or two, I fitted them to a dozen or more. They do exactly what they’re supposed to; they keep the super frames separated by a set amount.
The problem is they provide no flexibility to space the frames by different amounts. Your super can only be fitted with 8, 9, 10 or 11 frames. With brand new frames I routinely fit 11 in a super until they’re drawn out. But as the nectar flow continues I remove a frame or two, usually ending up with 9 frames per super.
More honey, less wax … and a convenient extractor-full of frames per super.
I now just manually separate and arrange the frames and the bees helpfully propolise them in place. At £2.04 a pair (there are some with the price sticker still attached) it wasn’t a cripplingly expensive mistake … but it was a mistake.
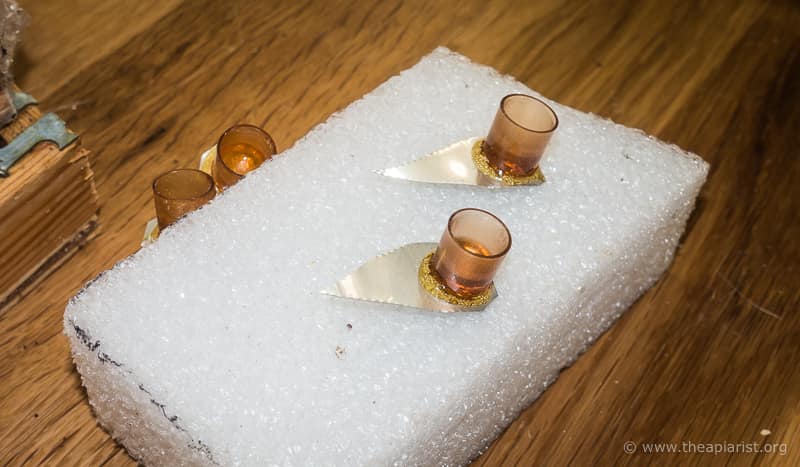
Crack pipes and queen marking cages
The final entry in the this ‘mistake’ category are the budget versions of queen marking cages. The budget ones are the two unused looking ones in the middle of the photo above. These work, but less well than the full-fat non-budget version (clearly used, on the left) mainly because they have a coarse inflexible plastic mesh covering them, making marking the queen difficult and clipping her wing nearly impossible.
I now prefer the turn and mark cage … and discovered an unused one (on the right, above) in my spring cleaning.
Handheld queen marking cage
The ‘crack pipes’ are what Thorne’s call a plastic queen catcher {{5}}. These actually work pretty well but were replaced by my index finger and thumb several years ago.
Useful discoveries
Not everything I found was an ill-considered purchase or a mistake.
Thankfully 😉
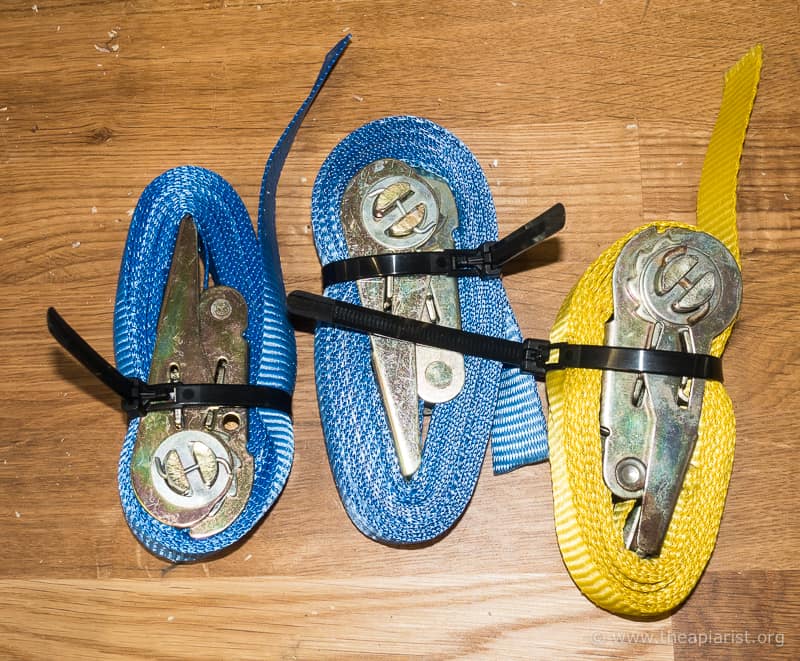
Ratchet straps … tamed for now
I discovered a spaghetti-like mess of ratchet straps and tidied them up with some reusable zip ties. These straps work well when new, or if well maintained. However, there are too many moving parts for my liking and they often eventually fail. They are excellent when transporting hives and allow the hive to be strapped together and attached to something immovable in the van.
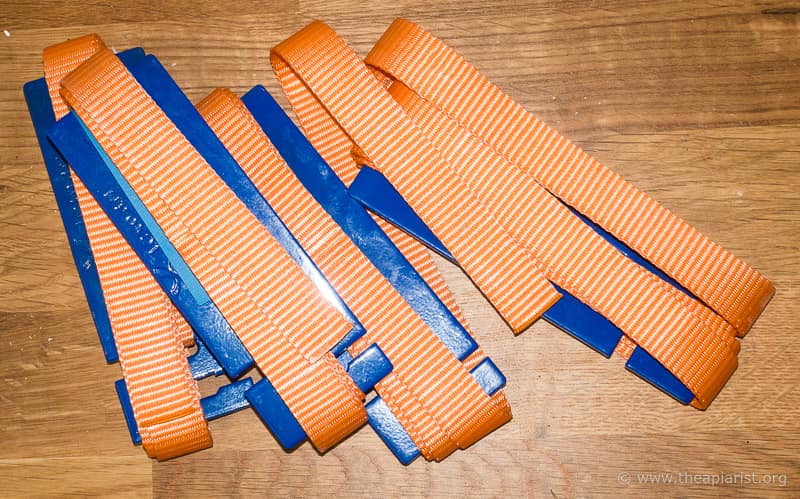
Standard hive straps
Better still, I found some standard hive straps. With no moving parts these are essentially infallible if you can remember how to use them properly {{6}}. Unlike ratchet straps they have the additional benefit of laying completely flat against the side of the hive when in use. This makes stacking hives together much easier.
These four hive straps look almost unused and I suspect they arrived on nucs I collected some time ago … so technically weren’t a purchase in the first place. Lost and now found 🙂
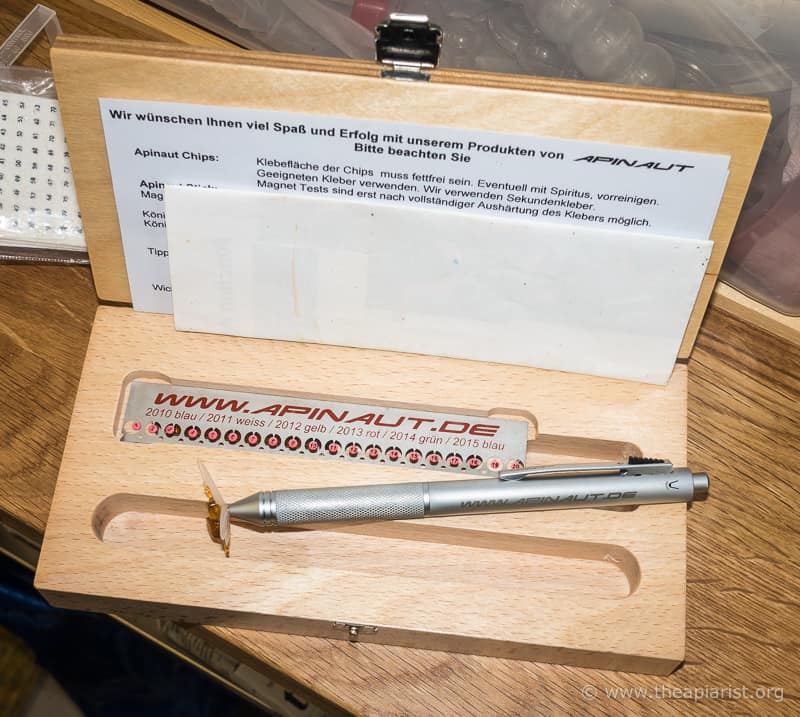
Apinaut queen marking kit
The final item in this category of ‘useful discoveries’ was an Apinaut queen marking kit. These are quite clever. Instead of marking the queen with a Posca water-based pen (or Tippex), you glue a small numbered metal disc to the top of her thorax.
The kit contains the glue, a set of coloured and numbered discs and a pen with a magnetic tip. Rather than chasing the queen around the frame trying to pick her up by the wings you simply use the magnetic pen. By retracting the magnetic tip you can then ‘drop’ or place the queen wherever you want {{7}}.
This was an impulse purchase which I’d lost. And forgotten. I rediscovered it, still in the bag it was supplied in, at the bottom of a box containing the components for ~200 frames. D’oh!
Queen introduction cages
Amongst all the queen rearing paraphernalia {{8}} I’ve collected were a number of items that are used quite often.
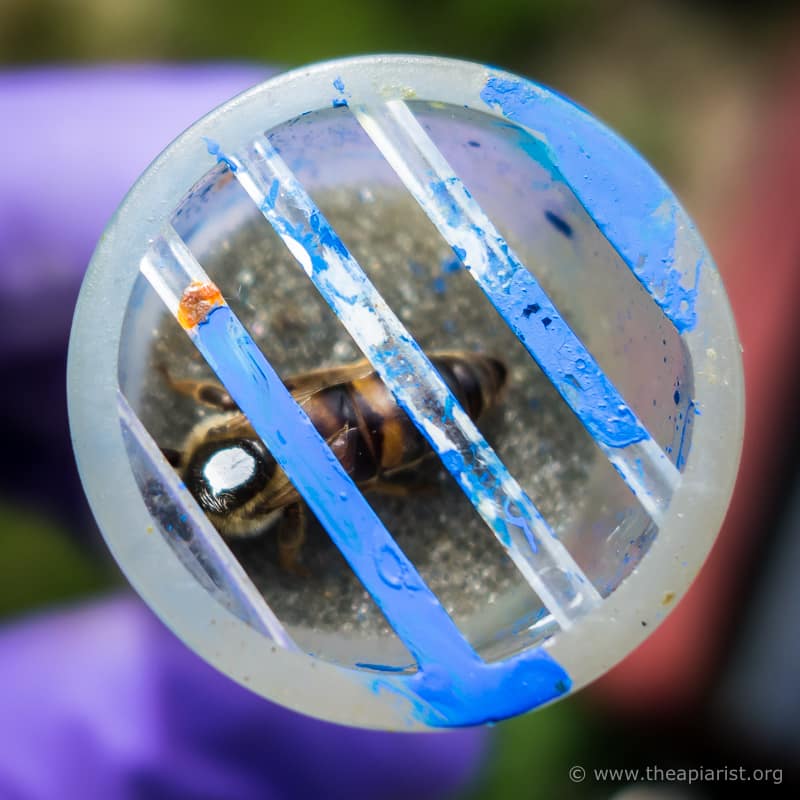
I usually use JzBz queen cages for introducing queens to queenless colonies as I inherited a bucketload {{9}} of them many years ago.
However, with very valuable queens or very unreceptive colonies {{10}} I prefer to use these Nicot queen introduction cages. These cages are about 13 cm square, with a short plastic leg at each corner that can be pushed into the comb. There is a cap on the front that can be removed to introduce the queen to the cage.
Nicot queen introduction cages
The idea with these is that you fix them over a patch of emerging brood and introduce a mated queen whose acceptance is guaranteed {{11}} by the newly emerged bees. After a few days the queen has often laid up the empty cells under the cage and has usually been ‘released’ by workers burrowing under the edge of the cage.
The problem is that there’s a tendency to lose the legs and the cap for the cage (I’ve lost one or both for all those above … so these should be in the ‘Lost and lost’ category). I therefore improvise, using a small square of silver foil-backed adhesive tape in place of the cap and strapping the cage to the frame with a couple of elastic bands.
Mini-nucs for queen mating
I’ve got a dozen or so Kieler mini-nucs which I sometimes use for queen mating. These are small top bar hives that are primed with a few hundred bees and a ripe queen cell. I’ve not used these mini-nucs for about three years, but hope to again this season … so the next two finds were most welcome.
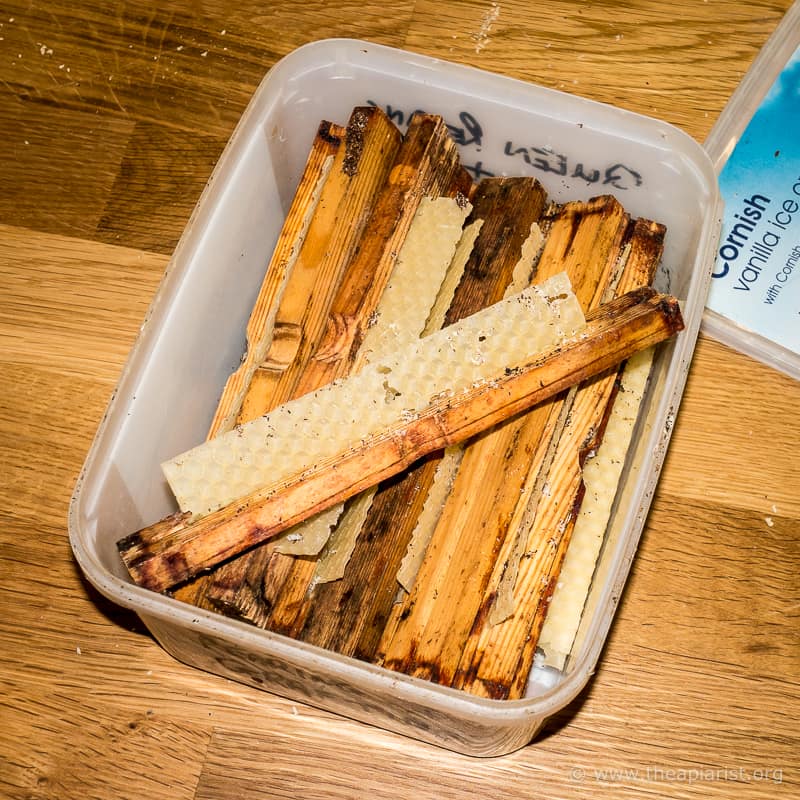
Kieler mini-nuc top bar frames and starter strips
The first was a box of Kieler mini-nuc frame bars, some with a small strip of foundation carefully glued in place with melted wax. Except many of the wax strips had become unattached or been damaged 🙁
This year I’ll try using the wooden tongue depressor starter strips I use in my foundationless frames. I see no reason why these won’t work for mini-nucs as well, and they’d have the advantage of being a lot more robust.
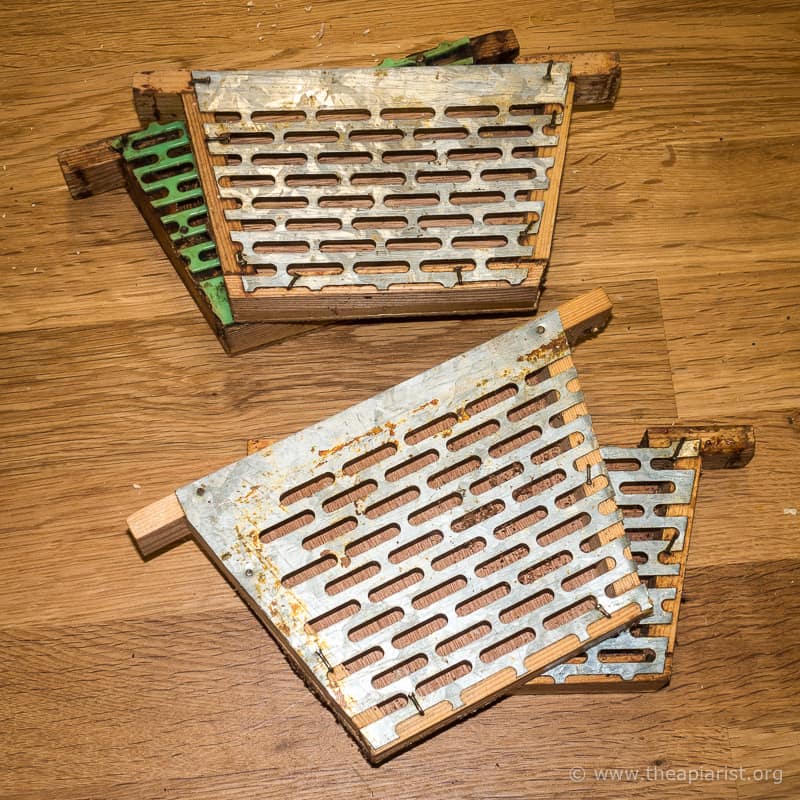
Kieler mini-nuc frame feeders
Kieler mini-nucs are supplied with a polystyrene feeder that occupies one third of the hive volume. That’s an awful lot of food for four tiny isosceles trapezoids of brood. I prefer to replace the poly feeder with a small fondant-filled frame feeder. This only takes one sixth of the hive volume and works very well. I was therefore pleased to find half a dozen well-used frame feeders built to my usual high standards and exacting tolerances 😉 {{12}}
Queenless colonies
When a colony is suspected of being queenless (and lacks any eggs or young larvae) the normal advice is to donate a frame of eggs from another colony. If queen cells are produced on the introduced frame the colony is queenless.
Is the colony queenless?
You might not have a frame of eggs to spare, or want to transfer an entire frame from another colony. Instead, these Nicot queen cell cups glued to a small aluminium tab can be used. You graft day old larvae into two or three of these cups and insert them, open end down, near the centre of the brood nest. The aluminium tab (butchered with only minor blood loss from a soft drink can) holds the cell cup in place.
If the colony is queenless they will start to draw out queen cells from the cup.
Conversely, if the larvae in the cup is ignored they are queenright … stop worrying 🙂
Unless, of course, the grafted larvae are duds 🙁
To use this trick – which isn’t my idea {{13}} – you need to be good enough at grafting to be certain that >50% of the larvae grafted would be accepted in a queenless colony. With a little practice that’s easy enough to achieve.
Putting the cleaning into spring cleaning
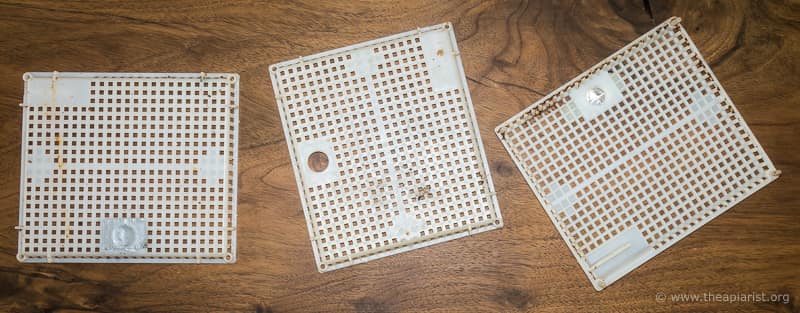
The final things unearthed during my tidying was a lot of queen rearing cups, cup holders, cell bar supports and cages.
The cups – the same as shown in the picture above – are usually supplied in 100’s or 500’s and cost a penny each. I use them only once.
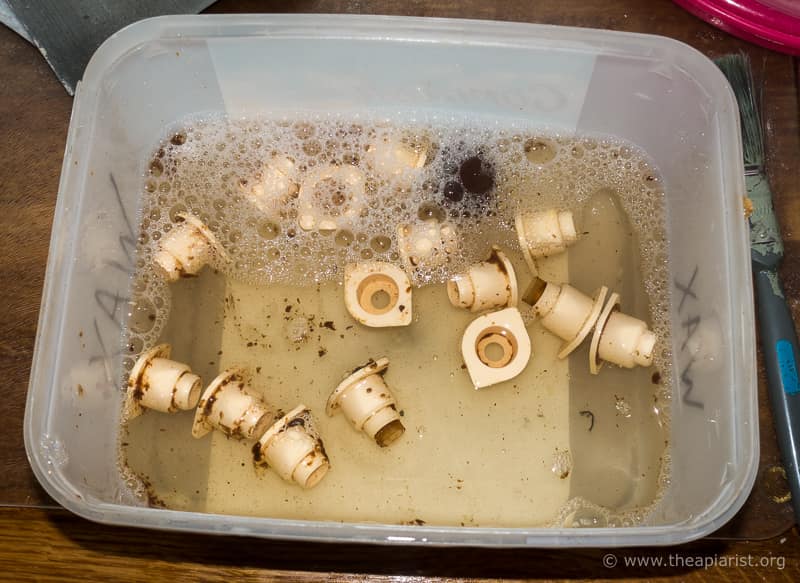
Nicot cup holders in the bath
The cup holders, cell bar supports and cages {{14}} – you need one of each per queen cell – often end up encrusted with wax or propolis. They’re not expensive (~75p for one complete set) but they can easily be reused.

Nicot queen cell protection cages being washed
I simply soak them in very hot water with some mild detergent and then rinse them really well. Most of the wax and propolis is removed.
If you’re worried about the smell of detergent lingering and inhibiting queen rearing you can add the cell bar frame to the hive 24-48 hours before grafting. To be absolutely certain it gets lots of attention from the bees in the hive ‘paint’ it with some sugar syrup. The bees will clean this off and it will then be ready for use.
After a few happy hours sorting through boxes I feel better prepared for the season ahead. I now have a much better idea what I’ve got and where it is.
I’ve also usefully freed up some more space for future conventions 😉
And I know I’ll never need to purchase another rhombus escape 🙁
{{1}}: Held virtually this year.
{{2}}: Anyone who has moved house will know that this isn’t entirely true. There are some things you never need to unpack. You just leave them in the box and move them to the next house when you next move. Been there, done that.
{{3}}: Well, you can, but it doesn’t end well.
{{4}}: Unlike metal runners, unless they’re stainless steel … which are the sort I use for preference. Acetic acid is used to inactivate Nosema spores.
{{5}}: Or more correctly, a queen catcher plastic, as the queen is not plastic … but you know what I meant. I see that Thorne’s have now changed the description online :)
{{6}}: And if you can’t there’s a useful video on Thorne’s website.
{{7}}: I’ll leave it up to the reader to think of applications you might need this for …
{{8}}: Rather appropriately derived from Medieval Latin meaning the bride’s property beyond (para-) her dowry (phernē).
{{9}}: Literally …
{{10}}: This deserves a post of its own … a colony with no queen or brood (terminally broodless) is often very difficult to requeen. These cages are the answer.
{{11}}: Well, perhaps not guaranteed, but I’ve never had a queen introduction using these cages fail.
{{12}}: Just look at that shocking workmanship, with bent nails holding everything together … if I cared I’d be embarrassed. I don’t care.
{{13}}: I have a vague recollection of being shown it on a German beekeeping discussion forum.
{{14}}: These are respectively Nicot part numbers CNE1, CNE2 and CNE5.
Join the discussion ...