Less is more
The season here started late after a a long, cold spring, and it’s giving every impression of ending early. A couple of low pressure systems have slowly drifted in from the west, replacing the settled calm weather with something a lot more changeable.
On the west coast of Scotland the heather has still to really get started. That is if it’s going to get started at all 🙁
It was so dry earlier in the summer that the recent rain may be too little, too late. I’m not unduly worried as I’m busy making bees rather than making honey this year.
Although the temperature hasn’t dropped much {{1}} it’s starting to feel quite autumnal.
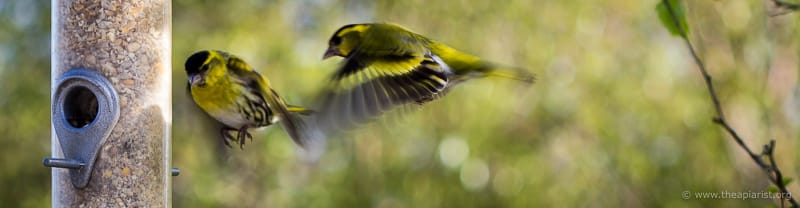
Siskin
The mixed woodland around us is now quiet most of the time, with very few small birds about. When you do see them, siskin and goldfinch are starting to form large jittery flocks, bounding away at the slightest provocation. The longer nights {{2}} are busy with the calls of tawny owls as the young leave the nest.
My infrequent visits to the east coast are short and packed with beekeeping and work commitments so I see much less wildlife. However, it’s very clear that the season is ‘all over bar the shouting’. The bees are getting defensive, there are lots of wasps about and the nectar flow is finished.
Let the heavy lifting begin … and Correx
On my last visit to Fife I cleared the supers and removed them for extraction.
I’ve described my clearer boards before {{3}}. They have no moving parts, a deep lower rim providing space for the bees to clear to, and two well-separated exits.
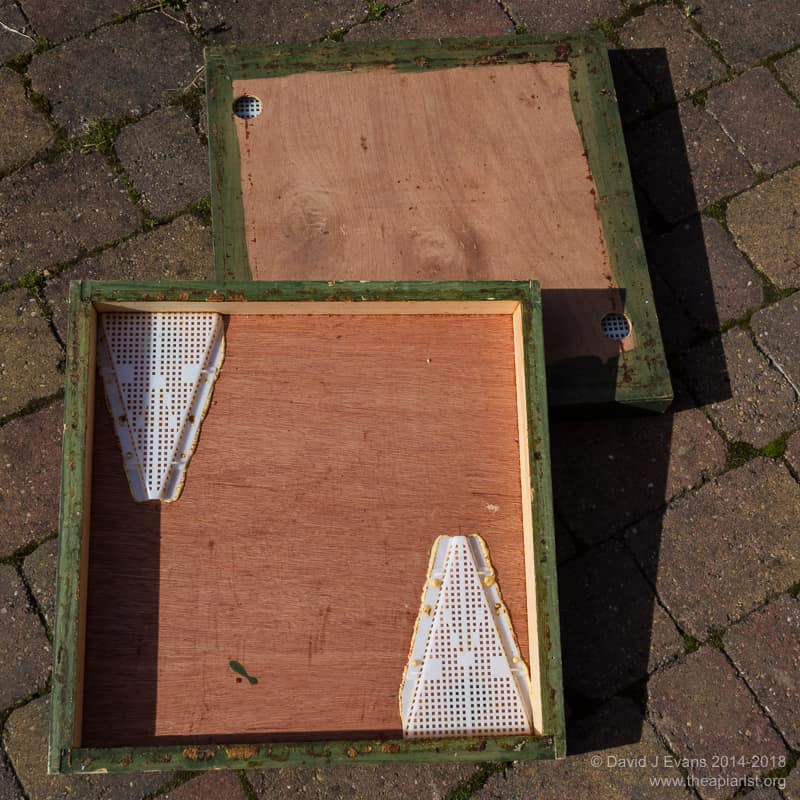
Clearer boards …
I usually try and clear all the hives in a single apiary at once. It increases the workload, but it saves making more than two visits. This of course means that I need sufficient clearer boards for every hive in the apiary … and on this trip I didn’t {{4}}.
At the last minute I therefore built a few extra using Correx, some butchered rhombus escapes, spare ekes and gaffer tape.
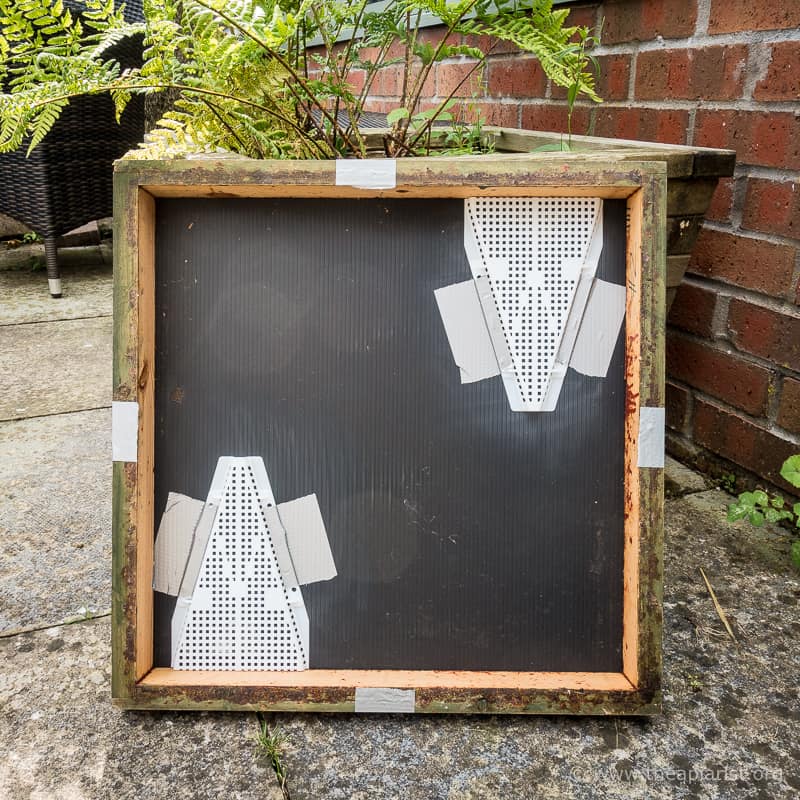
Quick fix clearer board – hive side
If you’re going to do this here are a couple of tips:
- Do not use standard 3M gaffer tape as sold in the ‘Middle of Lidl’ and elsewhere. It can’t cope with the warmth and humidity of the hive – at least when stuck to Correx – and the escape usually detaches within 24 hours. Unsurprisingly these things work a whole lot less well (i.e. not at all) without the rhombus escape. The best gaffer tape I’ve found for Correx is Unibond Power Tape (which is waterproof and very long lasting).
- Don’t try and save time/save rhombus escapes/cut corners by using only one exit hole and half a rhombus escape. The hives I tried this with still had hundreds of bees in the supers. Don’t say I didn’t warn you 😉
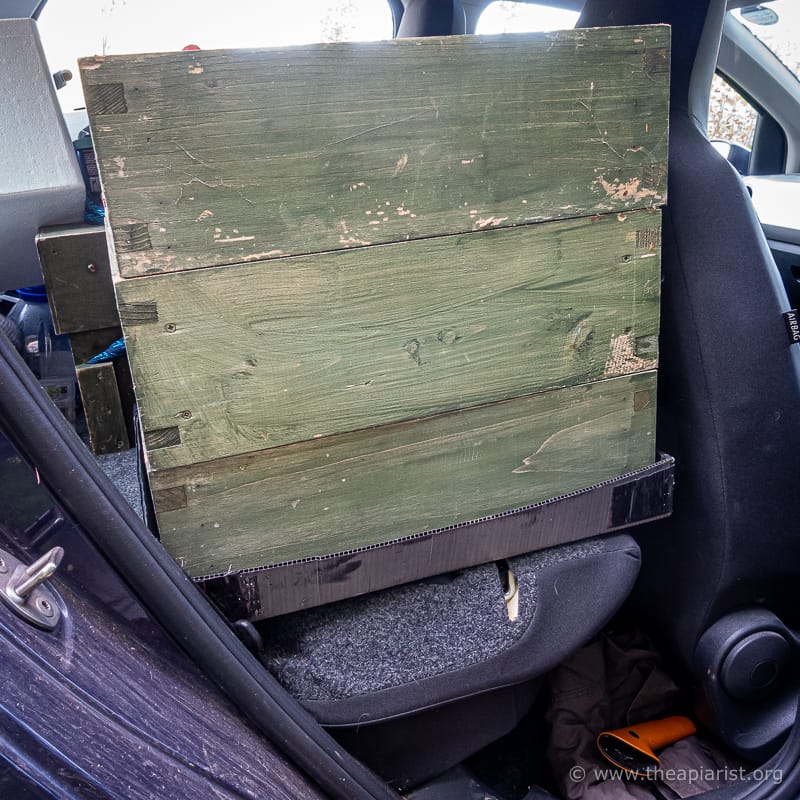
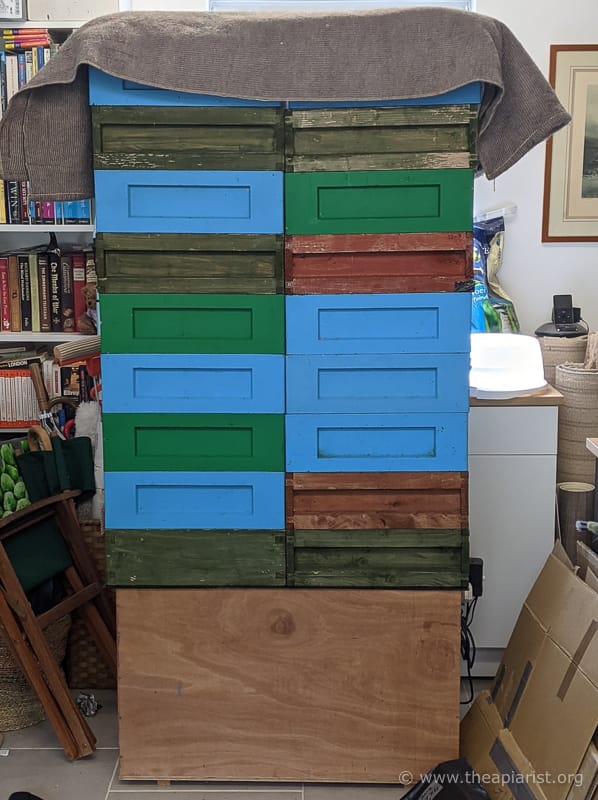
I have to transport all my supers to the west coast for extraction. Emptying them of bees, keeping the wasps away and loading them into my little car was a fraught and exhausting process.
More Correx
Whatever the opposite of a hot hatchback is … is what I drive.
It’s a great little car and very economical {{5}}. However, it’s not really ideal as a beemobile. I can only get a maximum of about 16 supers in it whilst still being able to see out of at least some of the windows.
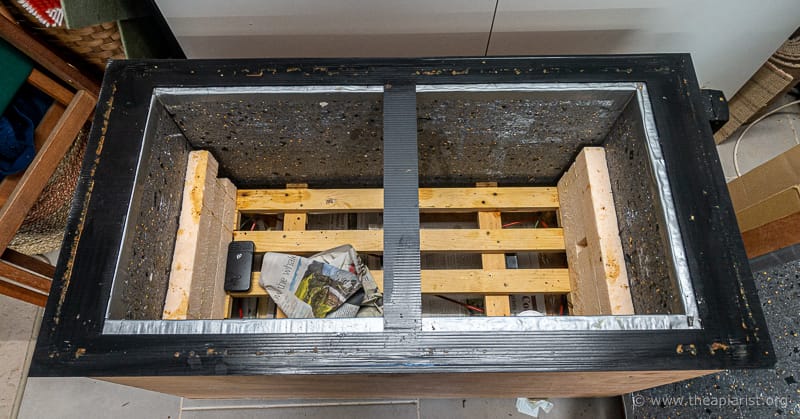
To save the already filthy upholstery from contaminating all that lovely honey in the supers I use more Correx …
The multi-purpose Correx hive roof
… in this case an upturned Correx hive roof.
These are simplicity itself to construct using Correx and more Unibond Power Tape. Correx is remarkably UV resistant and I have roofs originally built in 2013/14 still going strong. A single 1.2 x 2.4 m sheet of Correx will yield half a dozen roofs and cost you the grand sum of about £1.70 each {{6}}.
When you’re clearing and transporting supers these lightweight roofs/trays are invaluable. They keep the wasps out of the top of the stack and stop the honey dripping out of the bottom.
And a bit more Correx
It’s much easier to extract honey if it’s warm. I therefore stack the supers on top of my honey warming cabinet until I’m ready to do the extracting … or until my back recovers after lifting all those supers off the hives and into the car.
Honey supers waiting to be extracted
I built my honey warming cabinet several years ago. It is probably one of the most useful (and used) pieces of beekeeping ‘stuff’ I’ve got. It’s got excellent temperature control and I’ve even used it to incubate queen cells. However, it is primarily used for honey and every bucket I process and jar goes through it, often more than once {{7}}.
Because of the size of available plywood sheet, the depth needed to house the element and insulation, coupled with a generous helping of my incompetence, I built the cabinet slightly too small.
This resulted in the classic ‘good news and bad news’.
The good news is that I don’t need to be absolutely precise in terms of positioning the edge of the supers on the thin upper edges of the cabinet. Any mistakes here would result in the insulation getting crushed.
The bad news is that some supers can leave a slight gap at the bottom through which heat escapes. This depends upon the particular design of the supers. Paradise/Denrosa poly supers and Abelo supers are reasonably flat on the underside, but red cedar boxes leave lots of unwanted gaps.
Correx gap-filler on the honey warming cabinet
A simple shim of Correx is an easy solution to this issue. As an added benefit, this also stops the upper edges of the cabinet from getting sticky.
A wheely useful trolley
A honey warming cabinet takes up quite a bit of space when not in use. Mine conveniently fits onto a robust ‘trolley’ that allows me to easily wheel it out of the way when needed.
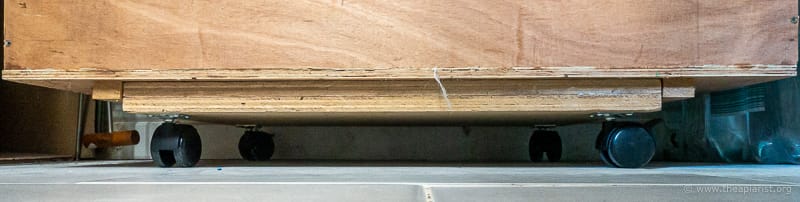
Wheely useful trolley under the honey warming cabinet
When pre-warming supers for extraction it has to be moved off this onto the floor. The 18 supers in the picture above probably weigh over 300 kg. Neither the tiled floor nor the castors would be able to support this.
However, when just warming a couple of buckets of OSR honey prior to creaming this allows me to tuck the cabinet out of the way until needed.
I’ve got a couple of these trolleys. I stack the empty supers on them after extraction and so can move them about without excess bending and lifting.
Extracting
I uncap supers using a hot air gun. This is fast and efficient. The cappings melt almost instantaneously but can generate wax ‘shrapnel’ which tends to fly off in all directions. I strongly recommend wearing an apron to avoid getting peppered with tiny specs of molten wax.
A 10 frame super … but I actually squeezed the bottom one in from another box.
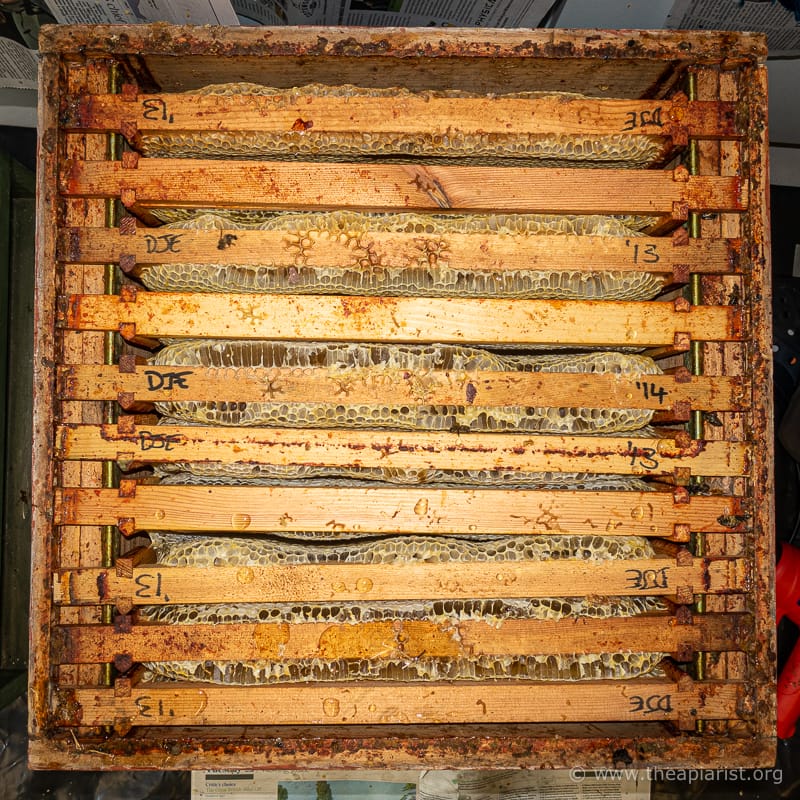
Almost all my supers are arranged to contain 9 frames. I start them with 11, reduce them to 10 once the comb is drawn, and take one more frame out once they start fattening up. Drawn super comb is reused year after year and it’s always nice to see a frame dated a decade or more ago going though the extractor.
The 9 frames in a super conveniently fills my 9 frame extractor (funny that). Of course, sometimes the bees fail to completely fill the outer frames, so there may be a little juggling to try and get the machine reasonably well balanced before starting the run.
It’s surprising how quickly you learn to judge the weight of a filled frame and to calculate where it should be placed in the extractor to achieve the best balance.
‘Best’ as in ‘best that can be achieved with these 9 frames without spending an interminable amount of time shifting the frames about’.
Thank goodness for extractors on castors 🙂
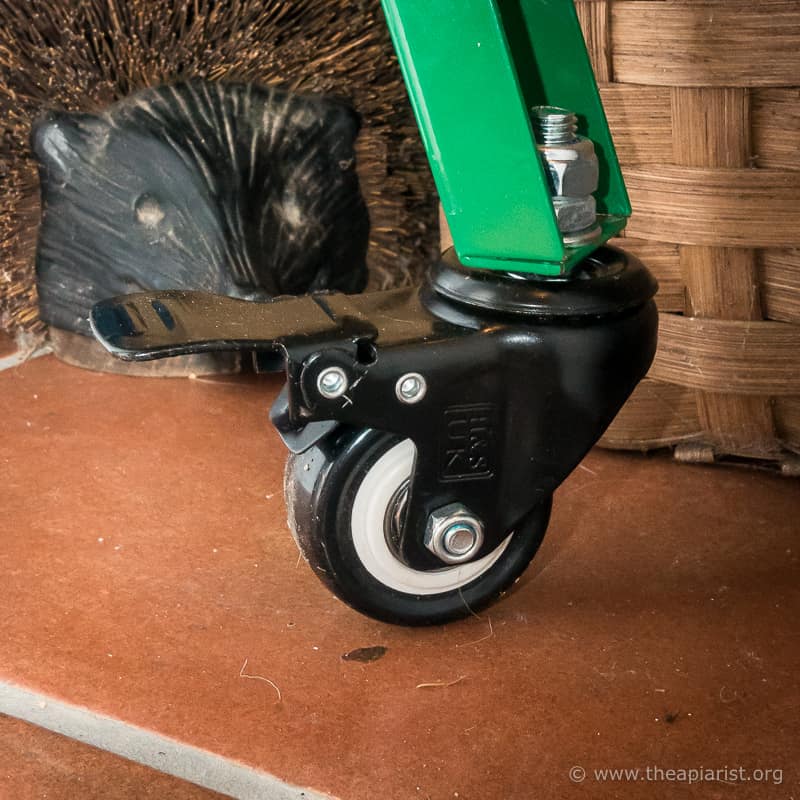
Rubber-wheeled castor with brake
An unbalanced extractor on castors gently wiggles back and forth, rather than walking boldly across the room. Leave the castors unbraked during use.
My extractor is pretty basic. On/off and speed control. No timed runs or other snazzy settings. Because some honey extracts more easily (perhaps because it was lower down in the stack of warming supers?) I use an LED headtorch {{8}} to look down the inner sidewall of the machine to judge when I should stop the run.
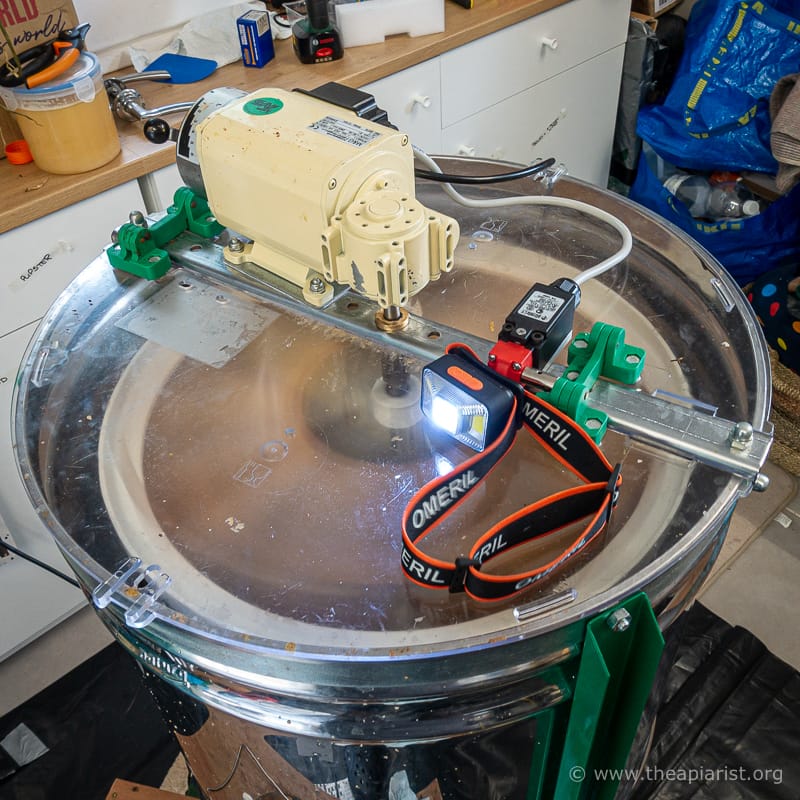
Extractor and headtorch
You can see the drops of honey hitting the sidewall as tiny pinpricks of reflected light. Once they’ve reduced to almost nothing I reverse the machine for a minute or two, or remove the frames and reload it.
Why is less more?
As I suggested in the opening paragraph, this has felt like a very short season. Because of my move to the west coast I’ve also got far fewer honey production colonies this year than any time in the last decade.
Nevertheless, it’s been an outstanding year for honey 🙂
My total crop is the best I’ve had since returning to Scotland in 2015, though this was largely due to a fantastic spring harvest. I’m also hopeful there may be a little bit of heather honey before the end of the season … we’ll see.
The priority now is to ensure that the bees are given sufficient fondant to store for the winter ahead, and that the mites are treated promptly and effectively. I’ll write about these important aspects of preparing for winter in the next week or three.
But before I go …
With all those winter bees to rear over the next couple of months the colony will need lots of pollen.
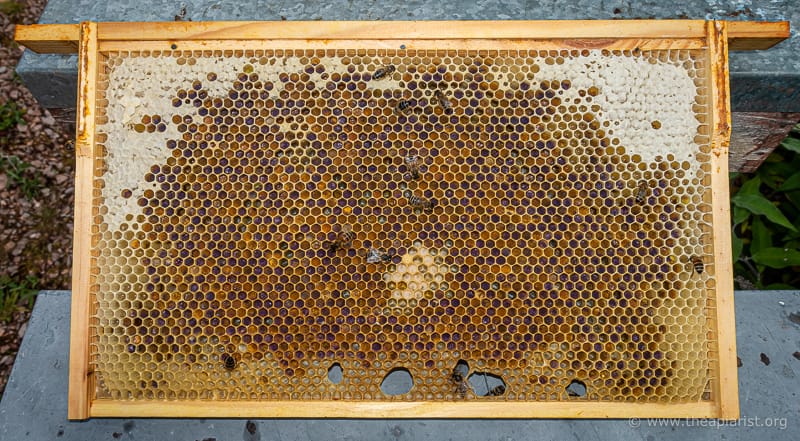
The United colours of Benetton pollen in one of my hives
This frame made me smile. I counted just 20 developing larvae in the centre, surrounded by a pointillist sea of different pollen types. These will be well-nourished bees 🙂
Although not absolute, the bees tend to store similar pollens in individual cells. Since it takes many corbiculae-full to fill one cell this must involve a degree of ‘sorting’ by the bees during pollen storage. This all happens in the dark, so presumably is based upon a characteristic other than the colour of the pollen.
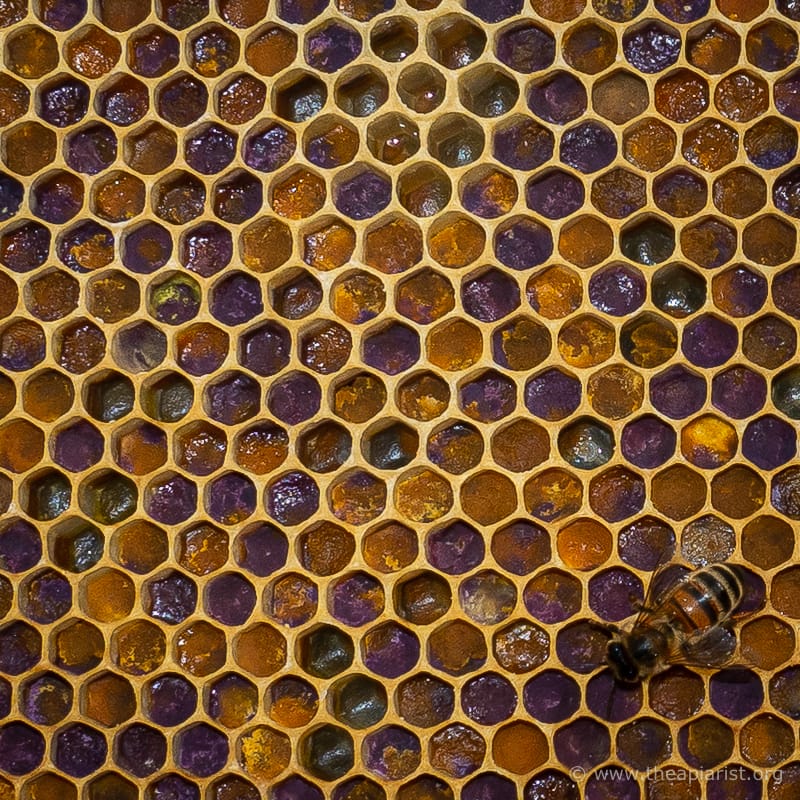
Pollen close up
I don’t know how they do this but will read a bit more during the winter and report back. This was one of the outer frames in the colony. Most of the rest are still packed with brood, ensuring the colonies will be strong going into the winter.
Wasps are starting to pester the hives. On the west coast I have several colonies recently promoted from nucs to a full hive. Most are in hives with kewl floors {{9}} which have an L-shaped tunnel entrance, making them easier to defend.
However, to improve things further I often add an entrance reducer. The ‘roof’ of the horizontal part of the L-shaped entrance has two small screws set into it {{10}} which act as ‘stops’ for the entrance reducer which I build out of the bottom bar of a frame.
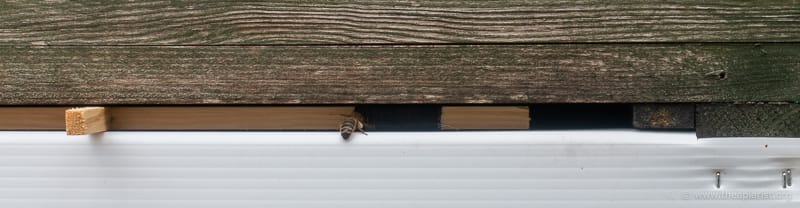
A case of misdirection …
My quality control is a bit shonky and these reducers sometimes fit rather poorly. To make them a better fit I added a few wraps of gaffer tape. Initially I used black tape. However, it was clear that this looked sufficiently like the dark entrance to the hive that the bees were getting ‘misdirected’ away from the real entrance to the black tape.
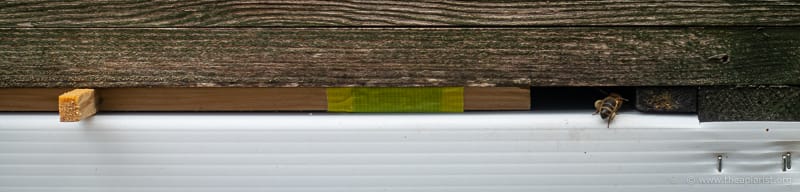
That’s better …
To avoid further confusion I added an overwrap of a lighter coloured tape. All of which resulted in me revisiting some of the scientific literature on bee vision … which I’ll save for another day.
{{1}}: Remembering that the temperature never gets that high over here on the Atlantic coast … we’ve only had four days over 20°C in the last month. I’ll discuss the significance of this with regard to queen rearing sometime in the future.
{{2}}: Also remember all these things are relative … I opened my last hive of the day at 9 pm on the 18th of August. The evenings are still a lot longer than most parts of the country.
{{3}}: Eight years ago! Where did those years go? I’m going to have to revisit some of those old posts as many of the current readership have probably never seen them … and I’ve forgotten what I’ve previously posted.
{{4}}: Pre-Covid I used to give an illustrated “Here’s one I made earlier” talk on DIY for beekeeping. At least one of my clearer boards never made it back from a draughty church hall in the middle of Scotland somewhere. I hope it works as well for whoever has it as they do for me.
{{5}}: 65+ mpg driving back and forth across Rannoch Moor every 7-10 days is both typical and affordable … I’d be bankrupt if I took the Bentley.
{{6}}: For comparison, a Thorne’s flat-packed standard hive roof costs about £54. The wood/metal roof is certainly stronger. However, it would need to last at least 250 years to give similar value for money. And the metal corners will shred the upholstery in your car … No … don’t ask …
{{7}}: Buckets are warmed before mixing/jarring, and jars are returned to the cabinet to allow the contents to settle before labelling. The result is an attractive product that sells well.
{{8}}: The same one I use for grafting.
{{9}}: Another 2013 post … oldies but goldies!
{{10}}: I’d have to take a floor to pieces to illustrate this, so please use your imagination.
Join the discussion ...