How to : Queenright queen rearing
How many bees does it take to rear a queen?
Using nano-colonies, scientists have shown that as few as 100 bees can rear a new queen (Lamas et al., 2025). That's right, 100 nurse bees in a perforated plastic cup in an incubator, provided with a 12-hour-old queen cell (i.e., one that's just been started), will rear the queen to emergence. There's no difference between the mating success of queens reared like this and those reared in a traditional cell builder {{1}}.
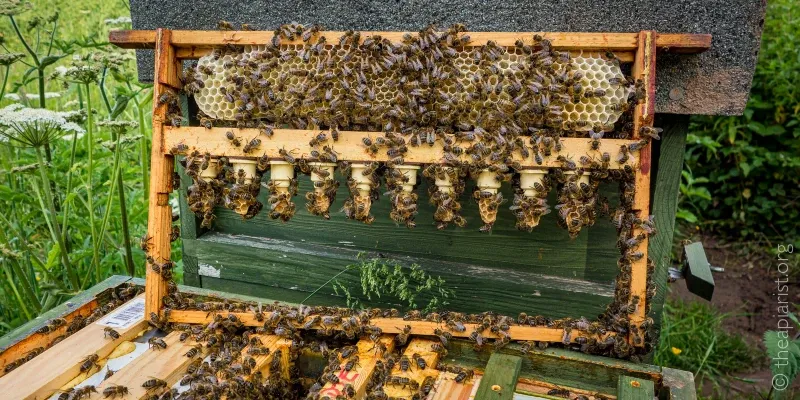
However, if you read about methods employed by beekeepers you'll often see towering cell raising colonies recommended, consisting of two or three brood boxes packed with young and emerging brood. Following the addition of grafted 12-hour old larvae to the cell-raising colony, the resulting queens are reared until close to emergence, and then transferred to mini-nucs for subsequent mating.
For the small-scale, enthusiastic amateur, both of these methods are unachievable … and undesirable.
The nano-colonies, because you need a laboratory, considerable dexterity and the time to optimise the setup. The towering cell raiser, because it requires a huge number of bees. If you've only got 2 or 3 colonies, establishing a double or triple brood box queenless cell raiser uses almost all of your stock.
Irrespective of their scale, both these methods use queenless colonies, and therefore the resulting queens are reared under what is termed the emergency response.
Queenright queen rearing
But think about what happens in a natural colony — for example, one living in an old oak tree. The likelihood of the queen suddenly dying is very small. Nevertheless, the colony still needs to reproduce (swarm), and the queen must be replaced (supersedure) as she gets old and infirm.
In these situations, new queens are reared in the presence of the existing queen.
The swarming and supersedure responses result in the production of new queens under queenright conditions.
In addition to being queenright, these colonies are not abnormally large {{2}}.
The reality is that the majority of queens — in both free-living colonies and in thousands of 'managed' hives (in the absence of swarm control) — are reared under queenright conditions.
Bees have been around for millions of years, and queenright queen rearing has worked very well for them.
As I'll describe in this post, I think queenright methods are ideal for the small-scale amateur beekeeper who wants to rear a few queens for their own apiary, or for friends.
This is a long post (~5,000 words) covering both the principles and practice of queenright queen rearing, together with the tips and tricks that make the difference between success and failure. Access is for sponsors (paying subscribers) of The Apiarist.
These methods require minimum amounts of specialist equipment, all inexpensive (or easy to build), and can be successfully employed using a single hive. The method can be repeated, producing a trickle of queens over several weeks or months, with minimum disruption to the normal activity of the hive.
Beekeepers often have to choose between making bees or honey … queenright queen rearing is about as close as you can get to achieving both 😄.