Measure twice, cut once
Swear often 😉
I’ll return to cursing shortly … bear with me.
The autumn solstice is long gone and we’re fast approaching the end of British Summer Time {{1}}. For most northern hemisphere beekeepers this means that there may be five months of ‘not beekeeping’ before we start all over again.
Of course, there are things we have to do with the bees in the intervening period.
The hive entrances must be kept clear so they can get out on the inoffensively named ‘cleansing flights’ when needed. There will be a winter miticide treatment to apply … probably long before midwinter. It is also important to keep an eye on the weight of the hive – particularly as brood rearing starts in earnest in late January and February – to ensure the bees do not starve.
But those three things aren’t going to fill anything like five months, so there is bound to be some time ‘spare’ over the coming months.
The elasticity of time
Although the year contains twelve about equal length months, those of us who keep bees in temperate northern countries experience a strangely warped calendar.

This is what it feels like … the beekeepers year
Apparently the months only vary in length by ±3 days. May and December contain the same number of days, but May disappears in the blink of an eye, whereas December can drag on interminably.
Weirdly there appears to be an inverse relationship between the available daylight to work in, and the amount of time it feels as though you have available to actually get the various beekeeping tasks completed.
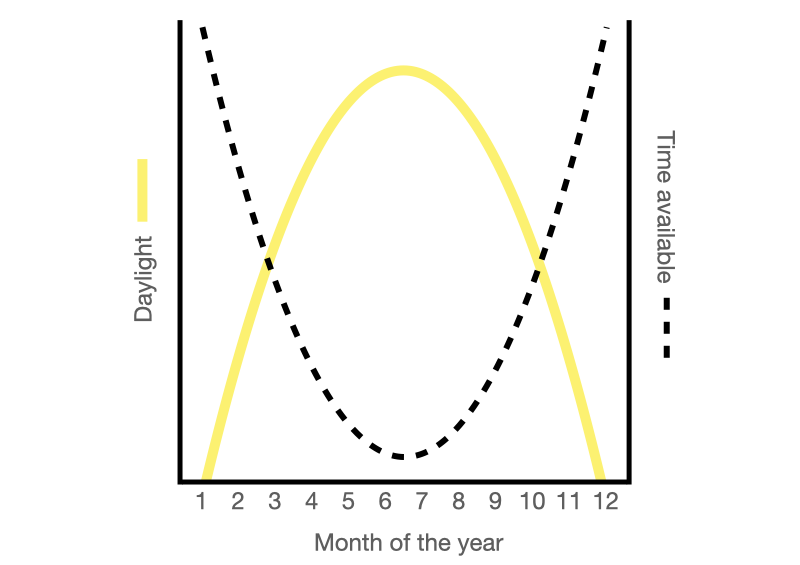
This surely defies the laws of physics?
All of which means that beekeepers often have little free time in the summer and ample free time in the winter.
Some wise beekeepers have a busman’s holiday and go to New Zealand to tour apiaries (and – more to the point – vineyards).
Others catch up with all of the non-beekeeping activities that apparently ‘normal’ people do … like the decorating, or building model railways, or flamenco dancing {{2}}.
Getting creative
But if you still want to dabble with a bit of beekeeping – in the broadest sense of the word – through the cold, dark days of December and January {{3}} there are all sorts of things you can do.
Many years ago I wrote an irregular column for my then beekeeping association on do-it-yourself (DIY) for beekeepers.
It was irregular because my use of punctuation has always, been suspect, and because it didn’t appear each month.
That column eventually morphed into this website {{4}}.
In fact, some of the very earliest articles were almost lifted verbatim from the beekeeping monthly newsletter.
I wrote about DIY because it was something that:
- brought me a lot of satisfaction
- saved me a few quid
- improved my beekeeping
Now, a decade or more later, I still use the winter months to do the majority of my beekeeping-related DIY {{5}}.
It’s only in the winter that I have the time to think things through properly before rummaging through the wood offcuts box and actually building something.
Measure twice, cut once
Which brings me back to the start of this post.
The motto for beekeeping DIY could be something like:
Measure twice, cut once, swear often {{6}}
However, having identified a problem, there’s almost as much enjoyment to be gained from thinking it through to a workable solution than there is from the actual woodwork.
But Think lots, measure twice, cut once etc. doesn’t have quite the same flow.
And, as we’ll see below, it doesn’t have to be woodwork.
So I can happily fill a few hours on a dark November evening thinking about improvements to a hive stand that could cope with 1500 mm of rain a year and very uneven ground {{7}}, or how to best construct the removable slides for a Morris board.
And by best here, I mean for a lot less than the £30 charged for the commercial ones {{8}}.
Morris board … that’s £8.25 please
Part of the thinking involves how to tackle the project with the limited range of tools I have. I don’t have the space or the skill {{9}} to own a bandsaw, or a thicknesser {{10}}, or a router.
Almost everything I build uses a combination of Gorilla glue, Correx, hand tools, blood {{11}}, wood offcuts and some really rich Anglo-Saxon phrases.
My DIY skills are legendary, and not in a good way, but the great thing is that the bees could not care less.
Fat dummies
Most of the various things I build develop from ideas that occur during the ‘active’ beekeeping season.
If it’s needed urgently I’ll cobble something crudely together and use it there and then. However, it’s unlikely to have received much thought (or care in construction) and so I’m more than likely to ponder how it could be improved once I have a bit more time.
I learnt the basics of queen rearing from the late Terry Clare at a BBKA Annual Convention and couldn’t wait to have a go myself.
Fat dummies – mark 1
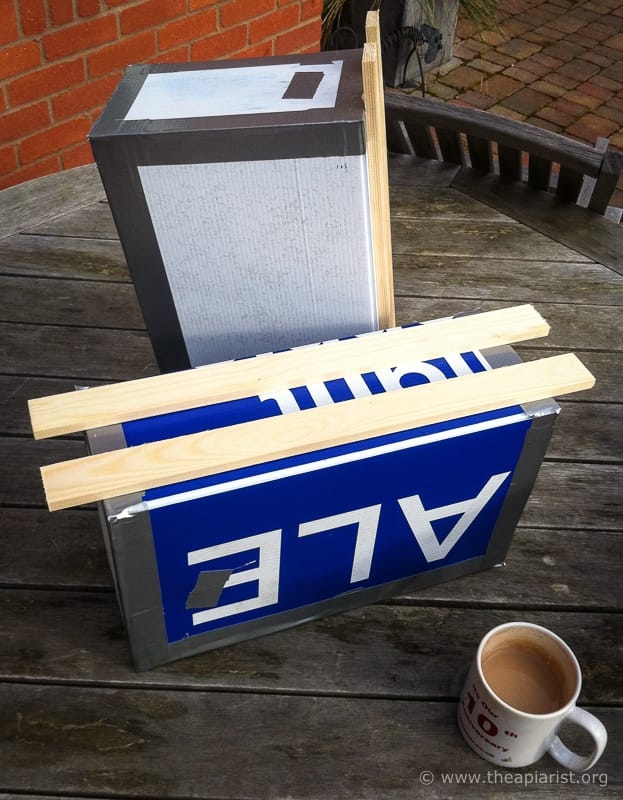
I used the Ben Harden queenright queen rearing approach. This needs an upper brood box with most of the space ‘dummied down’ to concentrate the bees on the grafted larvae. For this you need a couple of ‘fat dummies’ {{12}}. I built my first fat dummies one afternoon using gaffer tape and Correx (see above) and later that April reared my first queens.
But that winter I had time to do a bit more research. Dave Cushman’s website described fat dummies with integral feeders.
Clever.
These would clearly be an improvement – unless there’s a strong nectar flow you often have to feed the colony – so I built some.
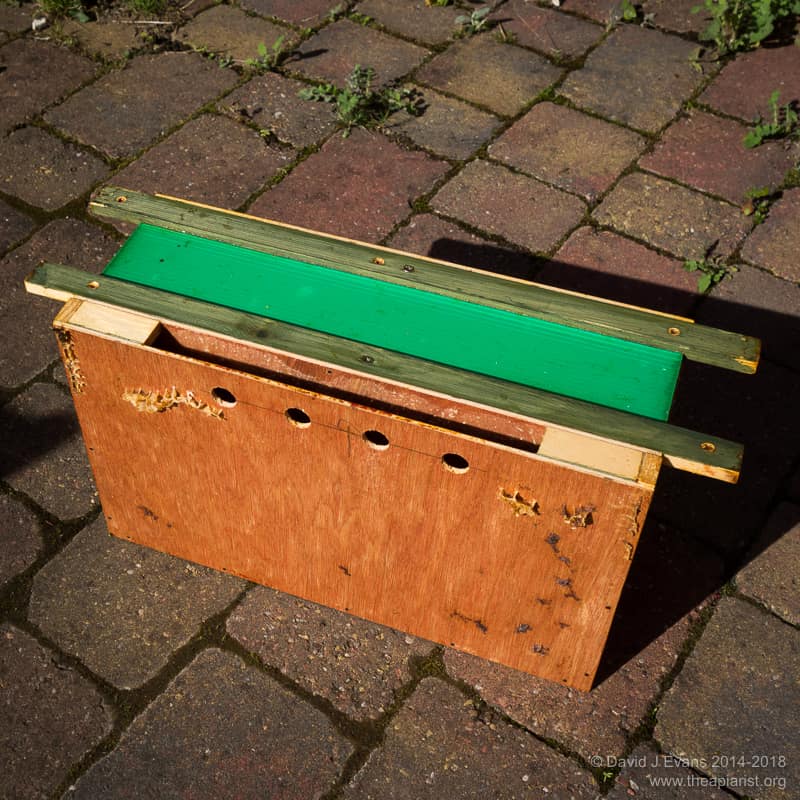
Fat dummy mark 2 … with integral feeder and insulation
Mine are still in use … and not just for queen rearing. They are packed with polystyrene insulation … an embellishment I thought up {{13}}. I can use them to reduce ’empty’ space in a brood box occupied by an undersized colony. In fact, with two of them, I can overwinter a four-frame nuc over a strong colony to provide warmth from below.
Problem solving
As I said earlier, the problem solving is part of the fun.
I use a lot of Correx. That’s the fluted polypropylene board that is used for political posters and For Sale signs.
Sourcing it is often not a problem if you’re prepared to do some homework.
It’s lightweight, strong, available in a range of cheery colours … but most importantly it is used for political posters and For Sale signs.
So, it’s often free.
And that’s a word all beekeepers like 😉
Wait for a general election and seek out a candidate who has suffered an ignominious and humiliating defeat. Ideally one in which they have both lost their deposit and and any remnants of support from the political party they were standing for … and ask politely.
And For Sale signs are even more easily obtained. Always ask … and remember that it’s bad form to remove them if the house has yet to be sold.
But there’s a problem with Correx. You cannot glue it with any normal glues. It’s got some sort of surface coating that prevents glue from adhering properly.
Believe me, I’ve tried.
There are special glues, but at special prices 🙁
Roofs
I wanted to build some hive roofs from Correx but had to solve how to fold it ‘across’ the longitudinal flutes, and then how to stick it together in a way that would be weatherproof.
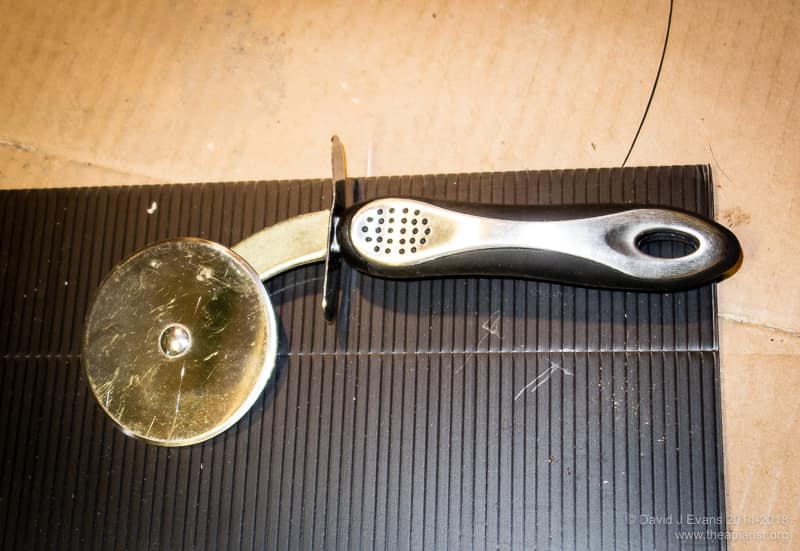
Pizza cutter … take care scoring the Correx
The folding bit was easy … it turns out that people who keep guinea pigs use this stuff to make the cages and runs for their cavies. And after an hour or two reading about someone else’s (weird) obsession I discovered that a pizza cutter was ideal for scoring Correx prior to folding it.
The glue I worked out for myself. I built a couple of dummy roofs and held the folded corners together with zip ties or regular gaffer tape, zip ties and regular gaffer tape, or some (claimed) waterproof tape.
Of these, the waterproof tape – specifically Unibond Extra Strong Power tape – worked really well.
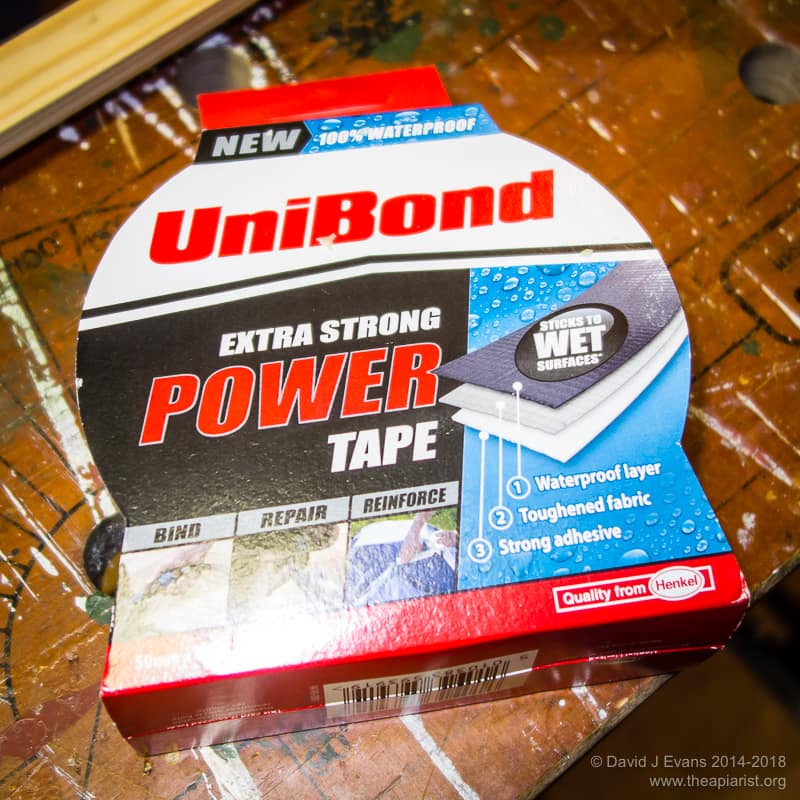
Sticky stuff …
And remains the only one I’ve found to work.
You need to lightly sand the surface of the Correx and ideally degrease it with some solvent. I still have roofs built 8 years ago with the original tape holding them together. They cost me £1.50 each to build as I had to buy {{14}} the Correx as the only For Sale signs I had were too small.
Here’s one I made earlier
Most of the things I’ve made have been through one or two iterations of ‘improvement’ before I’ve ended up with something I’m satisfied with.
The Kewl floors I almost exclusively use these days were an improvement of the original design I built, but have also had a couple of additional modifications.
My honey warming cabinet – one of the first things I ever built – was modified after a few years by the addition of a fan to better circulate the warmed air. This significantly improved it.
The things I’ve discussed above are all good examples of why it’s worth spending some time in the winter doing some creative thinking and DIY {{15}} :
- commercial Morris boards are expensive and (I think) have entrances that are too large
- I’m not aware of any commercially available fat dummies … please correct me if I’m wrong
- no one sells hive roofs (or super carrying trays) for £1.50
- my floors are ideal for the beekeeping I do and significantly less expensive than anything similar available commercially
- my honey warming cabinet is used to warm supers before extraction, to melt set honey and – because the temperature control and heat distribution is good enough – has even been used as a queen cell incubator
Electrickery
This winter I have three projects to entertain me.
The first project is the second iteration of my DIY portable queen cell incubator. The first of these was cobbled together earlier this year. Although it worked – more or less – it was far from satisfactory.
Mark 2 is currently being stress tested.
It is being tested.
I am getting stressed.
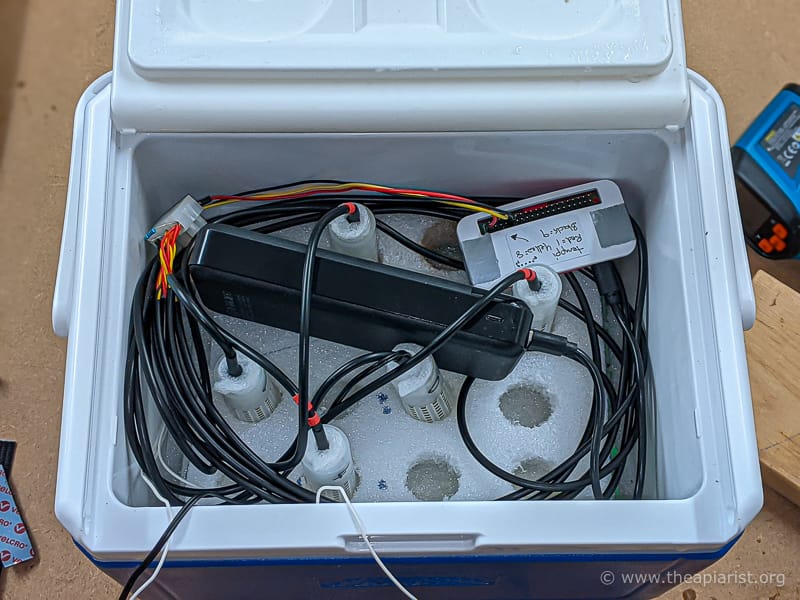
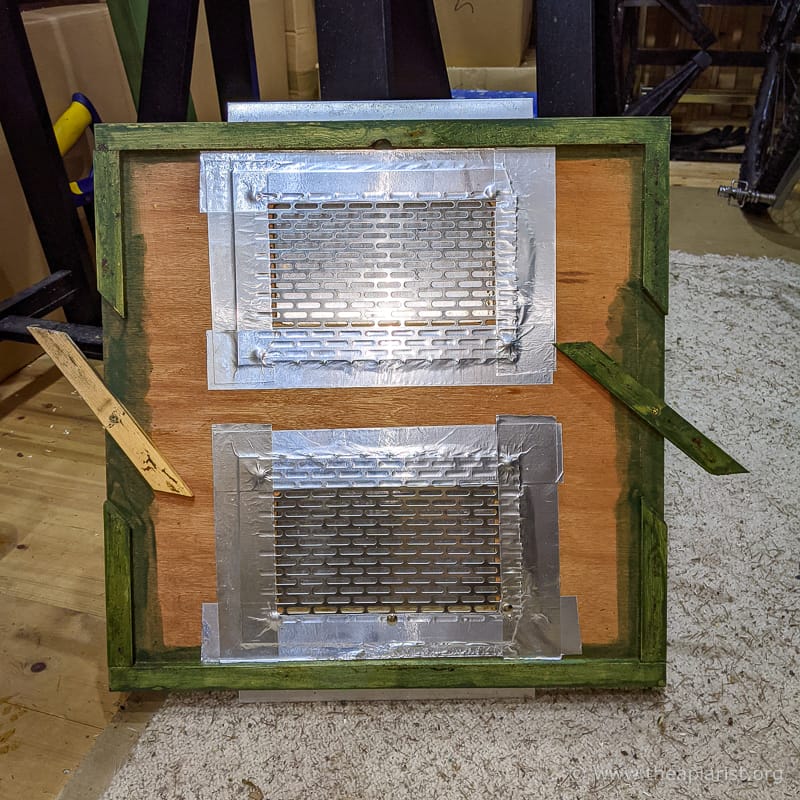
Queen cell incubator – mark 2 … a work in progress
I’ve managed to achieve really good temperature control. However, I’m currently struggling with uneven temperatures at different areas within the box. They barely fluctuate, but they’re not the same.
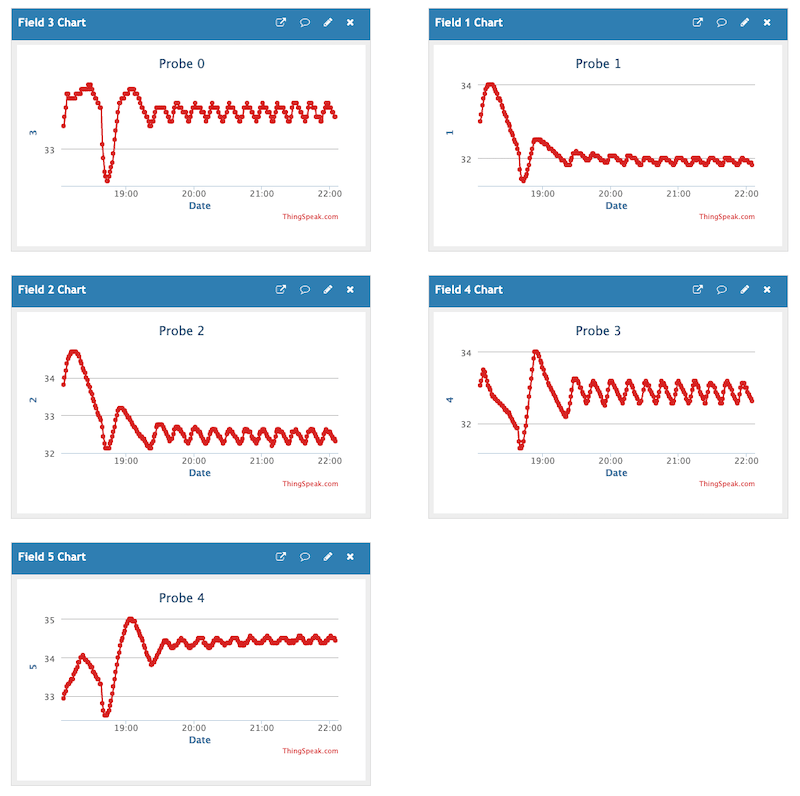
Great temperature control at a range of (different) temperatures
Grrrr.
I’m pretty sure this is solvable {{16}} and that it will be possible to build something better than is available commercially for about 10-15% of the price {{17}}.
But, almost more important than that, it will be a problem I’ve solved {{18}} that suits me, my bees and my beekeeping … which will be very satisfying.
The second project is a set of hive scales. Lots of others have tackled this problem and there are some really clever and complicated solutions out there.
The plan is for mine to be the exact opposite.
Simple, and not very clever at all.
Testing is ongoing 😉
Software, not hardware
And the final project is software, not hardware.
All my honey jars have unique batch numbers. These allow the individual apiary (and bucket) to be identified. The batch number is generated by some PHP or perl scripts and used to print a QR code onto a Dymo label affixed to the back of the jar.
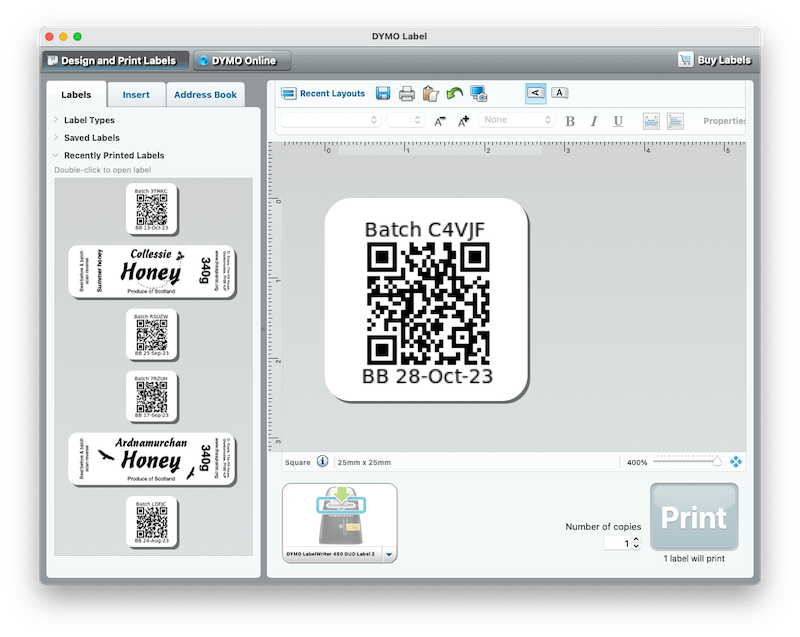
QR code containing a batch number
But that monochrome pointillist pattern contains a hidden web address as well. The purchaser will be able to point a mobile phone at the code and get more information about the honey {{19}}.
Having sold honey ‘from the door’ for years I’m unsurprised when buyers want to know more about local bees and the available forage … and with these labels they can (and do).
I’ve written the scripts to handle label creation and logging/redirecting ‘views’. I now have to write the programs that create the customised web pages with the local information lifted from the backend database.
And, with only ~165 days until I next expect to open a hive, I think I’m going to have my work cut out to complete any of these projects.
{{1}}: The clocks ‘go back’ in a couple of days here in the UK.
{{2}}: You can tell I have no idea what other people do …
{{3}}: Or, for readers from New Zealand – who routinely are placed fifth or sixth in reader numbers of this website each year – June and July.
{{4}}: The punctuation, remained – suspect – but, the frequency of posts increased and the range of topics broadened to include a load of stuff I knew (or know) very little about.
{{5}}: Which, in all honesty, is the only DIY I really do … to the constant annoyance of my better half.
{{6}}: You will get things wrong, but you’ll probably be doing this in the shed or the garage, so don’t hold back … it’s cathartic.
{{7}}: I think I’ve got a solution to this one …
{{8}}: I solved this one last winter and used them this summer.
{{9}}: Or enough spare fingers.
{{10}}: Is that a word?
{{11}}: Oops …
{{12}}: I’ll let you come up with the entirely predictable joke here …
{{13}}: But I guarantee has been thought up before.
{{14}}: Gasp!
{{15}}: And readers who attended my recent talk on DIY for Beekeepers to Kilbarchan and District BKA will be aware of a range of other things that can profitably – and not just meaning financial profit – be made.
{{16}}: Like Baldrick, I have a cunning plan.
{{17}}: Commercial ones are several hundred pounds.
{{18}}: Famous last words …
{{19}}: At the moment it just goes to a generic web page about local honey.
Join the discussion ...