The ultimate hive stand?

Beekeepers can be passionate advocates of their particular choice of hive type, the material it’s made from, or even the orientation of the brood frames. Equally fervently they may criticise the choices others make. They’ll argue about the best way to clear supers, the fastest way to build frames, or the need for landing boards at the hive entrance.
But they rarely, if ever, say very much about what the hive is sitting on.
Storms expected and I’ve run out of hive straps
The hive stand … possibly the most passive and overlooked item in the apiary {{1}}.
At its most simple, the hive stand is not so much ignored as omitted altogether. The hive is just placed on the ground.
You can easily identify beekeepers who don’t use hive stands; they either have bad backs or dirty knees.
Which neatly makes the point that the hive stand does more than just function as something to stand the hive on.
The purpose of a hive stand
I can think of several functions that a good hive stand provides, or any hive stand should provide. These include:
- keeping the hive off the damp ground
- preventing vegetation from blocking the entrance
- providing a stable, level or adjustable platform for the hive and – in a good season – its teetering tower of heavy supers
- space to place frames removed from the hive during inspections
- additional working space for boxes (supers, second brood boxes etc.) when inspecting colonies
- positioning hives at a better height to prevent, or delay, beekeepers back.
Not every hive stand provides all these, and some offer little more than one item from the list above.
Not even every hive stand I’m currently using provides more than one thing from this list 🙁
Perhaps that’s why they’re largely overlooked? Even poor hive stands work. Up to a point.
Which is not the same as saying that we shouldn’t aspire to something better.
I’ve been giving this some thought as my beekeeping activities expand on the west coast. The hive stands I’ve just completed are a significant improvement on anything I’ve used before.
I live on the side of a hill. There’s almost no level ground. Even the sitting room slopes a bit, and it’s a lot worse in what I laughably call the ‘garden’ {{2}}.
It’s also a damp hill.
I wanted a hive stand that wouldn’t dissolve into mush over a couple of seasons.
But before discussing what I currently think will solve the majority of my problems here’s a quick overview of several DIY and commercial hive stands … the good, the bad and the ugly.
A pictorial overview of hive stands
I’ll whizz through these and make a comment or two on each.
The ‘no hive stand’ hive stand
All well and good until the grass grows and obscures the entrance.
The ‘no hive stand’ hive stand i.e. the ground
In my defence, these were research colonies and we’d completely run out of anything suitable in this particular apiary. Not at all good for your posture … which is why we have PhD students to do most of the bending, lifting and carrying {{3}}.
On a positive note, hive stands like these won’t cost you much 😉
Pallets
These provide a convenient flat surface. However, it’s only a horizontal flat surface if the ground underneath is. Or if you spend time wedging stones or bits of wood in the right places to make the top of the pallet level.
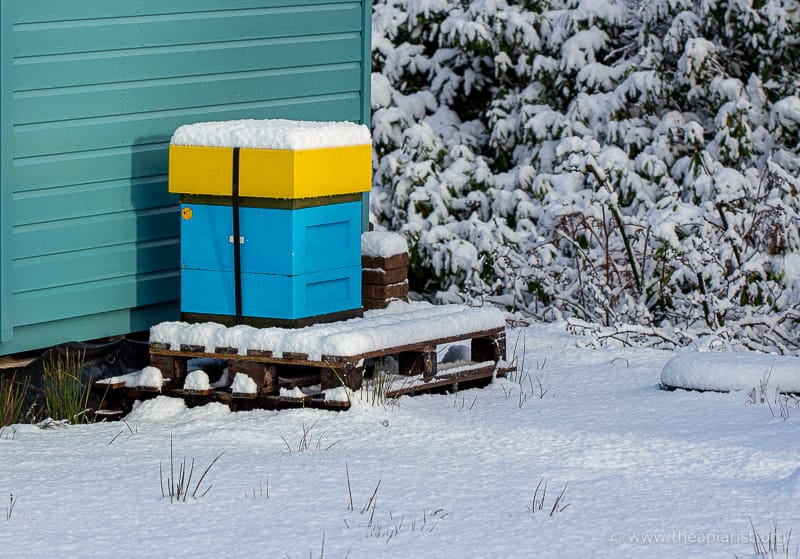
A pallet hive stand
Even two stacked pallets leaves the hive at an uncomfortable working height for anyone taller than four foot one (125 cm). Since I’m six foot one the setup above was decidedly temporary. In addition, although the snow isn’t deep, it’s already covering the hive entrance.
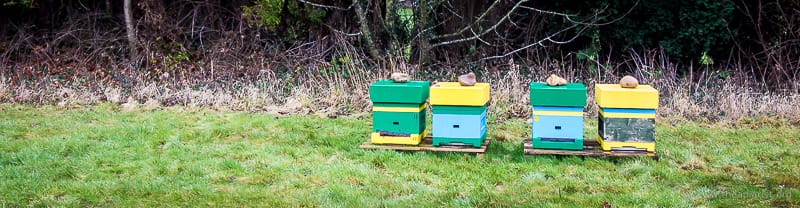
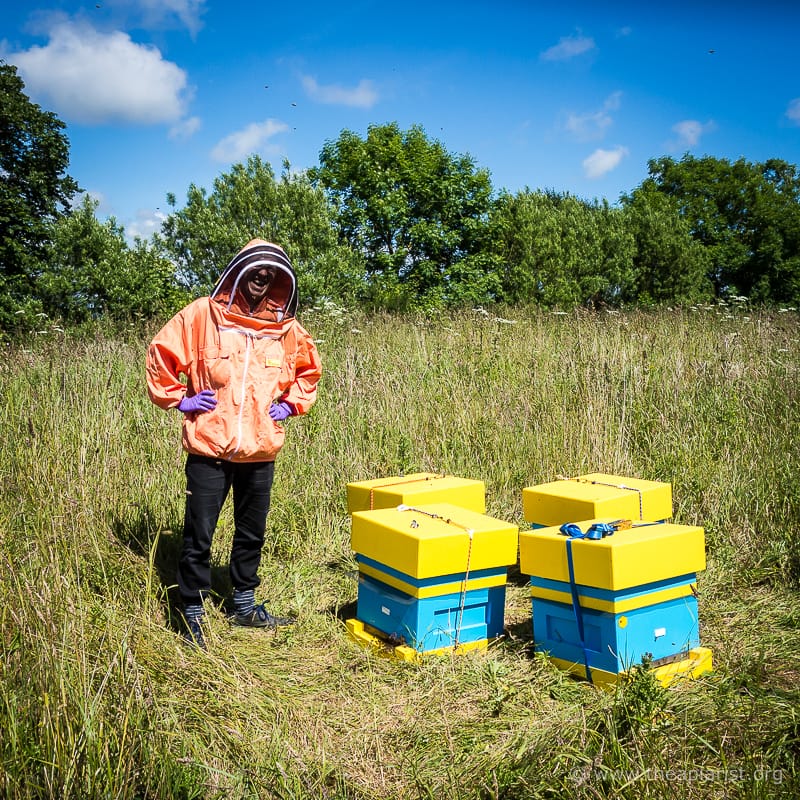
Abelo poly hives on pallets
Pallets are soon overgrown by the surrounding herbage in summer. The photo above was taken in January. That apiary was mown once a year but the hives were almost invisible by June.
Nicot sell a plastic pallet designed for two (European, not National?) hives that can be stacked, is rot proof and can be moved with a fork lift truck {{4}} … not unlike a wooden pallet you’ll get free with your next large order of jars from C Wynne Jones 😉
I’m not a fan of pallets though I regularly use them.
Tyres and milk crates
I’ve used both. Old tyres actually make quite good hive stands and it’s relatively easy to wedge things underneath them to make them level. Two is a reasonable working height, but three might suffer stability issues. Bigger tyres with flat sidewalls stack better.
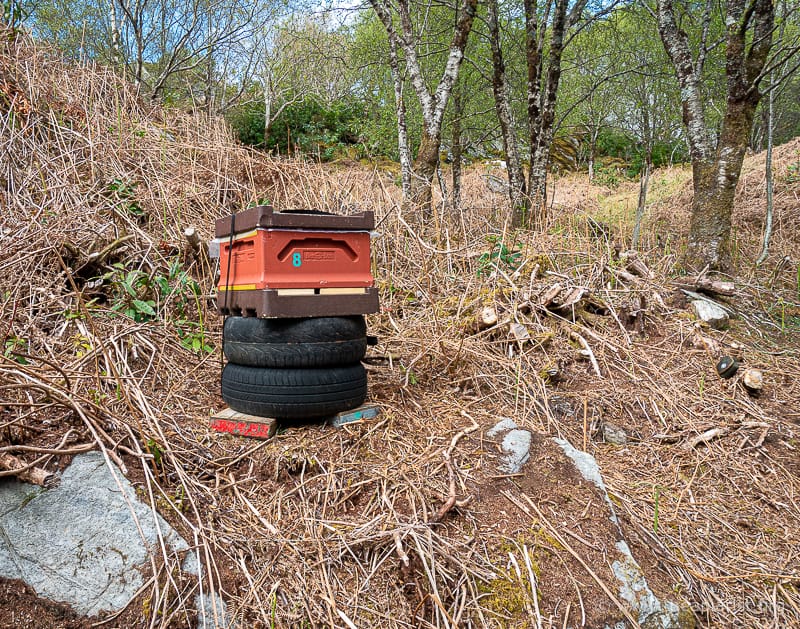
Poly bait hive on a hive stand of old car tyres
There’s no issue with them rotting and you can ‘work’ the hive from any angle if the ground surrounding is suitable. However, this also means that there’s nowhere convenient to balance a frame or two while you complete your inspections.
Arguably they’re also not really aesthetically pleasing … a sentiment I agree with. I wouldn’t have used these for the bait hive (above) had I not found them discarded underneath the rhododendron I cleared from the site.
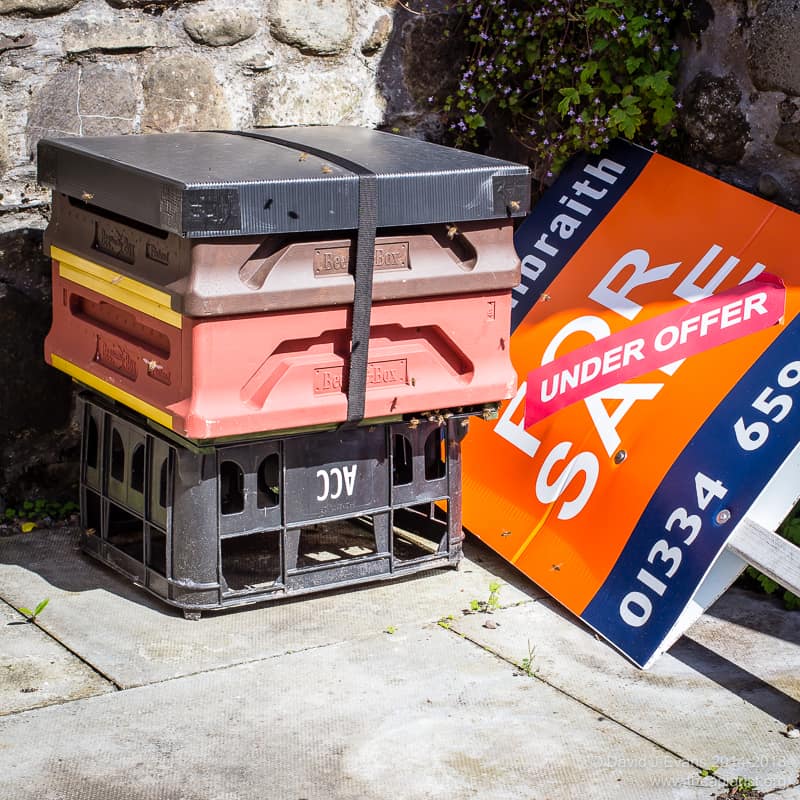
A bait hive on a milk crate
I’ve only used milk crates for temporary bait hives. The footprint of a National hive is larger than a standard milk crate and a full hive, with stores, would be unstable. For bait hives they’re great … and commendably light.
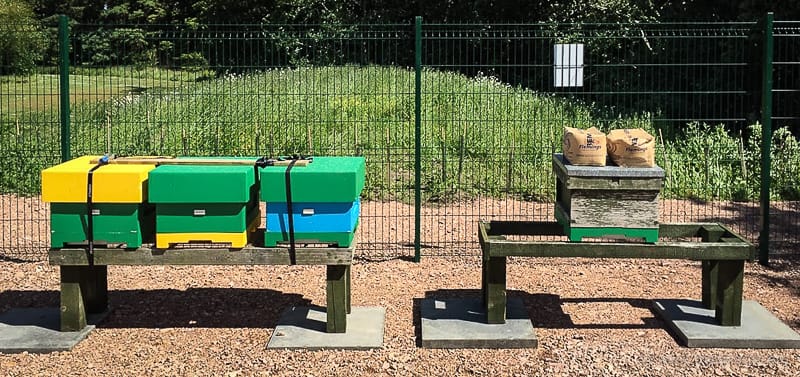
DIY and commercial ‘proper’ hive stands – with ‘legs’ and horizontal bars
I’ve grouped this lot together as it covers a very wide range of broadly similar designs. Two horizontal wooden or metal rails {{5}} supported at or near each end with wooden or metal legs, or by a stack of breeze blocks.
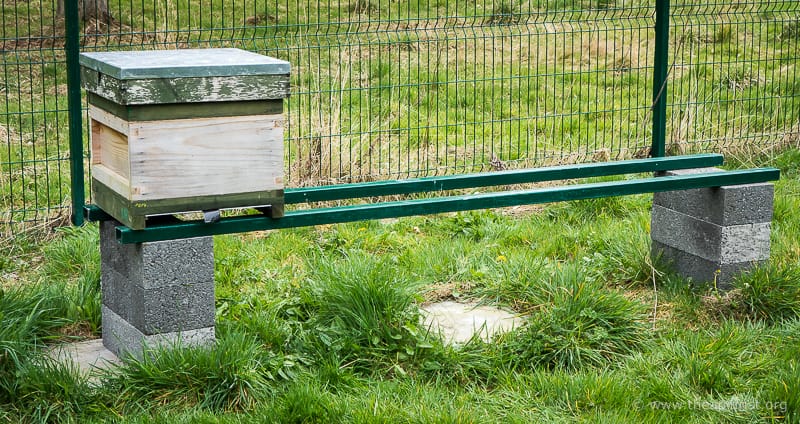
Breeze blocks and metal rails
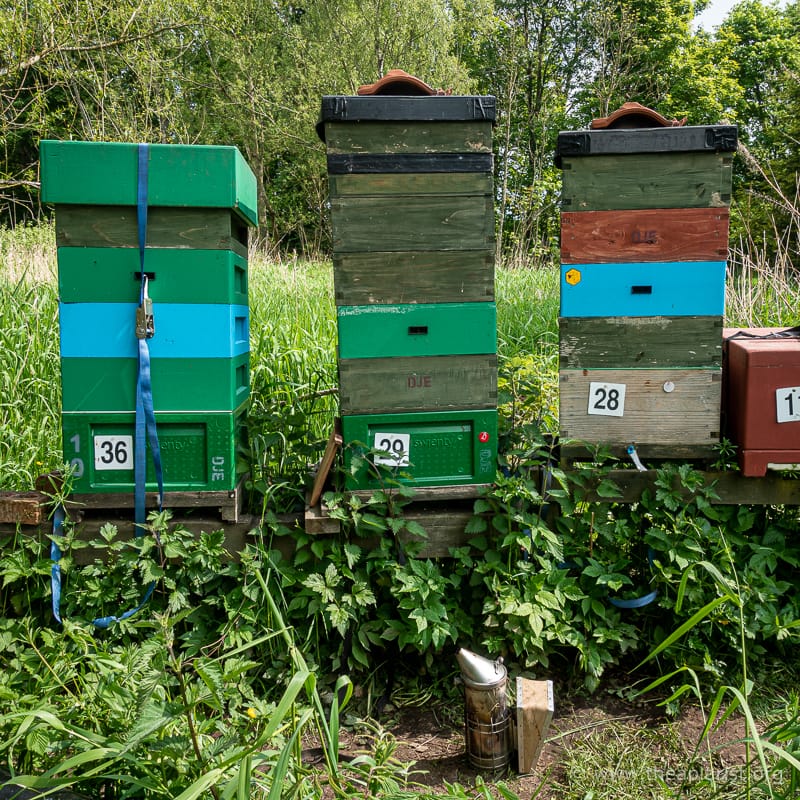
Almost all of the hive stands I’ve used have been of this sort of design. They suit my beekeeping. One or more hives sit on the stand, with space between them to place frames or dummy boards. Sometimes there’s additional space to stack supers as well.

A variety of homemade (rickety) wooden hive stands
Several manufacturers produce hive stands that are similar in design. Thorne’s sell one for two hives for £92.50 that looks as though it really needs flat ground due to the design of the legs. Abelo have what looks like a nicely designed set of adjustable metal legs (you need to provide your own wooden rails) for £125.
Abelo hive stand
I’ve not tried either of these hive stands {{6}}. Both appear reasonably well designed though I think there are improvements that could be made that I’d want to see for the sort of money they’re asking. I note that both are currently out of stock suggesting that many (previously wealthy) beekeepers buy them.
Levelling up
Not the ‘defining mission’ of our current government {{7}} … instead the need – or not – to have your hives standing on a flat and horizontal surface.
If you only use foundation-filled frames then it doesn’t really matter if the hive stand slopes a bit – left to right or front to back. Or both.
Some beekeepers who use solid floors tilt the hive so any moisture can drain out of the entrance, rather than pooling at the back of the hive. This is clearly irrelevant for those of us who use open mesh floors.
However, if you use foundationless frames it really helps to have the hive horizontal, at least in the orientation perpendicular to the frames. Bees draw comb vertically in relation to gravity. A hive tilted forwards, with frames the warm way (i.e. parallel to the entrance) would end up with comb at an angle to the side bars. This means you could never reverse a frame, or use it in another hive that wasn’t similarly angled.
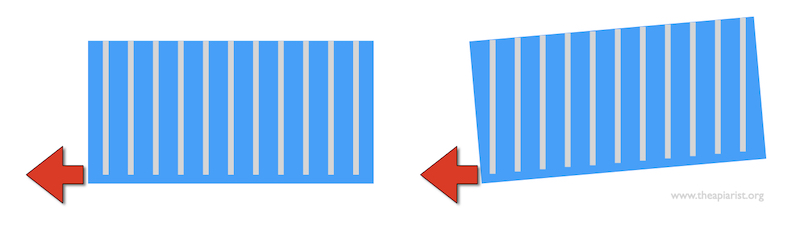
Comb is drawn vertically on foundationless frames.
And when I say ‘could’ I (of course) mean ‘can’.
I’ve done this and it’s infuriating 🙁
So, although a perfectly horizontal hive stand is not a necessity, the option of being able to easily make the stand horizontal is useful. The Abelo stand described above appears to be adjustable in 1.5 cm increments … so horizontalish, but possibly not truly horizontal unless you dig a hole for one foot, or place a shim under another.
I think we can do better than that 😉
Clickbait and originality
Let’s get a couple of important points cleared away before I get to the big reveal.
- the title of this post is rhetorical and/or simply designed to drive up page views {{8}} so I can rake in yet more money from this site’s highly intrusive advertising and sponsorship {{9}}. I’m more than happy to accept that there are better/cheaper/more adjustable/taller/lighter hive stands out there … but I’m not aware of them and this is the best design I’ve made.
- the most important feature – the legs – aren’t my idea. Regular reader Calum Grigor sent me a photo of a very similar design almost six years ago {{10}}. I liked it then, I liked it when I first mentioned it in passing in a 2018 post, and I like it even more now I’ve finally got round to making a couple. It’s not the first time Calum has passed on a good idea to me, and I hope it won’t be the last {{11}}. Thanks Calum!
Design features
I think the two most important features of a hive stand are its stability and strength.
Strength
At the height of the season a full hive could weigh 100+ kg (double brood box plus four full supers). A stand that will safely support that sort of weight needs to be strong and securely assembled.
Lots of full, heavy supers
If you intend to have multiple hives on the same stand {{12}} then the weight increases accordingly. Remember, they’re all likely to be at full strength/maximum weight at about the same time.
Stability
In addition, the majority of the weight is in the supers, meaning hives can be very ‘top heavy’.
Hive toppled by a summer storm
A hive stand with the feet placed close together will probably be unstable. In this regard, the Abelo stand pictured earlier is very good (and the one in the photograph above is – obviously – rather poor).
Convenience
The rails need to be spaced appropriately for the hive floor. However, it also helps if they are sufficiently far apart to accommodate removed frames during inspections {{13}}.
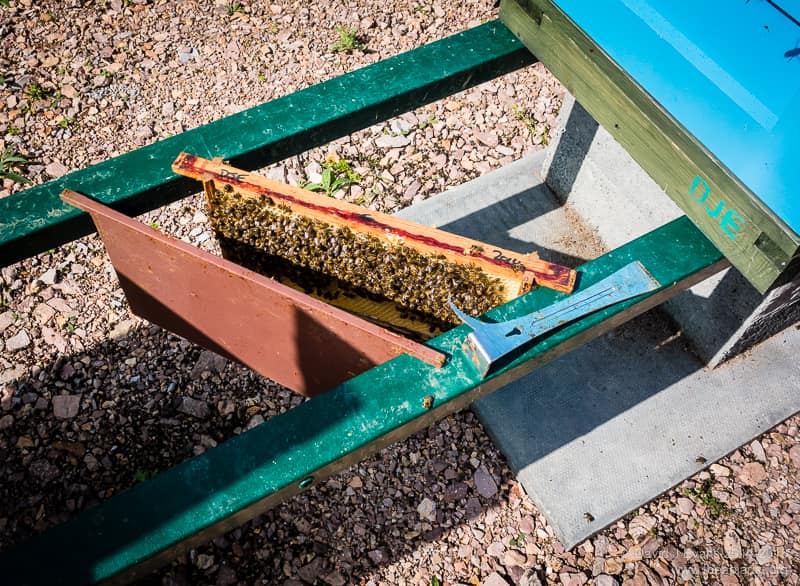
A bit wider would be better
This is a convenient way to keep a frame safe and out of the way as you go through the remainder of the box. However, placing the frame like this really requires two hands.
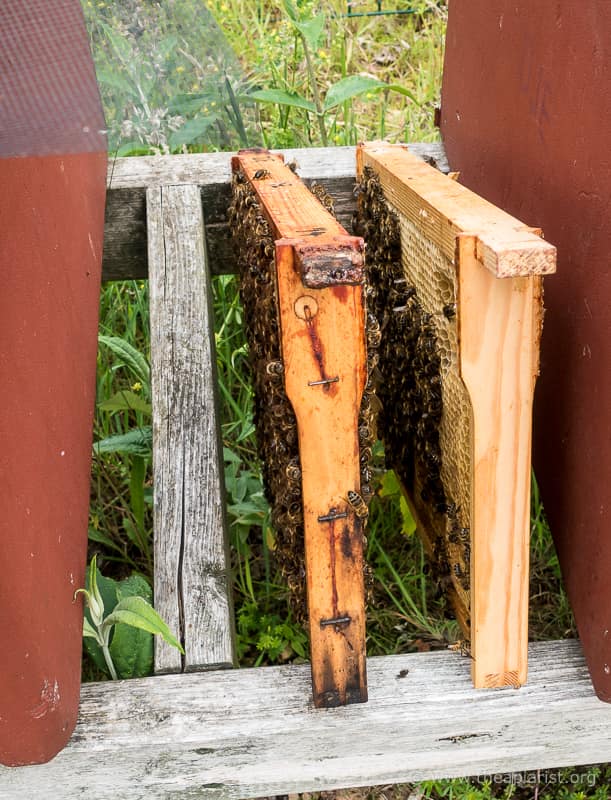
Frames can be placed like this with one hand
I therefore usually balance the frame at an angle – on one lug and the bottom bars (see above) – something I can easily achieve one handed.
Security
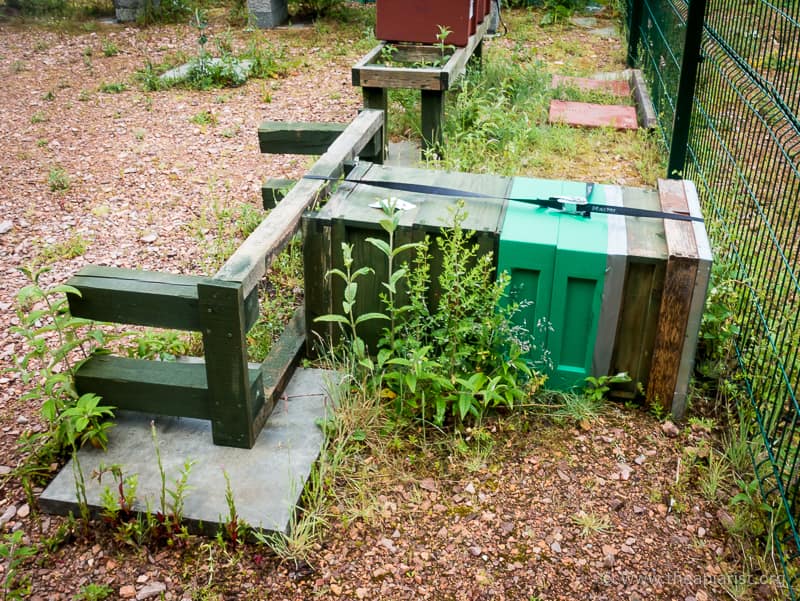
If there’s any risk of the hive being exposed to strong winds it needs to be strapped down. I regularly strap hives front-to-back i..e. with the strap across the hive entrance.
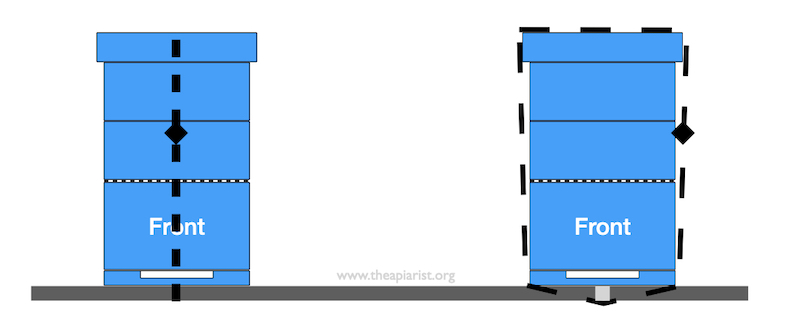
Strapping hives down. L) Front to back around rails, or R) side to side with a bar underneath hive.
However, it’s more convenient to have a bracing bar underneath the hive so it can be strapped side-to-side. This also makes it easier to strap down poly nucs which are usually longer (front to back) than a National hive.
The ultimate hive stand?
The original photo Calum sent me is reproduced below.
The photo sent to me back in 2016 …
Four ‘legs’ and just four bits of wood. I like the hive roofs.
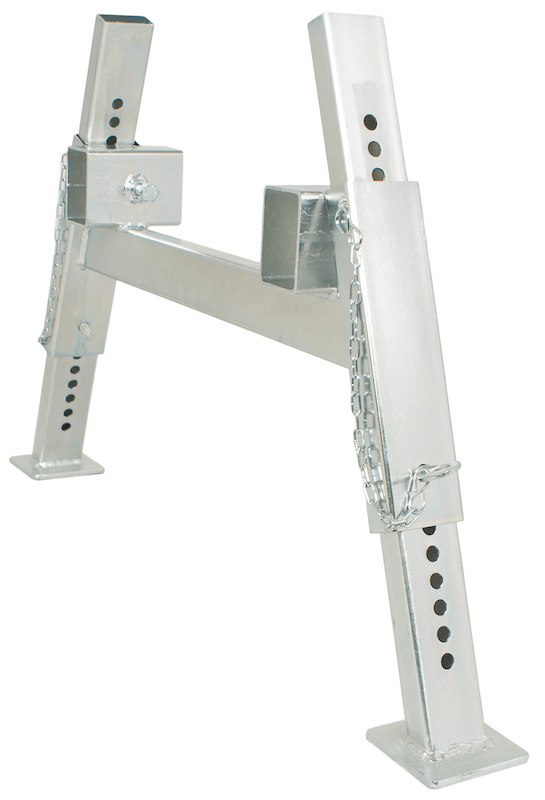
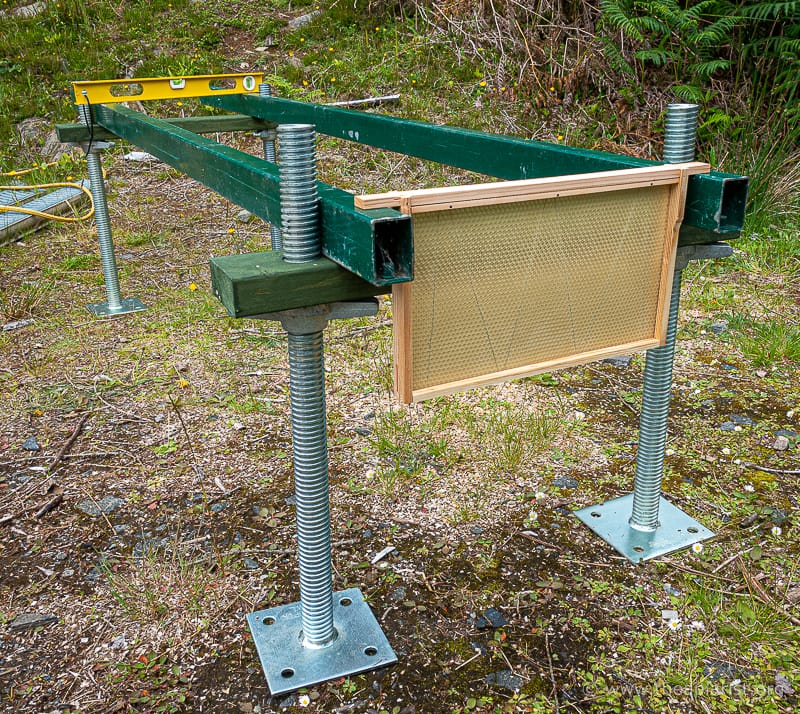
Scaffold jacks
The legs are termed scaffold jacks, scaffold levelling jacks or sometimes screw jacks.
These are typically 600 mm in total height, rated to 4 tonnes {{14}} and made of galvanised steel. The outer thread diameter is 38 mm and there is an infinitely adjustable nut that runs on the thread, and is retained by a defect in the thread about 100 mm from the top i.e. providing 500 mm of adjustable height (~16 cm more than the Abelo stand pictured earlier).
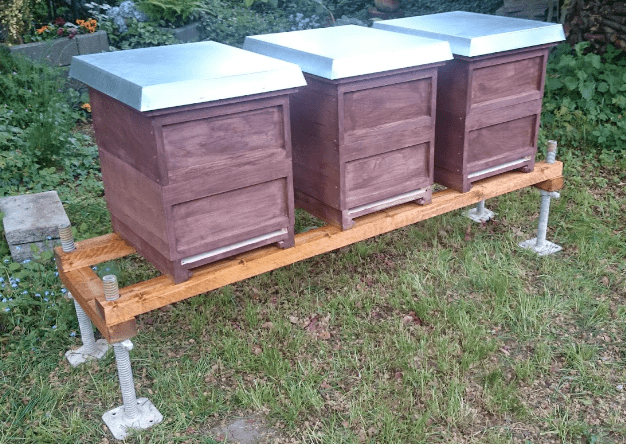
The ultimate hive stand?
Scaffold jacks can be purchased new for about £12 each {{15}}, or secondhand for a smallish jar of honey (though my experience suggests that most people selling scaffold jacks prefer beer tokens).
Rail supports
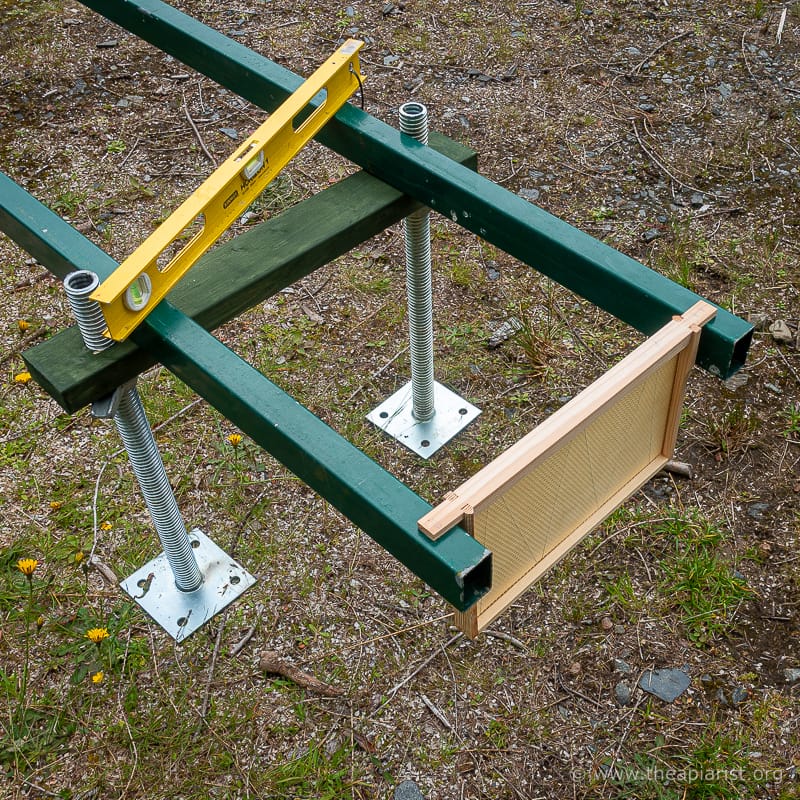
To support the longitudinal hive rails I built lateral supports from 4 x 2 offcuts. I drilled a 40 mm hole through them to take the scaffold jack screw thread. I used a centre distance of 50 cm, leaving exactly 46 cm to accommodate a National hive. In retrospect, making these rail supports a bit longer would have provided a wider, and therefore more stable, base {{16}}.
It would also allow my favoured poly nuc (Thorne’s Everynuc which has a long dimension of 58 cm) to be placed anywhere on the stand. Maisemore’s poly nucs are also 50 cm long so cannot be placed directly in line with the scaffold jacks (though also see below).
Rails
The intention is that I’ll eventually use pressure treated 4 x 2 (or even 6 x 2) timber as the longitudinal rails on most of these hive stands. I’m waiting for some building work to be completed so I can use the larger offcuts.
In the meantime I’ve repurposed a set of steel gateposts. These are 2.4 m in length and incredibly strong. They have 8 mm threaded captive nuts built into them for the hinges. Conveniently this means I can bolt through from the underside of the rail support into the captive nut, recessing the bolt head so that it doesn’t foul the scaffold jack height adjustment nut.
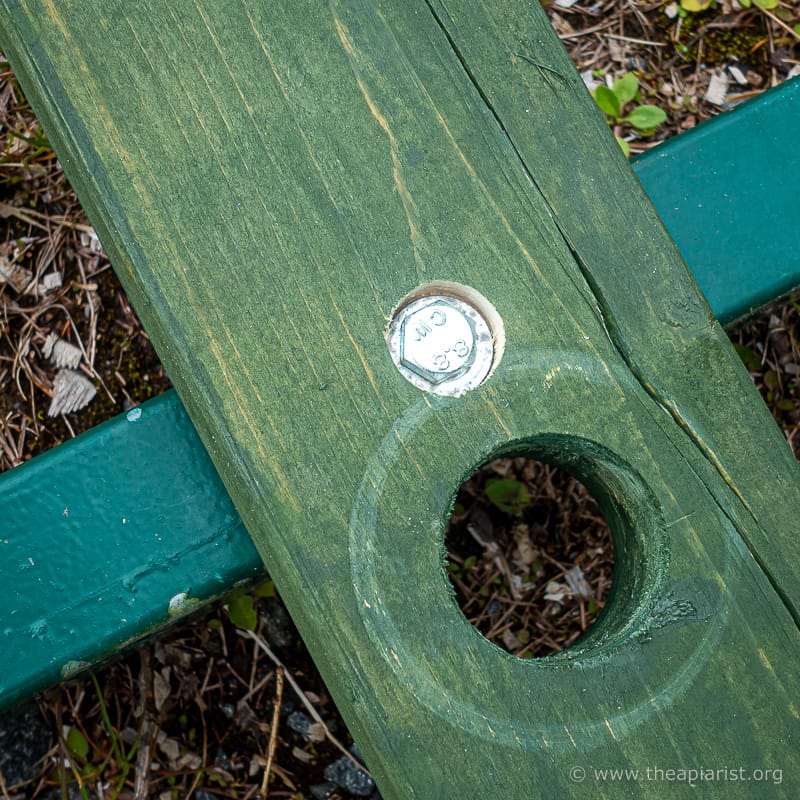
Recessed bolt head under the rail support
The position of the captive nuts in the gatepost dictates a distinct overhang at one end. I’ll use this to hang frames and/or place the supers aside.
The overhang … the bars will also support the frame on ‘one lug and the bottom bar’ as shown earlier
The metal posts are strong enough to carry 4 full hives, 18 cm apart. Or three hives plus ample space to stack supers or brood boxes.
However, I can see some advantages in using 6 x 2’s as rails. They will raise the hive floor above the tops of the scaffold jacks (at least if these are adjusted appropriately) and so will accommodate the poly nucs easily. In addition, they will provide a deep ‘skirt’ under the open mesh floor – a bit like standing the hive on an empty super – and so reduce draughts {{17}}. These wooden rails will either be bolted through or held in place with galvanised L brackets.
Finishing touches
I added a diagonal cross brace to keep the stand square. In due course (i.e. when I can find some suitable wood) I’ll add another. These make strapping hives to the stand very easy.
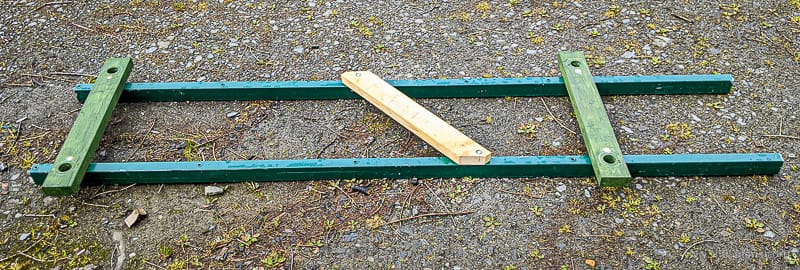
The angled cross brace keeps everything squared up
The top of the scaffold jack screw thread is designed to fit within a scaffold pipe. It is therefore unfinished and mine had very rough edges. Without modification this would result in lacerations to my bee suit and permanent scarring to my hands.
While making coffee prior to putting the angle grinder to work I noticed that a green plastic milk bottle top looked about the same size as the scaffold jack screw thread.
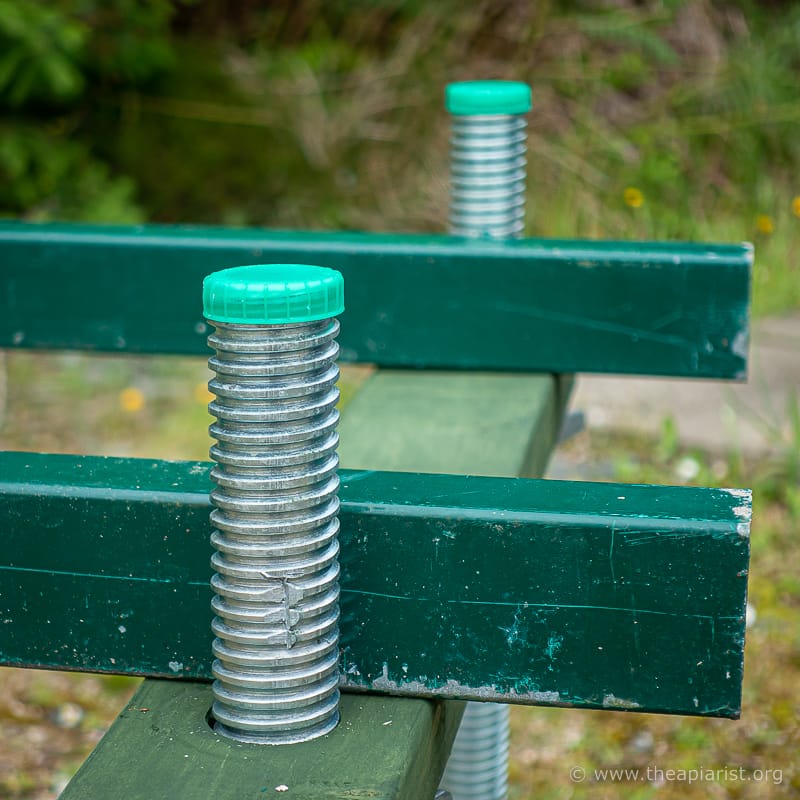
Patented beesuit and hand protectors fitted
And it is.
Ninety seven cappuccinos later I had the four milk bottle tops necessary for the legs on one stand. Not only do these prevent shredding your bee suit, gloves and flesh, but they also stop water running down inside the leg {{18}}.
But, I bet they’re not UV stable and will degrade in a year or two 🙁
So … more coffee 🙂
Portable? … yes, just about.
Scaffold jacks are quite heavy. However, if you’re strong enough, the component parts can be disassembled and easily transported by car. The one I’ve built with metal rails will fit inside my little car and can be put together in about 5 minutes with a single spanner.

Uneven ground … no bother. This stand is waiting for longer and stronger rails.
Or it can be taken to a sheltered and remote part of the garden to accommodate mating nucs.
Once the legs are placed on solid ground, the rail supports and rails are added and – using a spirit level – each leg in turn is adjusted until the rails are horizontal and level. There’s no need to dig holes, or wedge stuff under the jacks. This takes another 5 minutes.
Should the ground subside a bit, or get compacted with the weight of the hives, you can easily raise or lower the appropriate part of the stand to get things level again.
Job’s a good ‘un 🙂
Please support further articles by becoming a supporter or funding the caffeine that fuels my late night writing ...

Thank you
Note for Facebook followers
Facebook has changed (by which I mean broken) the way posts here are automagically also posted there. I don’t use Facebook and haven’t got a Scooby Doo how to fix this, so it’ll stay broken for the moment I’m afraid.
Followers on Facebook are strongly recommended to either subscribe by email (use the little subscription form in the right hand column of every page here) or on Twitter.
Of the two, email is probably more reliable … 🙂
STOP PRESS … perhaps it works after all? I randomly clicked some stuff and checked some checkboxes. If you are a Facebook follower and never see this post, please contact me.
{{1}}: Actually, that’s not entirely true. The three most overlooked items in the apiary are, 1) a queen cell tucked in the corner of an unevenly drawn frame, 2) the hive tool you lost in the tussocky grass a fortnight ago, and 3) Varroa. Remember, only one of these is truly passive … and only then until you hit it with the lawnmower.
{{2}}: Open scrubby mixed woodland with an understory of rhododendron and – where I’ve slain the latter – very occasional orchids and other things that deer don’t eat.
{{3}}: Or hard work as they call it.
{{4}}: The Nicot website is a nightmare as you cannot link to individual pages. Follow the left menu to Matériel Apicole, Elements de Ruche, Palette … or take the safe option and use the English menu.
{{5}}: Is that the correct term? It’s the one I’ll use.
{{6}}: And would need to sell a lot more honey before I could afford them.
{{7}}: No comments or discussion on this please as I don’t have time to edit out the bad language – yours or mine.
{{8}}: Hence clickbait and the ? at the end of the title.
{{9}}: There’s none any of these … advertising, sponsorship … or money.
{{10}}: What’s more, I don’t even think it was his idea as he suggested some defects to the design that implied he hadn’t built the one in the photo he sent me.
{{11}}: And he’ll be pleased to know I’ll be sending him 50% of the entirely non-existent advertising revenue generated from this page.
{{12}}: Convenient, though the vibrations created during inspecting one hive can disturb the neighbours … all the more reason to conduct inspections gently.
{{13}}: However, rails balanced on top of breeze blocks are really too close together and the frame needs to be placed at an angle.
{{14}}: Which I calculate is over 260 full supers … per leg.
{{15}}: By searching around I bought most of mine new for a tenner each delivered, though this was some time ago.
{{16}}: And an increased chance of clattering into the projection during inspections – ’you win some, you lose some’.
{{17}}: I should add that I’m not sure if this is beneficial, but I know some beekeepers do it.
{{18}}: In addition, collecting them produced an awesome 3 day caffeine buzz.
Join the discussion ...