It's the little things ...
When I first started keeping bees colony inspections were a special occasion.
There was quite a bit of preparation beforehand, collecting together the paraphernalia the catalogues all described as essential for effective beekeeping. I’d fuss over the hives, sometimes opening them a second time (or twice in a weekend) to check things. I’d write up some notes afterwards that – like certain websites ? – tended to verbosity.
Despite this, things went well.
Honey happened.
Splits worked.
Swarms didn’t … or were re-hived.
Larvae were grafted and queens were mated.
Colony numbers increased.
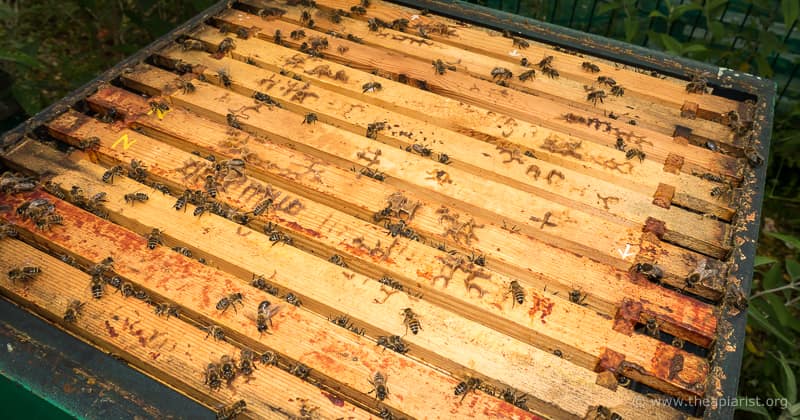
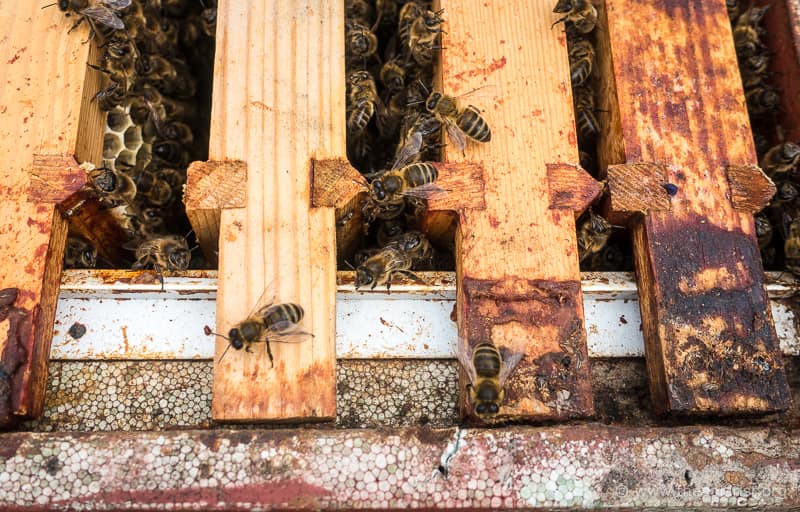
Ready for inspection … are you?
Inspections moved from being a special occasion to, at times, something of a chore.
Never not enjoyable or not a learning experience, but not quite the event they’d once been.
There were also a lot more of them.
Twenty or so a week, many more if you count the nucs and the mini-nucs some years.
During all this time I was learning a whole lot more about bees.
But as importantly, I was learning a lot more about keeping and managing bees.
The KISS principle
This US Navy acronym (for Keep it simple, stupid) means that things work best if they are kept uncomplicated.
And beekeeping, and particularly the essential weekly {{1}} inspections are one area where the KISS principle can be beneficial.
A combination of better (but less) preparation, greater efficiency during the time spent hunched over the hive(s) and improved (but less) record keeping, reflects improvements in my beekeeping over the last decade or so.
All of which have resulted in hive inspections again being a pleasure rather than a chore.
Most of these improvements are subconscious.
I’ve unknowingly ‘learned’ that doing things a particular way works better for me or the bees. None of the lessons have been learned the hard way – they’re definitely evolution, not revolution.
Described below are a few I’m aware of {{2}}.
Remember, these suit my style {{3}} of beekeeping (whatever that is ? ) and may not be relevant to you.
However, for all of the things listed below I’m aware the way I’ve done things has changed over time.
Or, I’m aware that the way I do things now seems to work well though I’ve no idea how I used to do them ?
Preparation
My essentials now fit easily into my bee bag. Partly because I now need less and partly because they never live anywhere else.
Stuff that was in the bag but wasn’t used, was ditched long ago.
I now have two boxes (2 litre ice cream tubs) in the bag, one for “daily” items and one for “queen-related” things. Neither box is full.
There’s not much in the daily container. Hive tools are kept in the apiary in a bucket of washing soda, with a spare tiddler in the bee bag to cover the inevitable losses. I now always carry a roll of gaffer tape and some staple-free newspaper. The former has all sorts of uses and the latter is for uniting colonies.
Staple-free to save the hassle of separating sheets, and potentially ripping them, when trying to unite colonies. You want one very small hole in the sheet … they’ll easily expand this and gently mingle.
The “queen” box contains things for grafting larvae (which haven’t changed since I last wrote about them, a lifetime ago) together with the things I need for queen marking and clipping {{4}}.
The smoker and blowtorch live together in a metal box. I have matches in the “daily” box, but never use them. A blowtorch is a much better way to light a smoker properly.
Smoker fuel lives in a plastic tub. I’ve discovered that the plastic tubs sold full of suet balls make excellent containers for smoker fuel. They are square(ish), have a handle and a convenient tab to help prise up the lid. Altogether better than a honey bucket.
Two final things come under the heading ‘preparation’.
The first is learning to fuel and light the smoker so that it stays lit. Exactly how you achieve this depends upon the fuel you are using. Practice makes perfect.
Buy a large smoker, prime it with something that smoulders well (dried rotten wood for example), light it with a blowtorch and then pack it reasonably tightly with additional combustible material. Dried grass, animal bedding, woodturning shavings etc. Top the lot off with a handful of fresh grass.
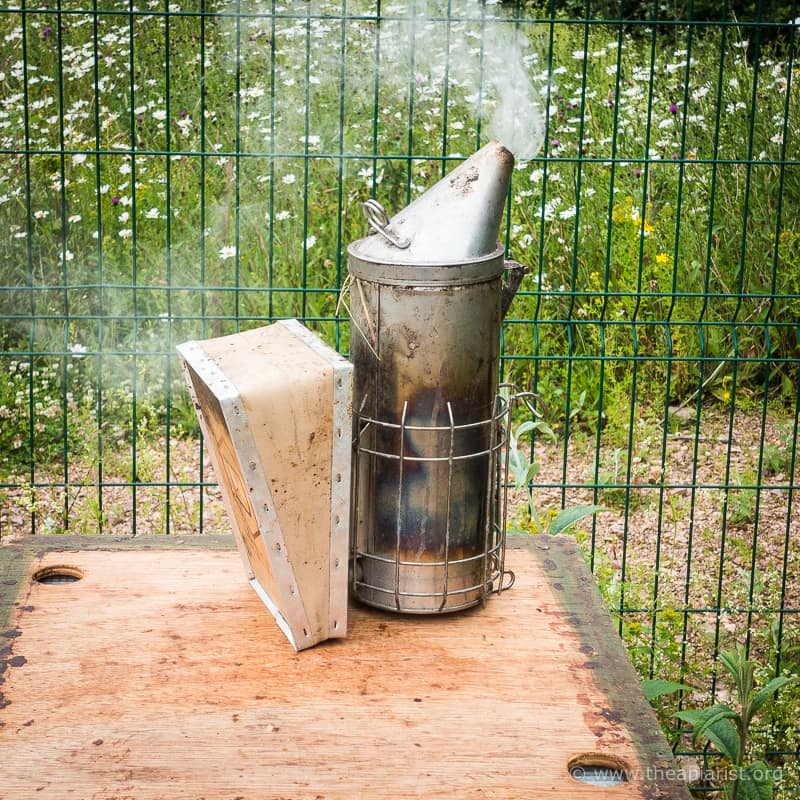
Once lit, stays lit … bigger is better
Once it’s going, my Dadant smoker will stay lit for one to two hours without more than the occasional squeeze of the bellows … or laying on its side if burning too fiercely.
It’s ironic that the more experience you get, the less you need the smoker … however the more experience you get, the more likely the smoker will actually work when you do need it ?
The final preparation involves reading the notes in advance from the last inspection … the ones that I made to remind me what will be needed next time I visit the apiary.
Don’t barbeque the bees ?
Less is definitely more when you open the hive.
The less smoke, the less knocks, bumps or sudden jarring, the less squashed bees, the less adjusting and readjusting the frames … all of these make the inspection more useful and effective.
The bees (and the beekeeper) will be calmer.
They’ll be behaving better {{5}} …
… not running manically around the frame or pinging off your veil.
You’ll see a whole lot more and, after all, what else is an inspection for if it’s not to see things?
Smoking the colony does not mean kippering them {{6}}.
One gentle puff at the hive entrance or under the open mesh floor is enough. However these both drive the bees up.
As useful, and arguably more so, is a gentle puff in the gap created when you first lifted the crownboard {{7}}. This eases the bees away from the top bars of the frames, making your next task easier.
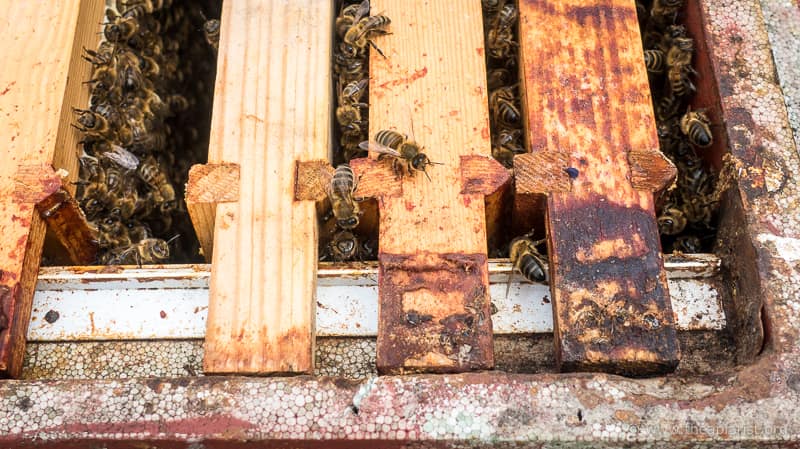
OK, let’s find the queen …
You need space to work and an orderly approach.
Think about what you’re doing. The colony, with all its darkness, smells, sounds and vibrations, is pulled apart during an inspection.
If I wanted to be anthropomorphic I’d say it’s a very distressing experience … like having a tornado ripping the roof off and rearranging the furniture while you were frying bacon and listening to some gentle jazz {{8}}.
But I’m not anthropomorphic.
What you need to avoid is the bees getting defensive. That just makes the looking part of the inspection more difficult.
And if the looking is difficult, finding the queen is going to be very tricky.
Except you don’t usually need to find the queen.
If the colony contains recently laid eggs and no queen cells you can be confident the queen is in residence and will remain so … so there’s no need to look for her.
But if your inspection is gentle and methodical, and the colony remains calm, you’ll usually see her anyway ?
Frame management
Remove the dummy board, shake the bees off it (onto the top bars) and lay it aside {{9}}.
Remove the outer frame. It probably contains stores and so it’s unlikely the queen is in residence. Check, then put it aside and get on with the inspection.
But where and how do you ‘put it aside’? Standing on end, leaning against the leg of the hive stand? Preferably not.
Most of my hive stands are a frame-width wide so you can hang a frame by the lugs, secure in the knowledge that the frame cannot be knocked over, kicked or stood on.
But I usually don’t hang the frame by the lugs.
To do so takes two hands when you put the frame down, and two when you pick the frame up. If you don’t use two hands it’s a clumsy procedure and you need a very strong grip – there’s a risk of crushing bees on the side bars.
Whilst I do have two hands (!) it’s actually usually easier to balance the frame at an angle, supported on a frame lug and the sidebar on one end, and the bottom bars on the other. There’s less reaching involved and one lug can be used as a very effective handle.
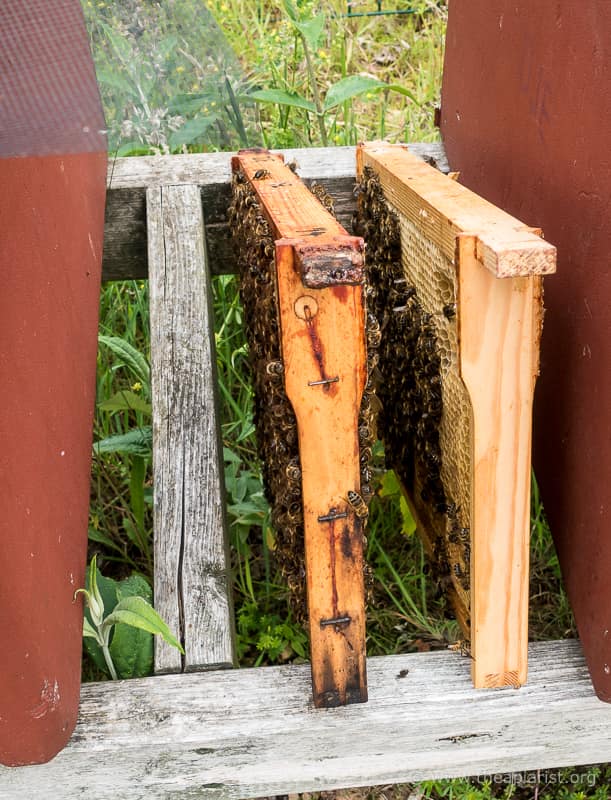
Easy to put down and pick up
The frame is held clear of vegetation below the hive stand. The protruding lug provides excellent grip. It can be put down and picked up with one hand.
When putting the frame down, gently place the lug on the further frame bar, slide the frame away from you until the further sidebar touches the hive stand (gently, allow the bees to move aside) then lower the bottom bar towards the nearer frame bar, gently moving the frame from side to side in a narrow arc. The bees will clear the lower bar rather than get crushed.
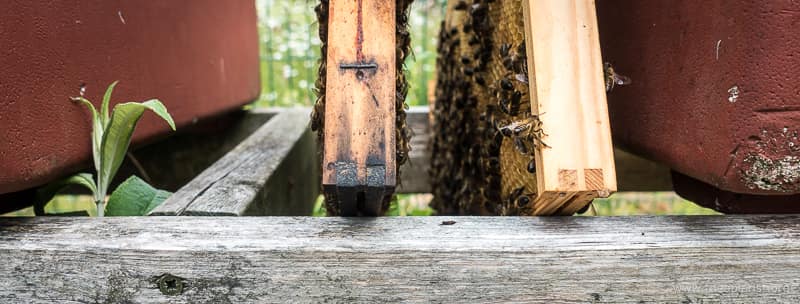
No crushed bees
It takes much longer to describe than to actually do.
If it’s blowing a gale, frames balanced like this might topple … but if it’s blowing a gale it’s really not an ideal day to be inspecting the colony.
Unless they’re in a bee shed ?
Removing and returning frames
With space to work you can now start the inspection.
The frames are probably propolised together. Even with good finger strength they can be difficult to separate.
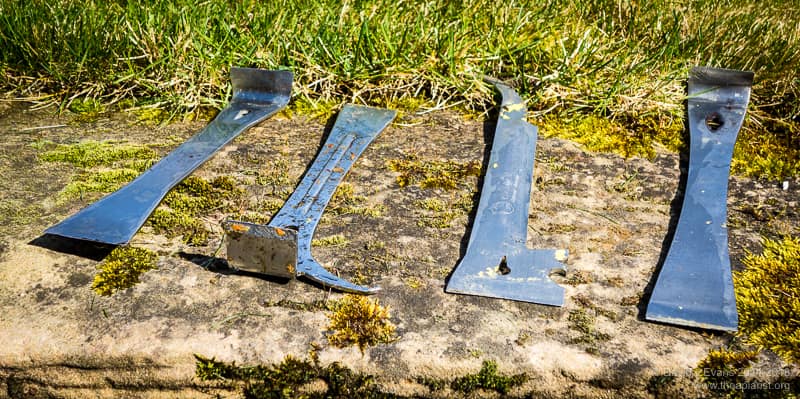
Hive tools …
Don’t try … use the hive tool, it’s what it’s for.
Gently break the propolis seal between every frame. Do all the frame lugs on one side first, then do the other. That way you don’t pass your hands repeatedly over the open hive, which can distress the bees make them defensive.
You don’t need to lever the frames far apart. Breaking the propolis seal only involves moving the frame a millimeter or two. The smaller the distance, the less chance a bee will sneak into the gap you’ve created and get crushed as you separate other frames.
Again, less is more.
With all the frames now ‘free’ you can do the inspection.
Slide the next frame a short distance along the frame runners into your working ‘gap’. You shouldn’t just lift the frame as bees at the interface with the adjacent frame will get “rolled” {{10}}. Grip the frame by the lugs, inspect one face, turn, inspect the other face, turn again.
The frame is now in the same orientation as when it was lifted out of the hive. It can therefore be returned easily to minimise the disruption to the brood nest. By using the same routine for every frame the colony is reassembled with the minimum unnecessary disturbance.
Wrong
Don’t just put the frame back ‘near’ it’s neighbour and squeeze them altogether when you put the dummy board back at the end of the inspection. Return it so the Hoffman spacers directly contact the neighbouring frame. That way, no bees get crushed when additional frames are added back later in the inspection.
That’s better
You’ll find that you can gently return the frame, pushing the bees aside between the Hoffman spacers as you lower it into the hive. You have a better view (more light and an oblique viewing angle) when returning the frame into the gap than when the frame is hanging by the lugs in the hive.
Gently shiggling {{11}} the frame from side to side as you lower it helps move the bees aside between the spacers.
By returning the frame right next to its neighbour you’ve also retained all your working space to move the next frame into.
You handle most frames only once, increasing the efficiency of your inspection but – more importantly – minimising the likelihood of crushing bees and agitating the colony.
Once through all the frames, you can even replace the removed frame of stores at the opposite end of the box to minimise further disturbance.
Finishing up
If there are supers on the hive there is probably a queen excluder separating them from the brood box.
I’ve got a big stack of plastic queen excluders in the bee shed, but no metal wired, wooden framed ones.
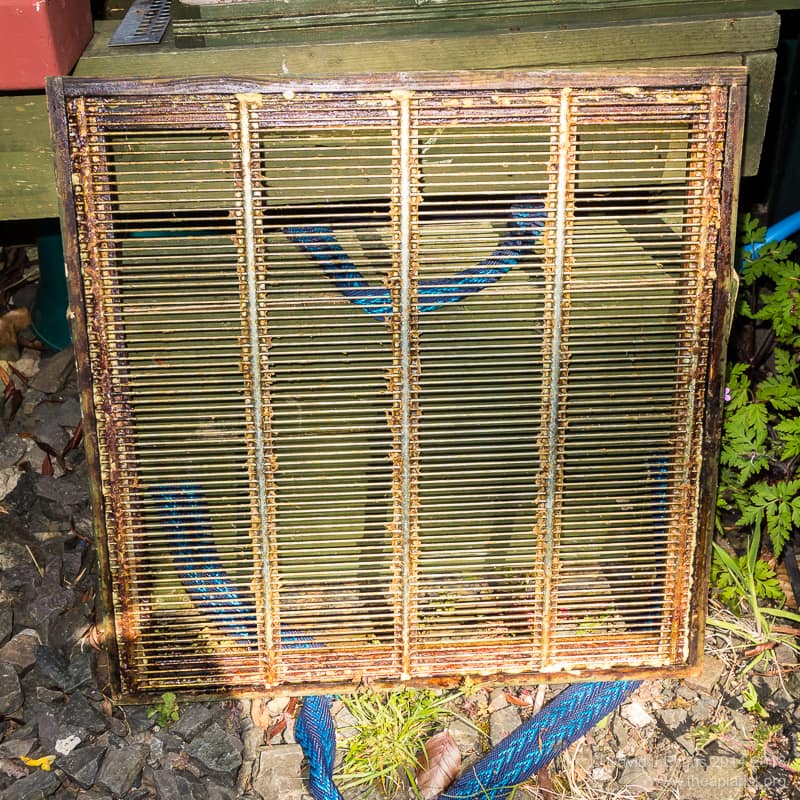
Framed wire QE …
That’s because all of the metal wired, wooden framed queen excluders are in use.
They are easier to remove and easier to replace on the hive. The bee space created by the frame prevents bees being crushed. The rigid frame means they can be replaced obliquely, then gently turned until square on the hive. In doing so, bees on the upper rim of the brood box are pushed aside, rather than squished below.
With the supers, crownboard and roof back in place there are only three things left to do:
- Make the hive secure. Will the roof stay on, and the hive stay upright, if there’s a gale … or a cow or deer ambles into it at night? The zephyr-like breeze when you inspect might be replaced with 50 mph gusts in 48 hours. Ratchet straps really do help, though tall stacks of boxes can still topple if top-heavy with honey.
- Put the smoker out. Plug it with grass and let it cool before putting it away. If you do this immediately after closing the last hive it will be ready by the time you …
- Write up the hive notes. Less really is more here. No verbiage {{12}}. You need to record the current ‘state’ of the colony – strength, health, stores. Ideally, also record its behaviour – defensiveness, running (are the bees stable on the frame?) and unpleasant traits such as following. All of this can be achieved with a simple scoring system. An additional sentence of freehand might also be needed – “Defensive – don’t use for grafting”. Importantly, make sure you note down anything needed at the next visit …

Objective and subjective notes
Which neatly takes us back to preparation.
I’m sure there are a million other things I do now that are an improvement on what I used to do. I’m also certain there are better ways to do some of the things I now do {{13}}.
Are you aware of changes to your beekeeping practices that have improved things, for you or – more importantly – for the bees?
Notes
Today (10th July) is Don’t step on a bee day … that improves colony inspections as well ?
{{1}}: At times during the season weekly colony inspections are more-or-less essential. Yes, I know that you can extend the interval to 10 days if the queen is clipped. I know many commercials work to a more extended schedule. Yes, my own timetable has been monthly during Covid … but all those are exceptions to the rule. Many queens are not clipped (and 7 days still works fine if they are), commercials know a lot more about their colonies than most amateurs (and don’t worry about losing a swarm or three) and I appear to have contrived a very successful and swarm-free ‘lockdown’ beekeeping year which I’ll write about once it’s over.
{{2}}: Lockdown has meant my beekeeping has been very restricted this year. Inspections have been few and far between. During the most recent I became aware of some of the good habits that I’ve evolved over the years … and perhaps ignored the bad habits due to the pleasure of working with bees again.
{{3}}: Or lack of style.
{{4}}: Which I was going to discuss, but won’t because I’ve run out of space and time. Be prepared. Have things ready. Finding an elusive, recently-mated queen in an overflowing brood box is an opportunity to make her much less elusive. Don’t waste it looking for the Posca pen!
{{5}}: The bees that is … I could comment on badly behaved beekeepers, but I’ve signed an NDA so cannot name names.
{{6}}: Having used this word, I’m delighted to say (I checked the OED) that kippering is a real word. First used in 1795 “The kippering of salmon is successfully practised …”, but seemingly not used much since then. Perhaps “Smoking the colony does not mean kippering them” should be engraved on all smokers sold to beginners.
{{7}}: I’m assuming here your crownboard is properly designed without holes.
{{8}}: Substitute your own favourite cooking smells and background music here.
{{9}}: With my Correx roofs I often stand the smoker on the dummy board on an adjacent hive to avoid melting the roof (been there, done that), whilst keeping the smoker close to hand ‘just in case’.
{{10}}: And they really hate that, er, get defensive.
{{11}}: Disappointingly, not a real word.
{{12}}: Superabundant or superfluous wording; profusion of words without good cause, or without helping to make the intended meaning clearer or more precise; excessive wordiness or elaborateness of language (OED, 2020), see here for working examples.
{{13}}: Uniting with air freshener in 20 seconds? Done it and it works. I’ll discuss it sometime in the future.
Join the discussion ...